| Table of Contents |
|---|
1. Introduction
The purpose of this Deployment guide is to demonstrate the way in which Dbvisit Standby 9.0 software can be used within the Oracle Cloud Infrastructure's Database As A Service (DBaaS) or Database System (DBS) space. In this guide, we focus on both the Primary and Standby databases hosted on DBS environments. This guide will offer instructions for configuring both the OCI DBS machines as well as the installation and setup of Dbvisit Standby version 9.
...
| Info |
|---|
| The setup will be for a vanilla Oracle 19c Single Instance Container Database when configured using the OCI portal for DBS. The default configuration is to have an ASM filesystem. The Standby server will be built the same way, however the pre-installed database will be removed prior to the Standby Database Creation. The options for configuring Dbvisit Standby 9.0 in OCI are in no way limited to this, it has simply been chosen for demonstration purposes. |
2. Initial Setup and Configuration
| Note |
|---|
| It is worth pointing out that it is not that obvious but before a DB system can be created a Vitual Cloud Network (VCN) must already exist. This is not easily possible as part of the DB system configuration, rather it is a required value in a dropdown that must not be empty in order for the DB system to be created. |
...
| Warning |
|---|
Configuring a VCN is outwith the scope of the document as there are too many factors involved that are client specific requirements. For the purpose of this guide, a VCN and Security Group was created with default values and the details specific to configuring Dbvisit Standby will be covered later in the guide. |
2.1 Provisioning the Severs
Connect to OCI Portal and navigate to the Database section from the menu on the left.
...
| Primary Server Details | Standby Server Details |
|---|---|
Name: dbvlab01 OCPUs: 1 OS: OEL7 Version: 19.3.0.0.0 Edition: Standard Edition Database: DEV Dbvisit Base: /usr/dbvisit Standby Version: 9.0.02 | Name: dbvlab02 OCPUs: 1 OS: OEL7 Version: 19.3.0.0.0 Edition: Standard Edition Database: DEV Dbvisit Base: /usr/dbvisit Standby Version: 9.0.02 |
2.2 Preparing the Servers
Connect to each of the cloud hosts with ssh, specifying the public key uploaded when creating the service, as user opc. I have added an entry locally with the public ip of each node.
...
At this stage, these servers are ready for the next stage of installing the software.
3. Install, Configure and Run the Standby software
3.1 Installing and Configuring the Software
Unzip, Untar and the run the dbvisit installer following the instructions in the dbvisit installation guide as the user oracle.
...
| Code Block | ||
|---|---|---|
| ||
[oracle@dbvlab02 installer]$ ./install-dbvisit ----------------------------------------------------------- Welcome to the Dbvisit software installer. ----------------------------------------------------------- It is recommended to make a backup of our current Dbvisit software location (Dbvisit Base location) for rollback purposes. Installer Directory /home/oracle/dbvisit >>> Please specify the Dbvisit installation directory (Dbvisit Base). The various Dbvisit products and components - such as Dbvisit Standby, Dbvisit Dbvnet will be installed in the appropriate subdirectories of this path. Enter a custom value or press ENTER to accept default [/usr/dbvisit]: > DBVISIT_BASE = /usr/dbvisit ----------------------------------------------------------- Component Installer Version Installed Version ----------------------------------------------------------- standby 9.0.02_0_gbd40c486 not installed dbvnet 9.0.02_0_gbd40c486 not installed dbvagent 9.0.02_0_gbd40c486 not installed dbvserver 9.0.02_0_gbd40c486 not installed observer 1.02 not installed ----------------------------------------------------------- What action would you like to perform? 1 - Install component(s) 2 - Uninstall component(s) 3 - Exit Your choice: 1 Choose component(s): 1 - Core Components (Dbvisit Standby Cli, Dbvnet, Dbvagent) 2 - Dbvisit Standby Core (Command Line Interface) 3 - Dbvnet (Dbvisit Network Communication) 4 - Dbvagent (Dbvisit Agent) 5 - Dbvserver (Dbvisit Central Console) - Not available on Solaris/AIX 6 - Dbvisit Observer (Automatic Failover Option) - Not available on Solaris/AIX Press ENTER to exit Installer Your choice: 1 ----------------------------------------------------------- Summary of the Dbvisit STANDBY configuration ----------------------------------------------------------- DBVISIT_BASE /usr/dbvisit Press ENTER to continue ----------------------------------------------------------- About to configure DBVISIT DBVNET ----------------------------------------------------------- >>> Please specify the Local host name to be used by Dbvnet on this server. Dbvnet will be listening on the local IP Address on this server which resolve to the host name specified here. If using a cluster or virtual IP make sure the host name or alias specified here resolve to the IP address local to where dbvnet is installed. The host name should resolve to IPv4 address, if not you can use an IPv4 IP address instead of host name. Enter a custom value or press ENTER to accept default [dbvlab02]: > >>> Please specify the Local Dbvnet PORT to be used. Dbvnet will be listening on the specified port for incoming connections from remote dbvnet connections. Please make sure that this port is not already in use or blocked by any firewall. You may choose any value between 1024 and 65535, however the default of 7890 is recommended. Enter a custom value or press ENTER to accept default [7890]: > >>> Please specify the Remote host name to be used by Dbvnet. By default Dbvnet will use this remote hostname for any remote connections. Dbvnet must be installed and configured on the specified remote host. If using a cluster or virtual IP make sure the host name or alias specified here resolve to the IP address local to where dbvnet is installed. If you are unsure about the remote host name during installation, use the default value which will be the current local hostname. The host name should resolve to IPv4 address, if not you can use an IPv4 IP address instead of host name. Enter a custom value or press ENTER to accept default [dbvlab02]: > dbvlab01 >>> Please specify the Remote Dbvnet PORT to be used. Dbvnet will connect to the remote server on this specified port. On the remote host Dbvnet will be listening on the specified port for incoming connections. Please make sure that this port is not already in use or blocked by any firewall. You may choose any value between 1024 and 65535, however the default of 7890 is recommended. Enter a custom value or press ENTER to accept default [7890]: > >>> Please specify the Dbvnet Passphrase to be used for secure connections. The passphrase provided must be the same in both the local and remote Dbvnet installations. It is used to establish a secure (encrypted) Dbvnet connections Enter a custom value: > kiwi123 ----------------------------------------------------------- Summary of the Dbvisit DBVNET configuration ----------------------------------------------------------- DBVISIT_BASE /usr/dbvisit DBVNET_LOCAL_HOST dbvlab02 DBVNET_LOCAL_PORT 7890 DBVNET_REMOTE_HOST dbvlab01 DBVNET_REMOTE_PORT 7890 DBVNET_PASSPHRASE kiwi123 Press ENTER to continue ----------------------------------------------------------- About to configure DBVISIT DBVAGENT ----------------------------------------------------------- >>> Please specify the host name to be used for the Dbvisit Agent. The Dbvisit Agent (Dbvagent) will be listening on this local address. If you are using the Dbvserver (GUI) - connections from the GUI will be established to the Dbvisit Agent. The Dbvisit Agent address must be visible from the Dbvserver (GUI) installation. If using a cluster or virtual IP make sure the host name or alias specified here resolve to the IP address local to where dbvnet is installed. The host name should resolve to IPv4 address, if not you can use an IPv4 IP address instead of host name. Enter a custom value or press ENTER to accept default [dbvlab02]: > >>> Please specify the listening PORT number for Dbvagent. The Dbvisit Agent (Dbvagent) will be listening on the specified port for incoming requests from the GUI (Dbvserver). Please make sure that this port is not already in use or blocked by any firewall. You may choose any value between 1024 and 65535, however the default of 7891 is recommended. Enter a custom value or press ENTER to accept default [7891]: > >>> Please specify passphrase for Dbvagent Each Dbvisit Agent must have a passpharse specified. This passphrase does not have to match between all the servers. It will be used to establish a secure connection between the GUI (Dbvserver) and the Dbvisit Agent. Enter a custom value: > kiwi123 ----------------------------------------------------------- Summary of the Dbvisit DBVAGENT configuration ----------------------------------------------------------- DBVISIT_BASE /usr/dbvisit DBVAGENT_LOCAL_HOST dbvlab02 DBVAGENT_LOCAL_PORT 7891 DBVAGENT_PASSPHRASE kiwi123 Press ENTER to continue ----------------------------------------------------------- About to install Dbvisit STANDBY ----------------------------------------------------------- NTF repo installed. Component standby installed. ----------------------------------------------------------- About to install Dbvisit DBVNET ----------------------------------------------------------- Component dbvnet installed. ----------------------------------------------------------- About to install Dbvisit DBVAGENT ----------------------------------------------------------- Component dbvagent installed. ----------------------------------------------------------- Component Installer Version Installed Version ----------------------------------------------------------- standby 9.0.02_0_gbd40c486 9.0.02_0_gbd40c486 dbvnet 9.0.02_0_gbd40c486 9.0.02_0_gbd40c486 dbvagent 9.0.02_0_gbd40c486 9.0.02_0_gbd40c486 dbvserver 9.0.02_0_gbd40c486 not installed observer 1.02 not installed ----------------------------------------------------------- What action would you like to perform? 1 - Install component(s) 2 - Uninstall component(s) 3 - Exit Your choice: 1 Choose component(s): 1 - Core Components (Dbvisit Standby Cli, Dbvnet, Dbvagent) 2 - Dbvisit Standby Core (Command Line Interface) 3 - Dbvnet (Dbvisit Network Communication) 4 - Dbvagent (Dbvisit Agent) 5 - Dbvserver (Dbvisit Central Console) - Not available on Solaris/AIX 6 - Dbvisit Observer (Automatic Failover Option) - Not available on Solaris/AIX Press ENTER to exit Installer Your choice: 5 ----------------------------------------------------------- About to configure DBVISIT DBVSERVER ----------------------------------------------------------- >>> Please specify the host name to be used for Dbvserver The Dbvisit Web Server (Dbvserver) will be listening on this local address. If using a cluster or virtual IP make sure the host name or alias specified here resolve to the IP address local to where Dbvserver is installed. If you are unsure about the remote host name during installation, use the default value which will be the current local hostname. The host name should resolve to IPv4 address, if not you can use an IPv4 IP address instead of host name. Enter a custom value or press ENTER to accept default [dbvlab02]: > >>> Please specify the listening port number for Dbvserver on the local server You may choose any value between 1024 and 65535. The default recommended value is 4433. Note: if you can not access this port after the installation has finished, then please double-check your server firewall settings to ensure the selected port is open. Enter a custom value or press ENTER to accept default [4433]: > >>> Please specify the host name (or IPv4 address) to be used for Dbvserver public interface In most cases this will be the same as the listener address, if not sure use the same value as the listener address. The Dbvisit Web Server (Dbvserver) will be listening on the local listener address. The public address can be set to an external IP example a firewall address in case the Central Console (Dbvserver) and agents (Primary and Standby Database servers) have a firewall inbetween them. The public interface address will be passed to the agents during communication for sending information back. If you are unsure about the public host address, use the default value which will be the current local hostname. The host name should resolve to IPv4 address, if not you can use an IPv4 IP address instead of host name. Enter a custom value or press ENTER to accept default [dbvlab02]: > ----------------------------------------------------------- Summary of the Dbvisit DBVSERVER configuration ----------------------------------------------------------- DBVISIT_BASE /usr/dbvisit DBVSERVER_LOCAL_HOST dbvlab02 DBVSERVER_LOCAL_PORT 4433 DBVSERVER_PUBLIC_HOST dbvlab02 Press ENTER to continue ----------------------------------------------------------- About to install Dbvisit DBVSERVER ----------------------------------------------------------- Component dbvserver installed. ----------------------------------------------------------- Component Installer Version Installed Version ----------------------------------------------------------- standby 9.0.02_0_gbd40c486 9.0.02_0_gbd40c486 dbvnet 9.0.02_0_gbd40c486 9.0.02_0_gbd40c486 dbvagent 9.0.02_0_gbd40c486 9.0.02_0_gbd40c486 dbvserver 9.0.02_0_gbd40c486 9.0.02_0_gbd40c486 observer 1.02 not installed ----------------------------------------------------------- What action would you like to perform? 1 - Install component(s) 2 - Uninstall component(s) 3 - Exit Your choice: 1 Choose component(s): 1 - Core Components (Dbvisit Standby Cli, Dbvnet, Dbvagent) 2 - Dbvisit Standby Core (Command Line Interface) 3 - Dbvnet (Dbvisit Network Communication) 4 - Dbvagent (Dbvisit Agent) 5 - Dbvserver (Dbvisit Central Console) - Not available on Solaris/AIX 6 - Dbvisit Observer (Automatic Failover Option) - Not available on Solaris/AIX Press ENTER to exit Installer Your choice: 6 ----------------------------------------------------------- Summary of the Dbvisit OBSERVER configuration ----------------------------------------------------------- 127.0.0.1 localhost localhost.localdomain localhost4 localhost4.localdomain4 DBVISIT_BASE /usr/dbvisit Press ENTER to continue ----------------------------------------------------------- About to install Dbvisit OBSERVER ----------------------------------------------------------- Component observer installed. ----------------------------------------------------------- Component Installer Version Installed Version ----------------------------------------------------------- standby 9.0.02_0_gbd40c486 9.0.02_0_gbd40c486 dbvnet 9.0.02_0_gbd40c486 9.0.02_0_gbd40c486 dbvagent 9.0.02_0_gbd40c486 9.0.02_0_gbd40c486 dbvserver 9.0.02_0_gbd40c486 9.0.02_0_gbd40c486 observer 1.02 1.02 ----------------------------------------------------------- [general] What action would you like to perform? 1 - Install component(s) 2 - Uninstall component(s) 3 - Exit Your choice: 3 >>> Installation completed Install log /tmp/dbvisit_install.log.201907290000. [oracle@dbvlab02 installer]$ |
| Note |
|---|
Version 8.0.20 has a new parameter, that of DBVSERVER_PUBLIC_HOST (parameter public_address in dbvserver.conf) Rather than accepting the default hostname prompt here, the public-facing IPv4 address of the Cloud Host should be used. Public-facing IPv4 address that will be supplied to the Agents (Dbvagent) to be used for pushing information back to the Central Console. This is the externally resolvable address supplied to dbvagent, not an additional listener address on dbvserver itself. |
Repeat the installation on node 1 but install only the core components (Dbvisit Standby Cli, Dbvnet, Dbvagent)
...
Optionally uninstall telnet after this test has confirmed communication.
| Note |
|---|
Before Creating the DDC, check if the oratab entries(/etc/oratab) have been added for the primary server's database and ASM instances if any. The Oratab entries for the standby will be added as a part of the CSD process. |
3.2 Start the GUI and Create the DDC
Start a web browser and navigate to the https://<dbvserver_host>:4433 and accept the exception.
...
Now we can proceed with the CSD (Standby creation)
3.3 Create the Standby Database
Select the Create Standby Database option from the main menu.
...
Click Submit. The progress can be monitored from the resulting icon in the status bar.
3.4 Performing Basic Tasks
Some examples of basic tasks are outlined below. Please refer to the online documentation for more details on each command.
3.4.1 Log Transfer
First send the logs to the standby site
...
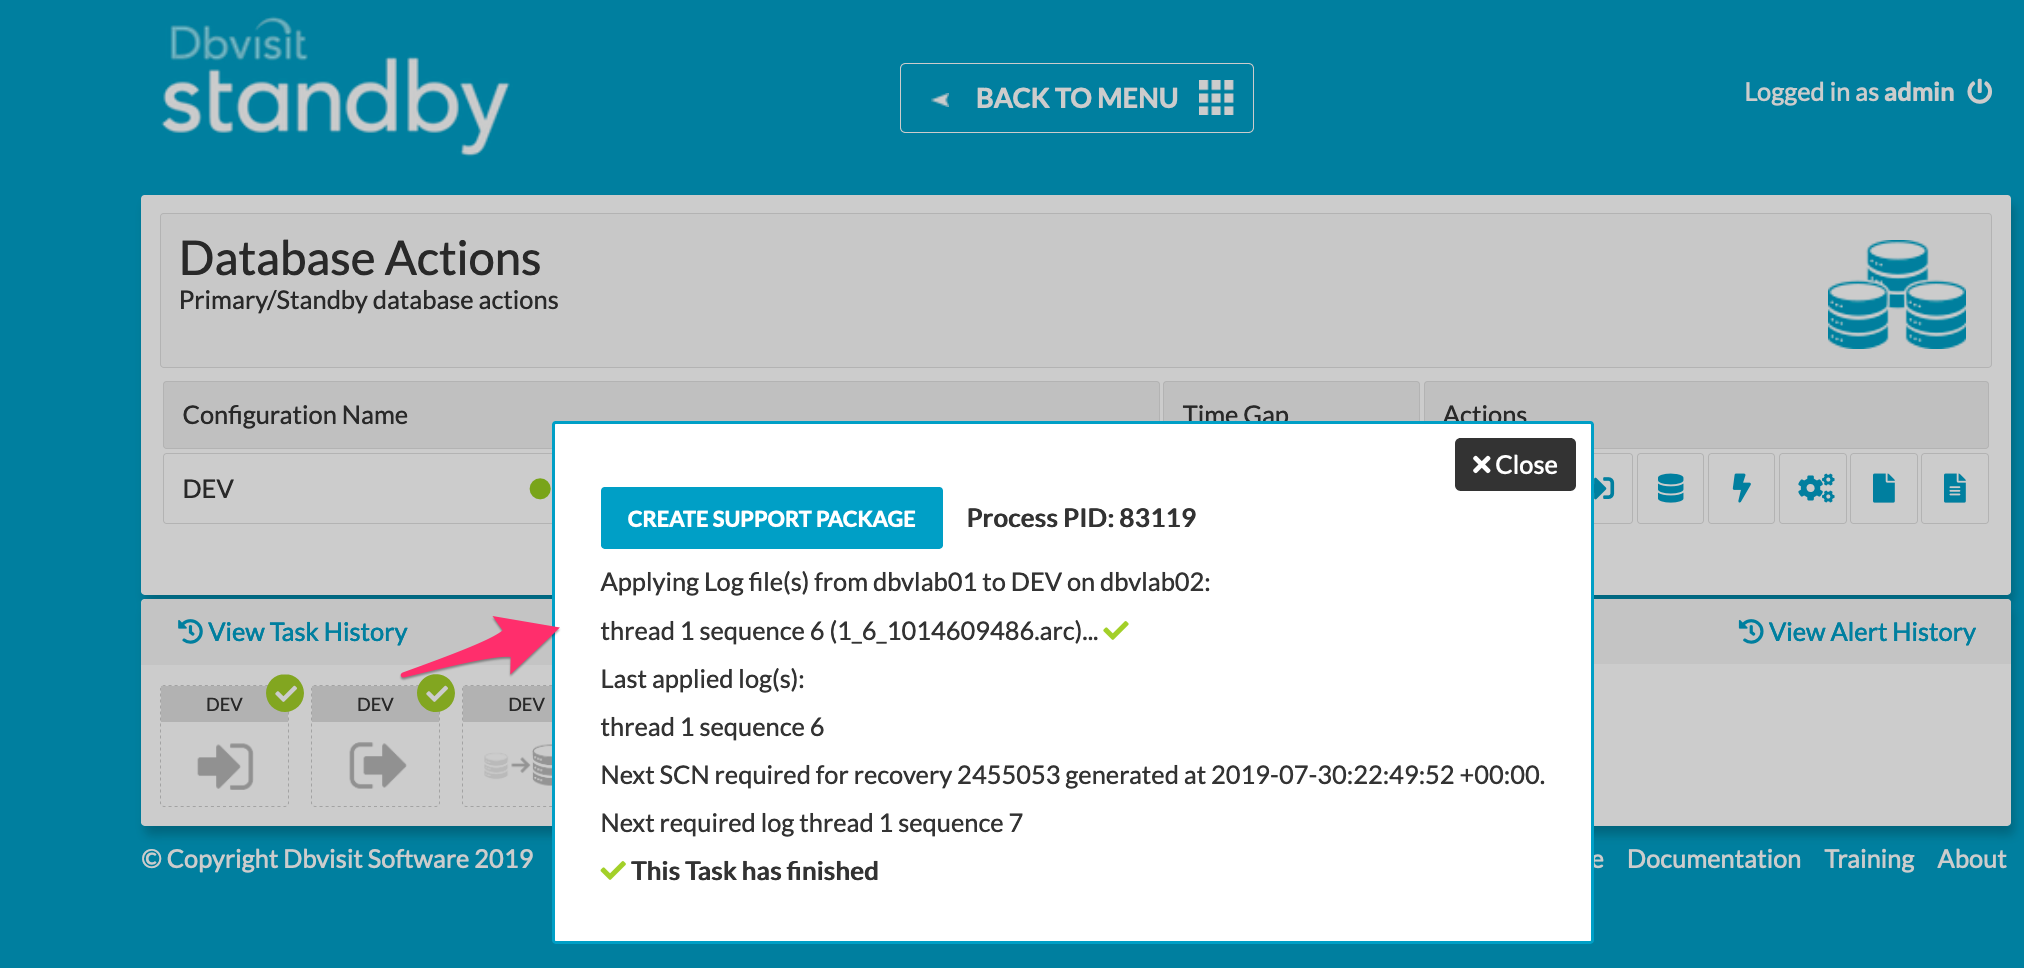
And similarly monitor this task from the taskbar.
3.4.2 Log Gap Report
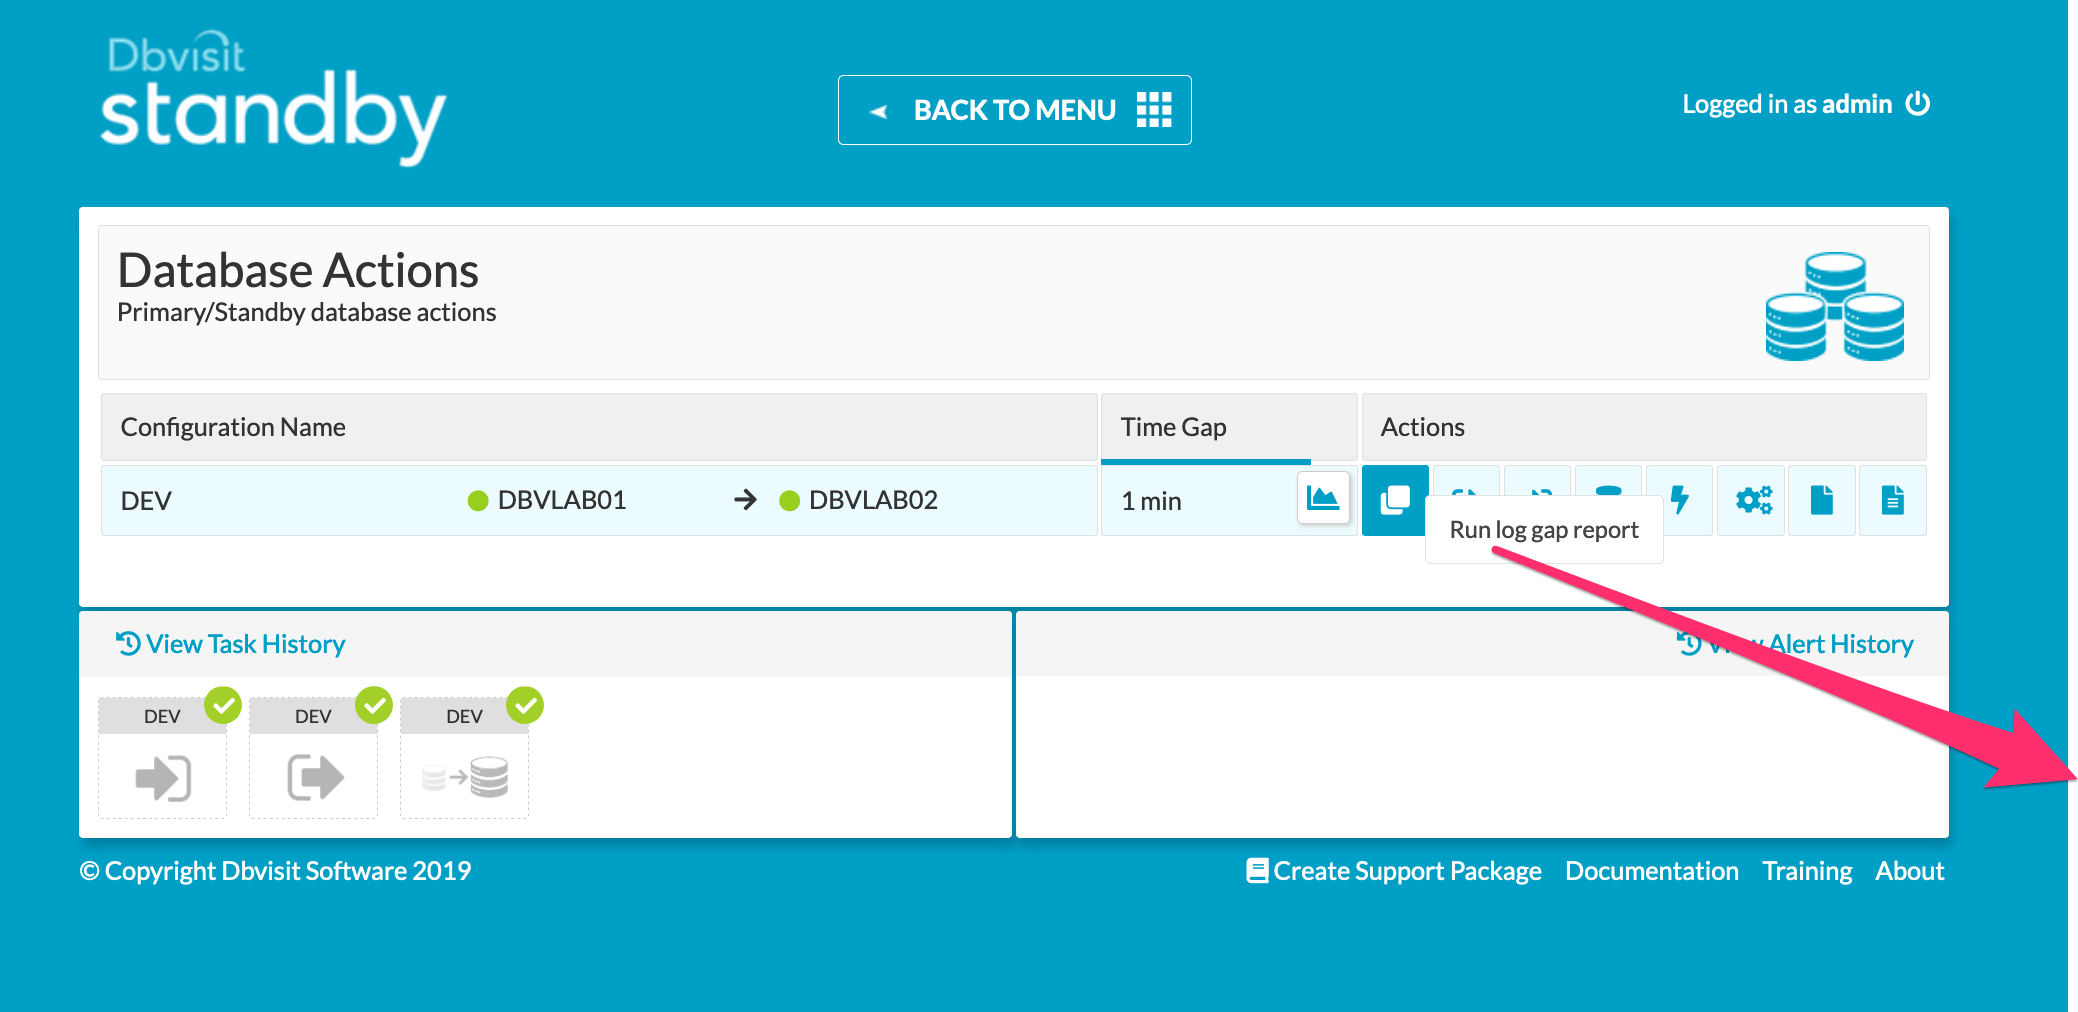
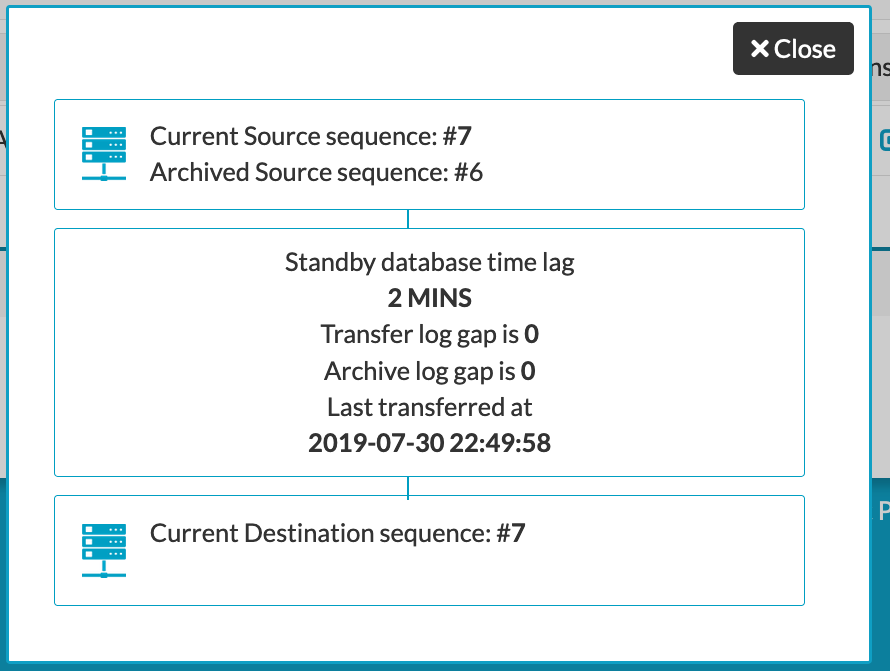
Run a log gap report from the Primary Site from the GUI
3.5 Performing Graceful Switchover
The following screenshots show a Graceful Switchover from one Cloud Standby to the other using the GUI. A first pre-requisite is to ensure that the daemons if started earlier are not running whilst the switchover is in progress.
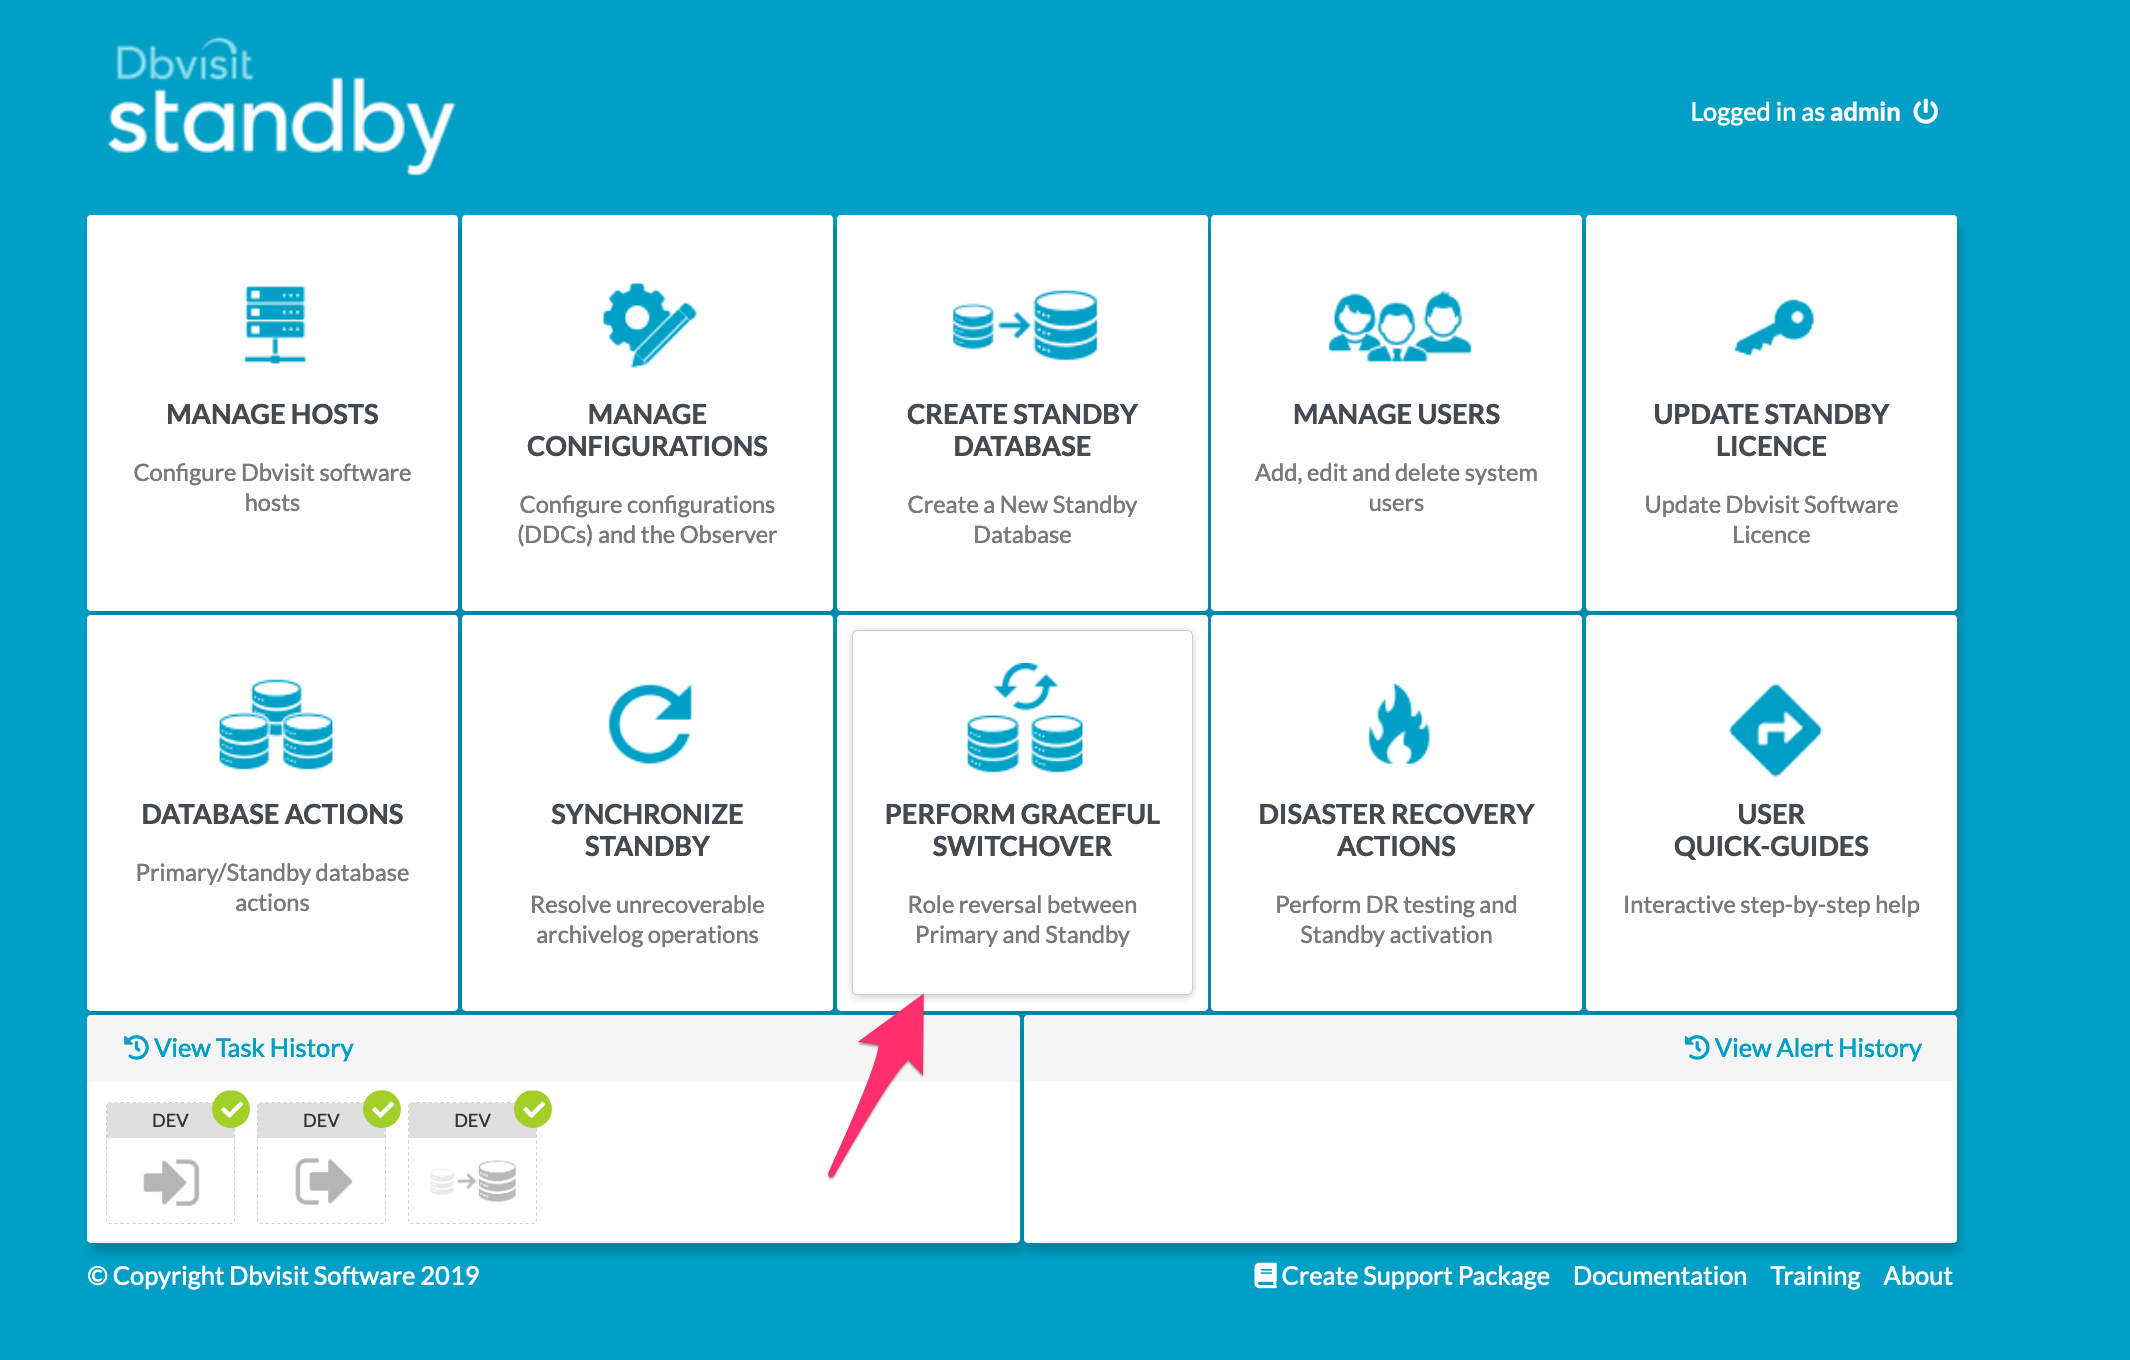
3.5.1 Graceful Switchover Icon
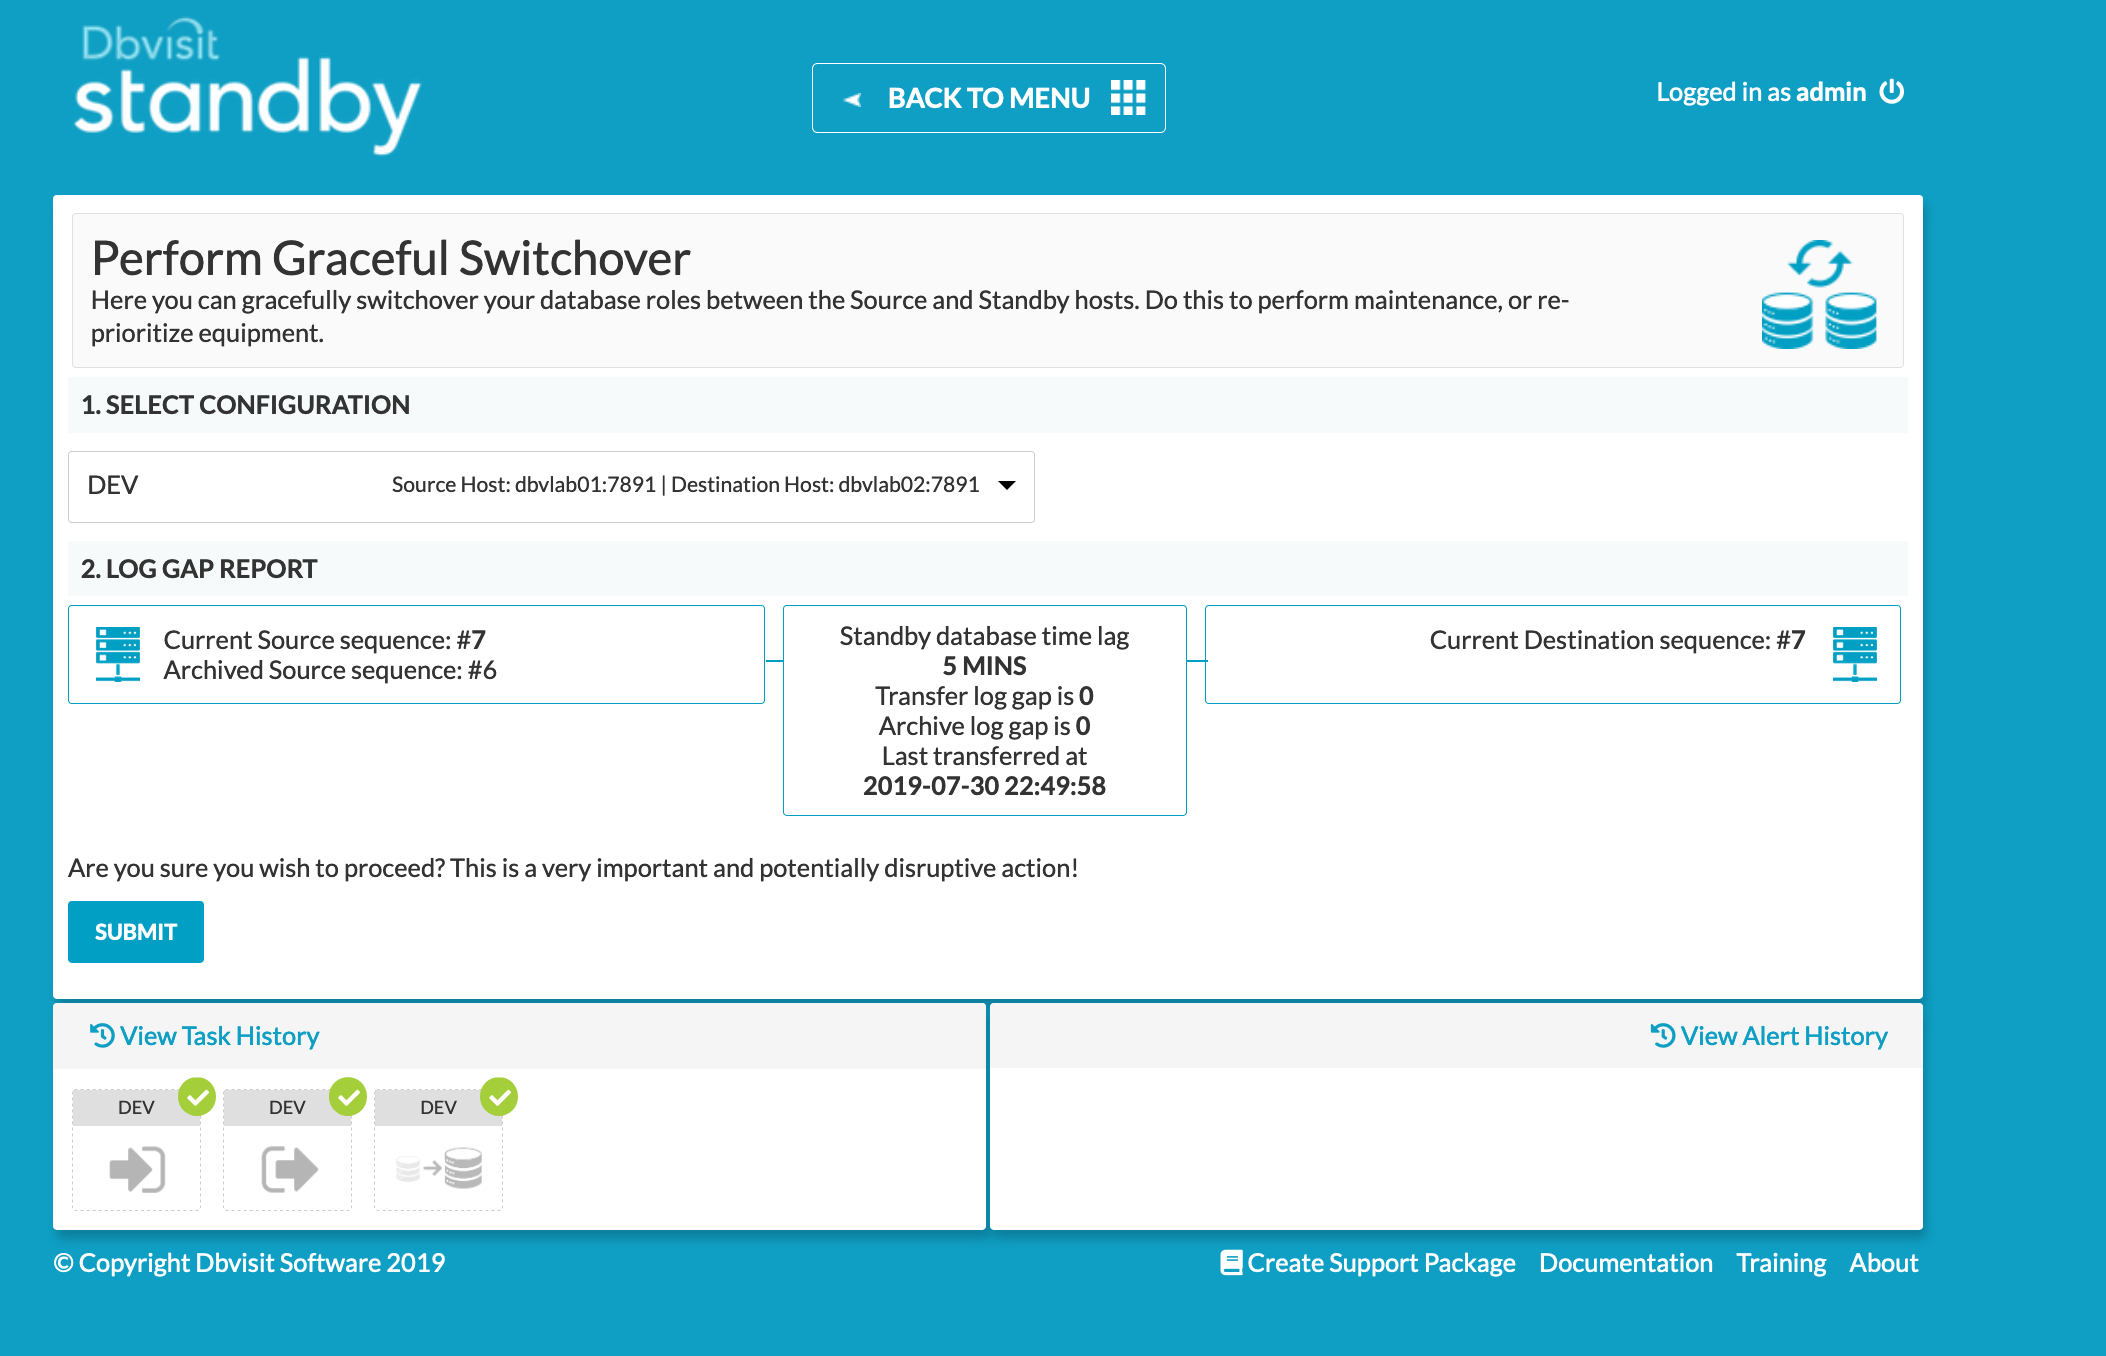
3.5.3 Check Log Gap is Zero and Click Submit
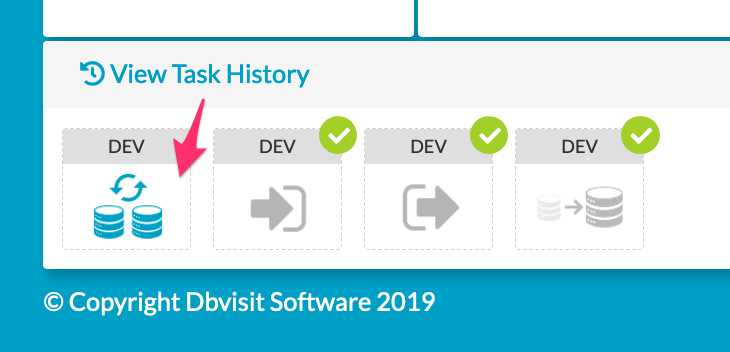
3.5.4 Locate the Task on the Task Bar
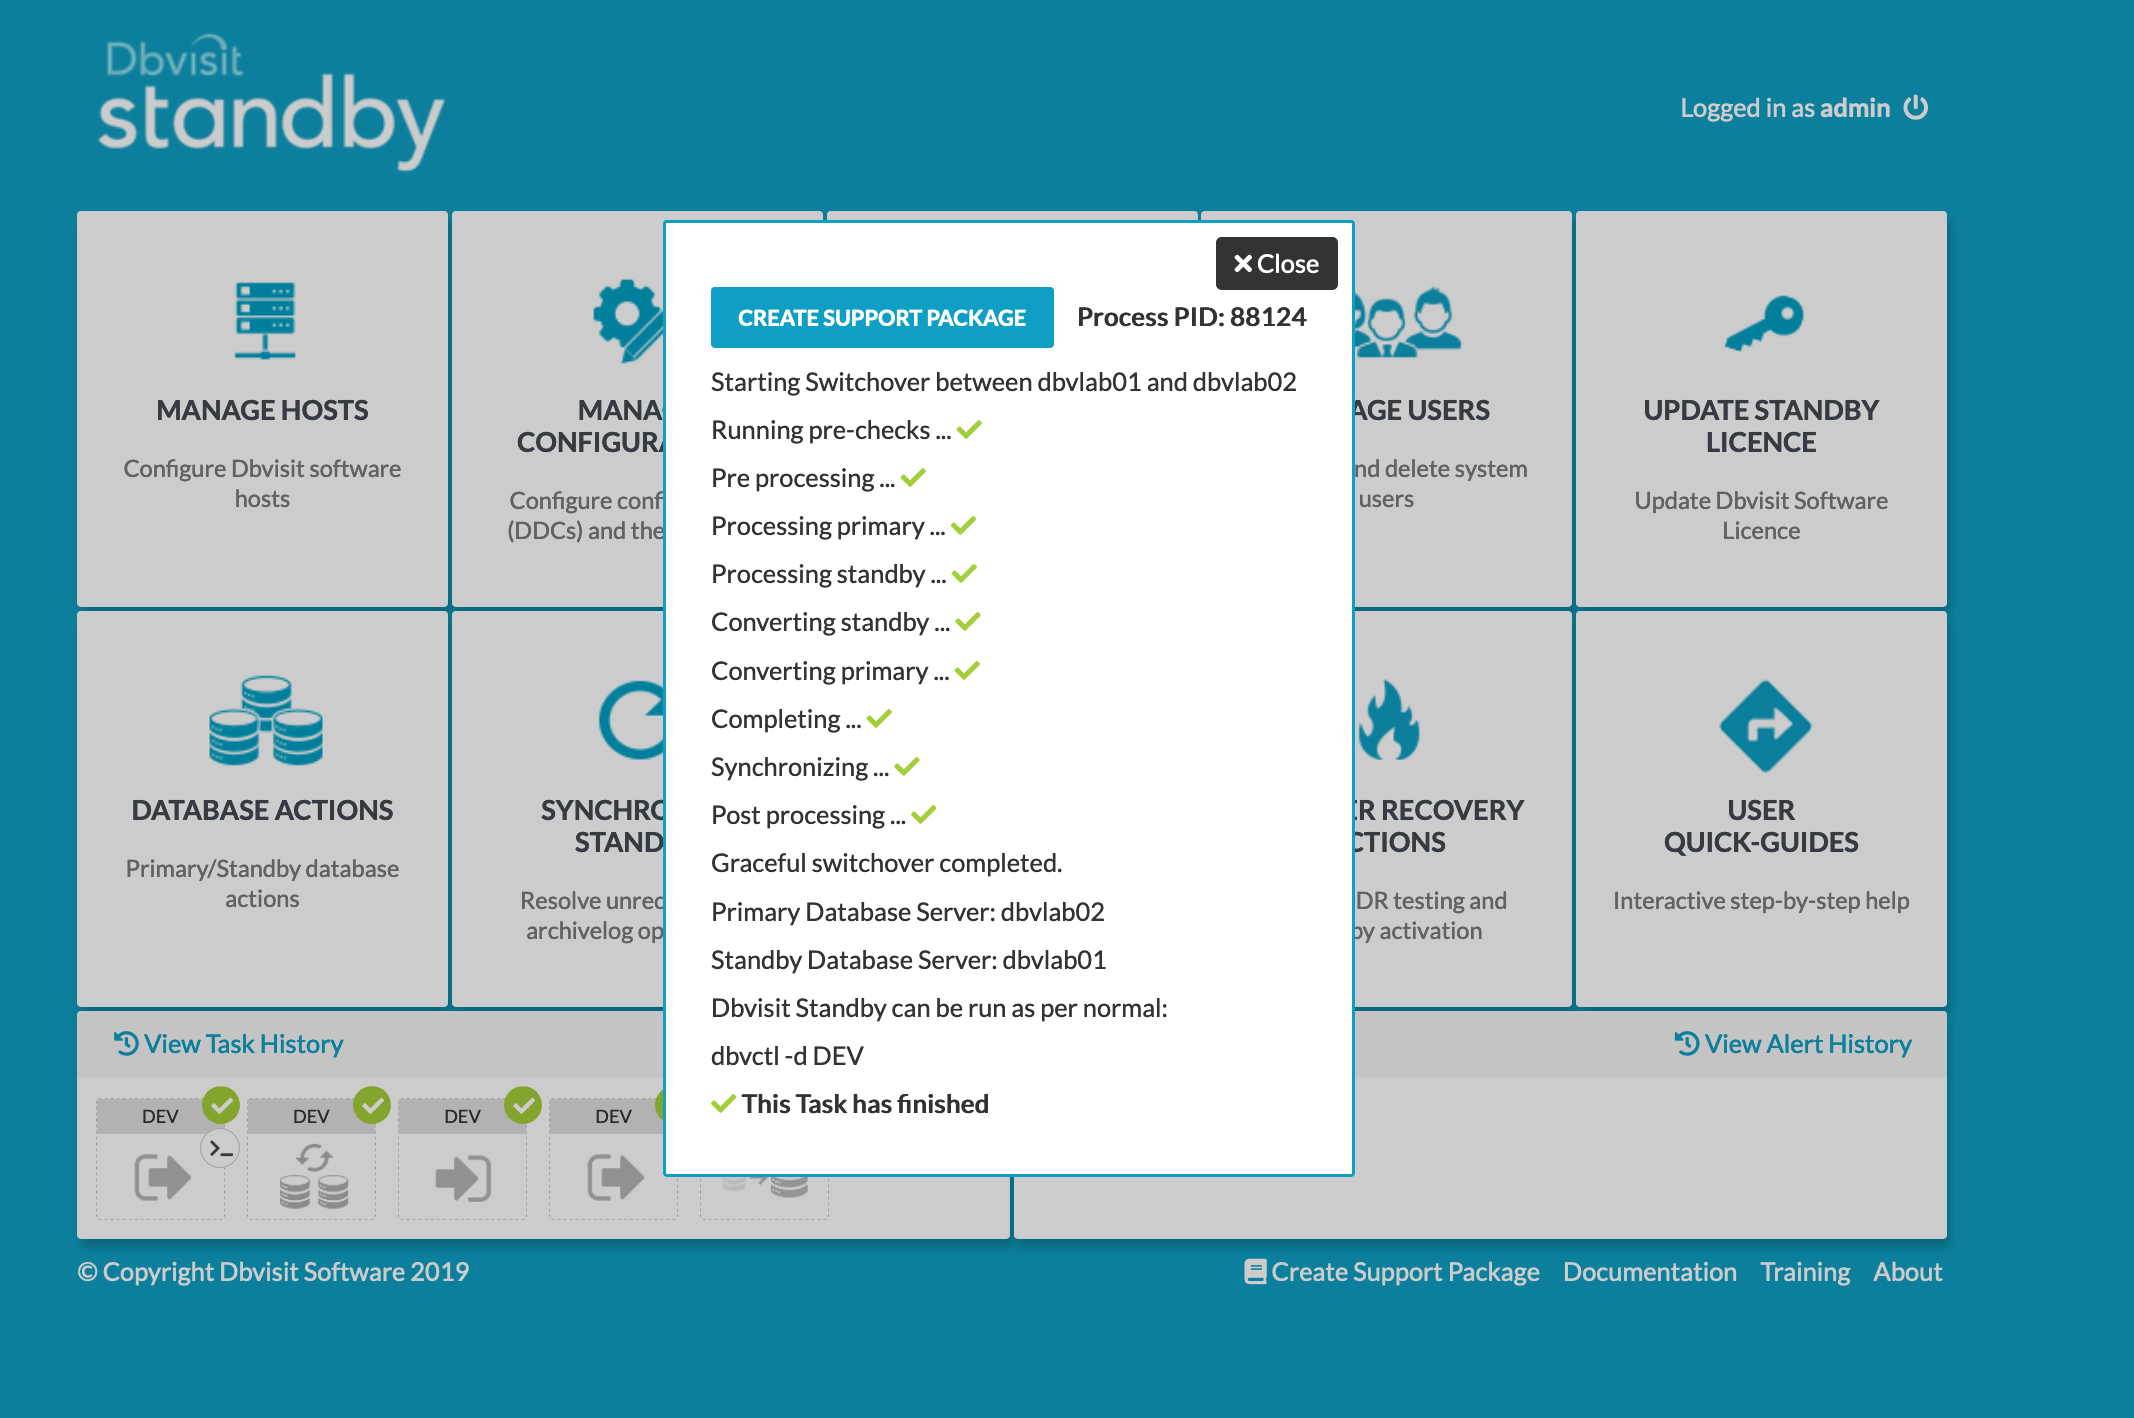
3.5.5 Monitor the Activity
3.5.6 Verify Configuration Switch within the GUI
3.5.7 Verify the New Roles within each of the Databases
Verify the new database roles within the database
| Code Block |
|---|
[oracle@dbvlab01 trace]$ sqlplus / as sysdba SQL*Plus: Release 19.0.0.0.0 - Production on Wed Jul 31 08:51:51 2019 Version 19.3.0.0.0 Copyright (c) 1982, 2019, Oracle. All rights reserved. Connected to: Oracle Database 19c Standard Edition 2 Release 19.0.0.0.0 - Production Version 19.3.0.0.0 SQL> select name, database_role from v$database; NAME DATABASE_ROLE --------- ---------------- DEV PHYSICAL STANDBY [oracle@dbvlab02 ~]$ sqlplus / as sysdba SQL*Plus: Release 19.0.0.0.0 - Production on Wed Jul 31 08:51:51 2019 Version 19.3.0.0.0 Copyright (c) 1982, 2019, Oracle. All rights reserved. Connected to: Oracle Database 19c Standard Edition 2 Release 19.0.0.0.0 - Production Version 19.3.0.0.0 SQL> select name, database_role from v$database; NAME DATABASE_ROLE --------- ---------------- DEV PRIMARY SQL> |
3.6 Configuring the Observer
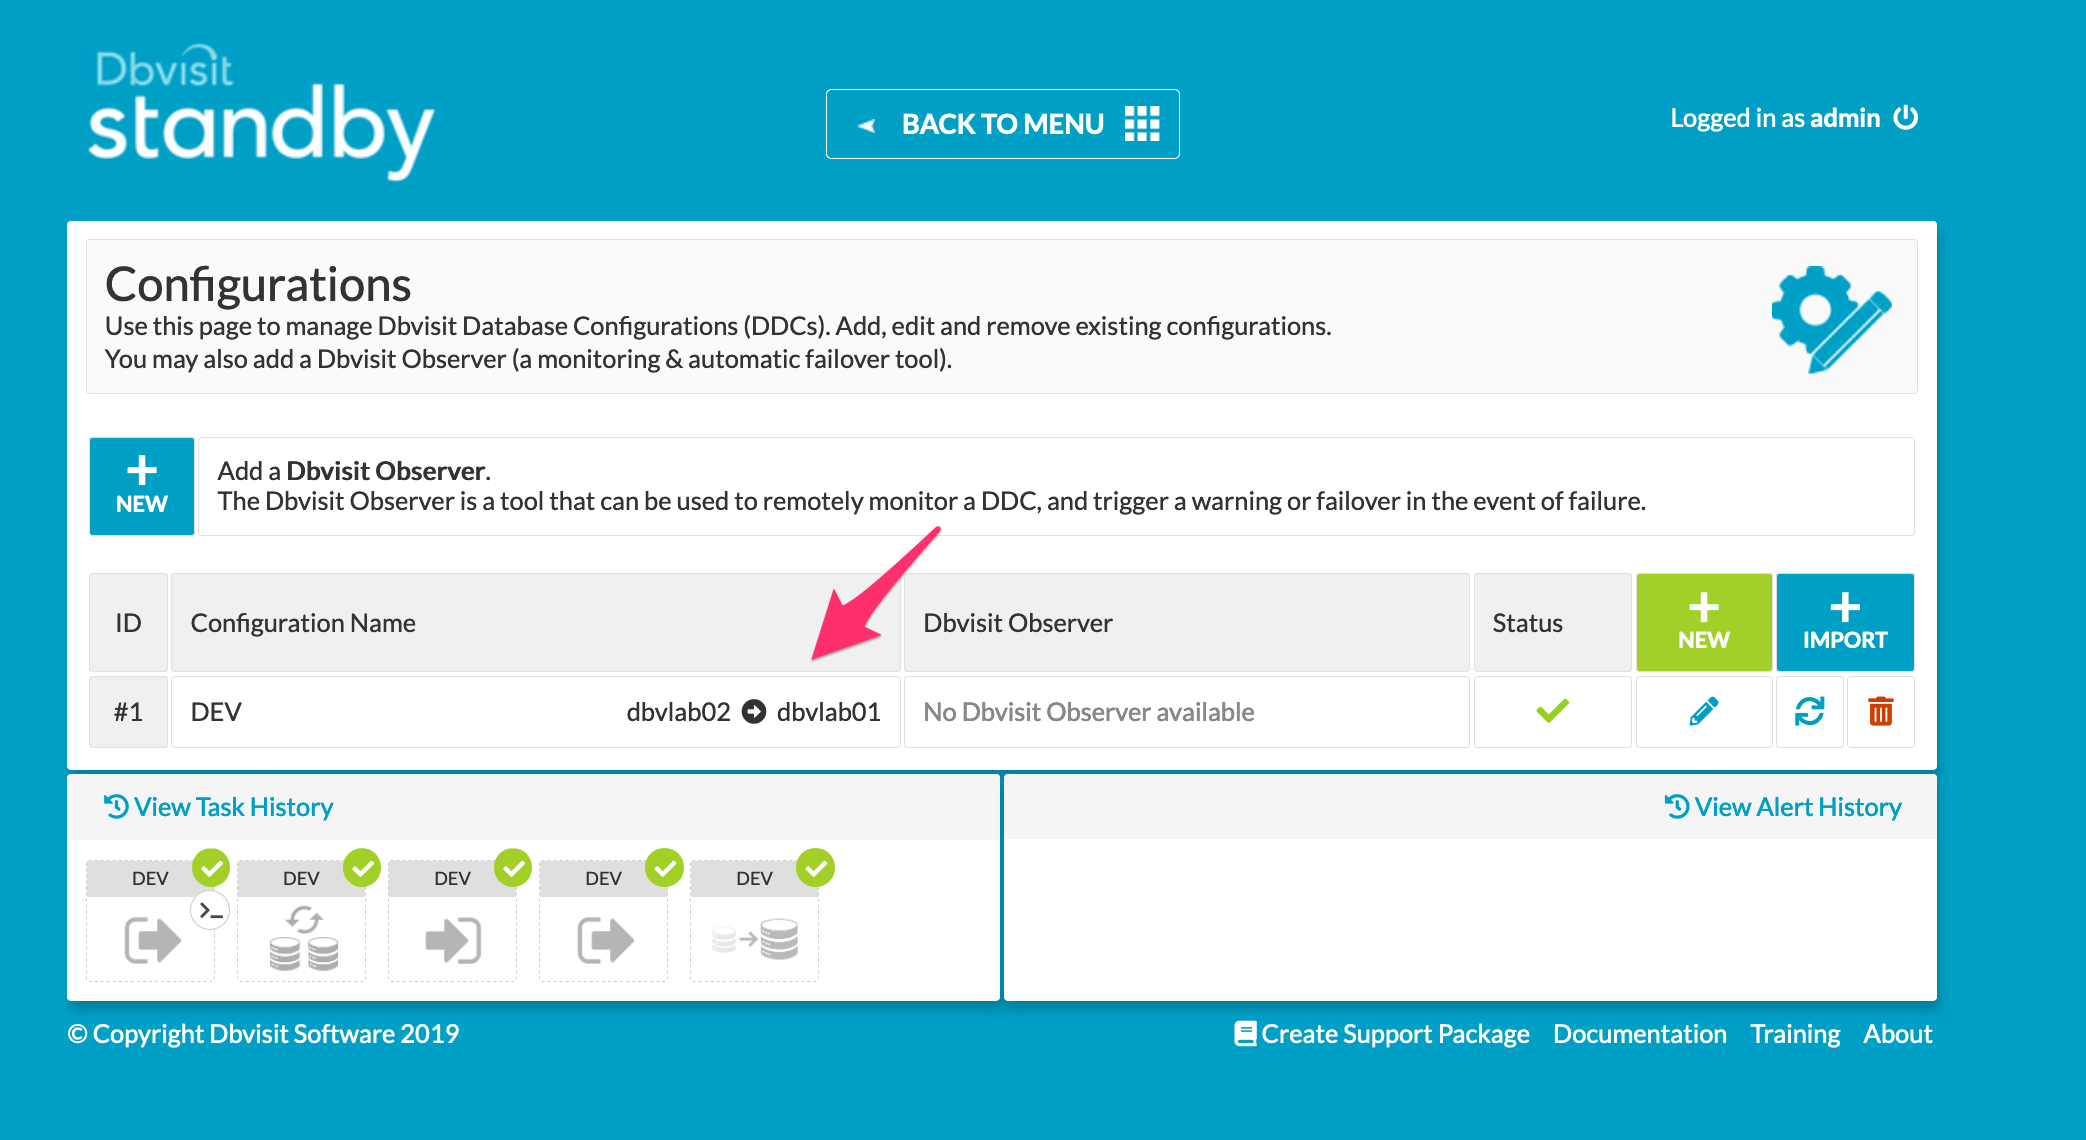
The observer process was started earlier so it can be simply added within the Manage Configurations Tab. However before starting it, a 2nd graceful switchover (1) has been performed and it was confirmed that hosts have returned to their original setup (2)
...
