...
The purpose of this Deployment guide is to demonstrate the way in which Dbvisit Standby 8.0 software can be used within the Azure Cloud Hosting Space. In this guide, we focus on both the Primary and Standby databases being hosted on MS Azure Windows 2016 Virtual Machines. In another document, we focus on 'On-Premise Primary' to Standby in the Azure Cloud. A link that document can be found here
...
| Info |
|---|
| The setup will be from Single Instance Primary Database to Single Instance Standby Database with Datafiles stored on standard filesystems on a Windows Platform. However, the options for configuring Dbvisit Standby are in no way limited to this. |
...
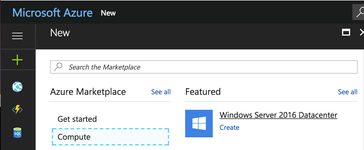
Connect to Azure Portal and Select 'Compute' from the options for 'New'
In this guide, we are going to install and configure Dbvisit Standby on Windows so both Virtual Machines will be Windows Server 2016 Datacenter.
Clicking "create" directed us to a wizard with the following Steps.
Step 1 "Basics": configures the name of the VM and adds an 'Admin User', Subscription and Resource Group. License details are also entered here. Choosing No for the Windows Server License here means the daily cost of the VM increases as the Windows Server License costs are bundled into the daily price for the VM.
...
| Info |
|---|
In the User Name box, 'oracleOracle' was entered. However, further on into the installation it was realised that choosing a more generic name such as dbvisit (admin is a reserved word and not allowed) would have made more sense. Creating a Windows VM meant that the Oracle binaries needed also to be installed (unlike when you chose an Oracle pre-built VM in Azure where the platform is Linux and the binares binaries are pre-installed). The installation of the Oracle binaries insisted that the installing user not be an administrator and suggested to create a new user. Therefore it was not possible to use the oracle user to install the binaries and instead user dbvisit was created. This, in turn, meant the $ORACLE_HOME didn't have 'oracle' in the directory_path. (A minor annoyance, but still worth a mention to think about the users before creating the VMs) It was decided to keep this in the guide as an information point. |
...
Step 2 "Choose Virtual Machine Size". The size of both VMs in this Guide are is DS11 Standard consisting of 2 vCPUs, 14GB Memory and 28GB local SSD.
...
| Note |
|---|
Throughout this guide, no mention is made to about the licensing implications of running Oracle software on Microsoft Azure. The setup we have here has been built for demonstration purposes and falls within the scope of the Microsoft Azure 'free-trial'. Further information regarding Oracle Licenses in the cloud can be found here. Also Licensing Oracle Software in the Cloud Computing Environment. |
...
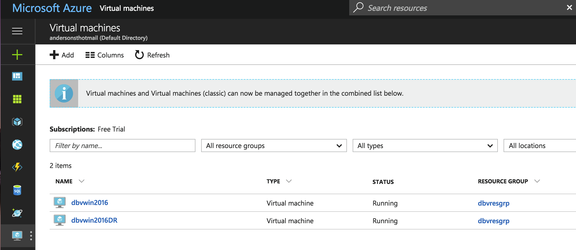
Then, 'click' on the VM icon on the task bar taskbar to view the VMs.
Connecting to each of the VMs VM is via Microsoft Remote Desktop.
...
Within the dashboard home section of each VM, the connect icon downloads the RDP file required to connect.
...
The password details can be stored for each VM and the connect connection details adjusted to reflect the machine name instead of just the IP.
...
2.2 Preparing the Servers
Connect to each of the server servers using the Microsoft Remote Desktop details provided earlier and copy and then unzip the required binaries for the Oracle and Dbvisit Installations from the local mapped drive.
...
| Info |
|---|
One other point to note. It was found to be easier to pre-create the user for the oracle Oracle install rather than choose this option as part of the binary installation. The reason for this, when the user is created as a windows administrator, the password policy is adhered to. However, when a password is chosen as part of the binary installation , unless you ar are confident the password adheres to the correct security policy no check is made until the create user step is reached. If the password doesn't fit the security standards, the installation fails and exits. |
In order for For Dbvisit Standby to communicate between the 2 hosts, and to enable access to the GUI frontend, 3 ports need to be made available. These are 7890 (Dbvnet), 7891 (Dbvagent) and 4433 (dbvserver: GUI). To do this, security rules need to be added to each Network Security Group for each node and, also inbound and outbound firewall rules need to be added to the VMs themselves.
...
Configure additional Inbound and Outbound Security rules. For ease, a range encompassing all 3 ports can be used (as is shown here). But for maximum security create one one rule per port.
Inbound Rules
...
| Info |
|---|
For further information regarding the pre-requisites for installing Dbvisit Standby v8 can be found here. |
At this stage, the servers are ready for the next stage of installing the Dbvisit Standby software.
...
On the primary server (dbvwin2016) install the core components, leavin leaving the box for the central console (Dbvserver) unchecked.
...
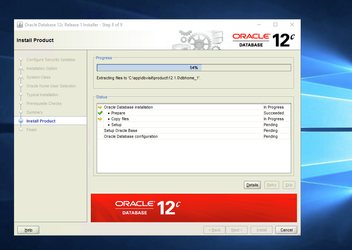
Once the correct username and password has have been entered and verified the binaries will be installed.
...
Download and install either Chrome of or Firefox.
From within the browser navigate to the https://<dbvserver_host>:4433. In this case, the standby node
...
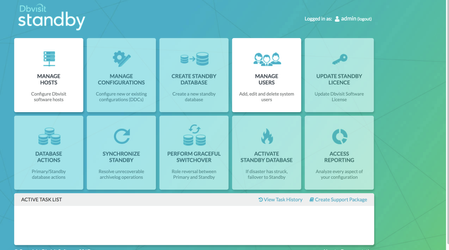
Enter the default username/password of admin/admin and proceed to the first screen, manage hosts.
Each of the VMs were was created using the same Virtual Network, therefore each host is already resolvable from the other using their machine name.
...
| Note | ||
|---|---|---|
If either of the Host Names displays aan x here, then check the firewall rules, the IPv6 settings, and the network security group rules for each server. A useful test is to use telnet on the Dbvisit agent port to check connectivity
If a blank screen is returned then the port is open and available |
...
The former is only required in the event of a Graceful switchover , when the Primary becomes a Standby database. In this example, the same location is created on each server.
...
| Note |
|---|
We've opted not to show the DDC file creation from this installation due to the binaries being installed under a user that wasn't oracle Oracle and don't want to add misdirection to the worked example. Instead, refer to the userguide section on creating the DDC. |
...
Select your configuration, New Database, edit the spfile SPFILE parameters if required and then check there is enough space in the Source and Dest temp locations.
...
To Create the Standby database with the command line is shown below
...
Start the Daemons for automatic send/apply from the GUI Database Actions Tab.
The lightening lightning bolt icon manages the daemon processes.
...
Select the Standby Host, review the current status and Select Start READ ONLY.
...
If the daemons have been started in the previous step, they need to be stopped before performing a graceful switchover.
...
3.6 Activate the Standby Database
It is possible to activate the Standby Database and make it become the new Primary. This is also called failover to the standby database.
...


