1. Introduction
Dbvisit Standby can be scheduled on both the primary and standby servers.
When scheduling Dbvisit Standby there are a few key factors to be taken into consideration such as the Recovery Time Objective (RTO) and Recovery Point Objective (RPO) of your environment.
This is a business decision, but certain factors play a key role. These are:
- Speed of the network
- Activity on the database
- Speed of the disks
- Compression method chosen and CPU power to compress and uncompress archive log files.
A good recommended time frame is to schedule Dbvisit Standby every 5-15 minutes on both the primary and standby servers.
| Note | ||
|---|---|---|
| ||
In the Dbvisit Standby version 8.0.02 initial release, there is only one way to schedule Dbvisit to send and apply logs on Windows Based systems, and this is using the Windows Scheduler. From Dbvisit Standby Version 8.0.04 there is a Windows service for each DDC which will then run as a kind of "background" process, which will then monitor the Oracle database if a primary and if logs are generated they will be detected and send to the standby. On the Standby a service will be created per DDC and when started, will review the ARCHDEST locations and if new logs arrive, they will automatically be applied. See section 4.2. Windows Based Systems for step by step procedure to use the Windows service option in sending and applying the archivelogs. Values will be configurable via the DDC file. |
2. Using the UNIX CRON to schedule
To schedule Dbvisit Standby, add a CRON entry to the Oracle software owner on both the primary and standby server.
This entry will run 24x7 and every 5-10 minutes. It is recommended that the standby CRON is scheduled a little later than the primary CRON. This ensures there are log files to be applied when Dbvisit Standby executes on the standby server.
| Panel | |
|---|---|
On this page:
|
2.1. Example CRON schedule
To edit the CRON type in crontab -e. Below are two example schedules, one on the primary server, the second one on the standby server.
On the Primary Server:
| No Format |
|---|
# Dbvisit Standby Schedule 00,10,20,30,40,50 * * * * cd /usr/dbvisit/standby; ./dbvctl -d PROD >>/dev/null 2>&1 |
On the Standby Server:
| No Format |
|---|
# Dbvisit Standby Schedule 05,15,25,35,45,55 * * * * cd /usr/dbvisit/standby; ./dbvctl -d PROD >>/dev/null 2>&1 |
Where PROD is the name of the database (DDC Name) and Dbvisit Standby is installed in the /usr/dbvisit/standby directory.
3. Creating a Windows Schedule
When using Dbvisit Standby on Windows-based systems, the Windows Scheduler must be used.
This section will provide you with an overview of creating a Windows schedule.
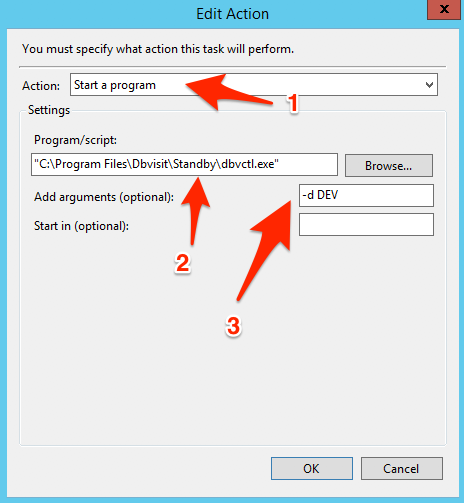
The command that should be scheduled is: "dbvctl -d <DDC>"
This command, if executed on the primary system will send logs to the standby server, and if executed on the standby server, will apply logs to the standby database.
| Note |
|---|
Using Windows scheduler is not required from Dbvisit Standby Version 8.0.04, We can use the Windows service option discussed in 4.2. Windows Based System. Please Note that you have to use only one of these options to schedule and send the archives from primary and apply them in standby i.e either you can use the windows scheduler or use the Windows service option introduced in version 8.0.04 |
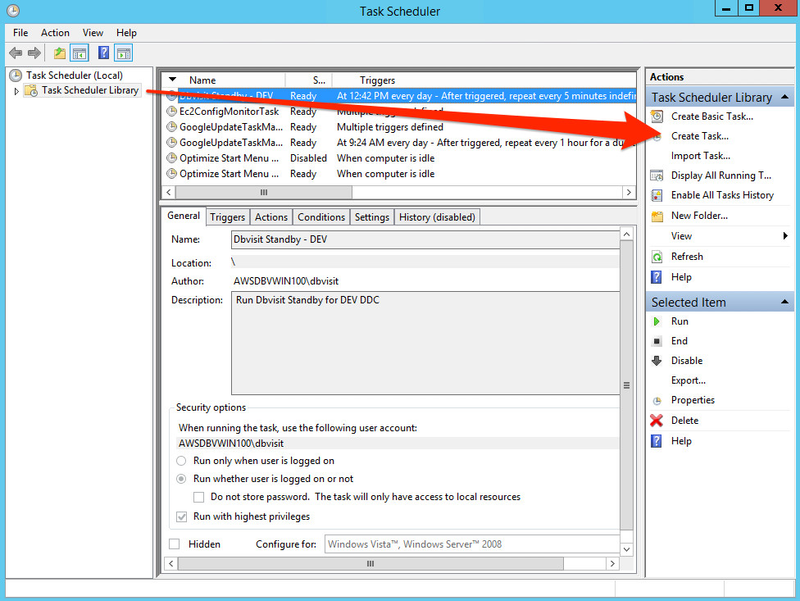
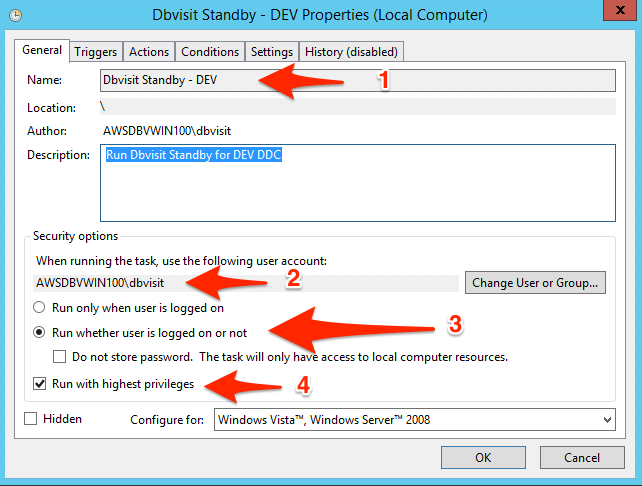
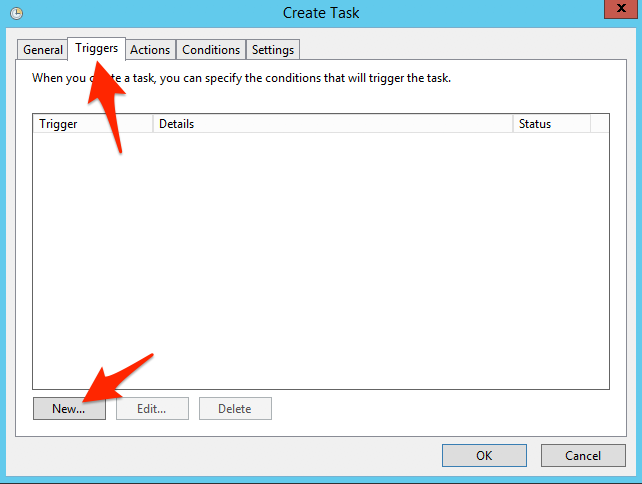
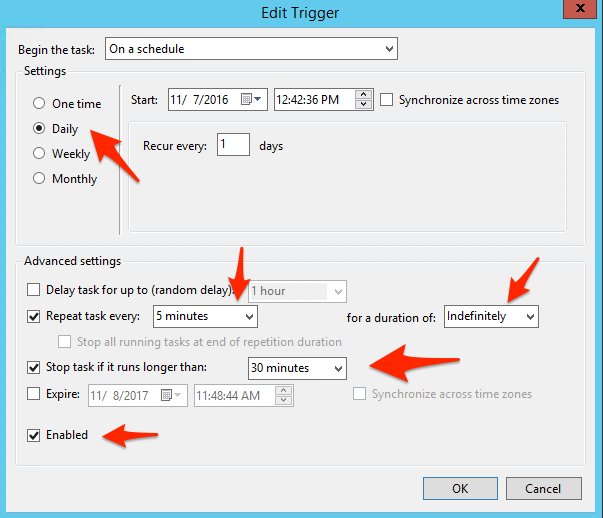
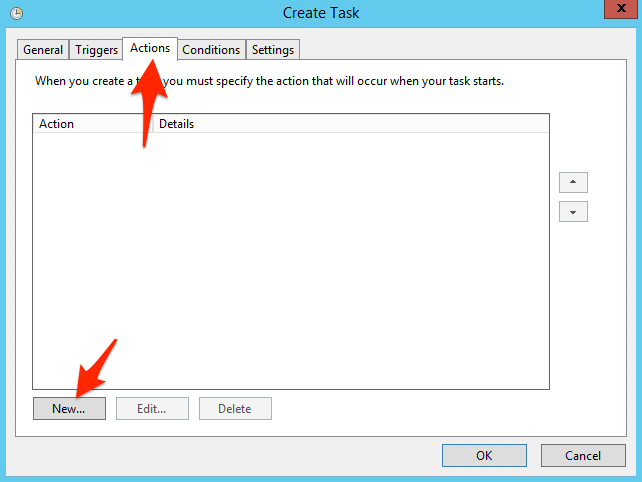
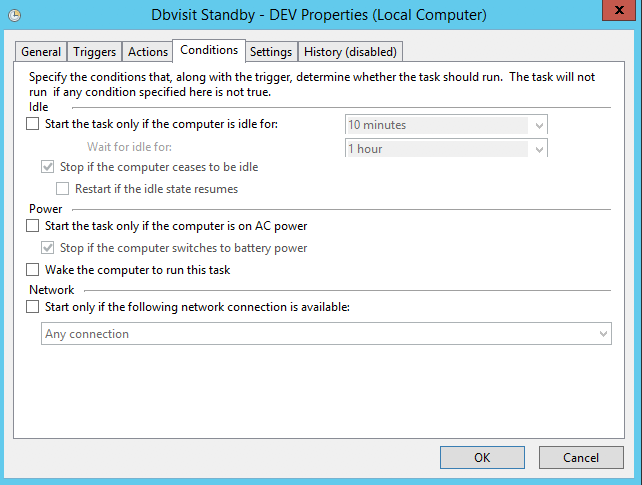
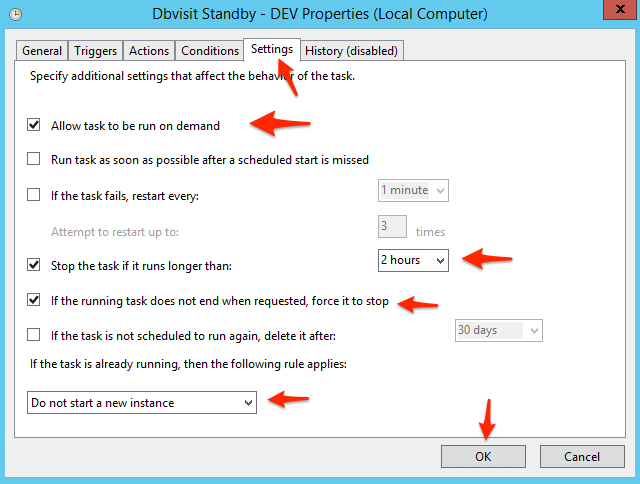
3.1. Creating a new Schedule
The screenshots below provide you with an example of creating a schedule in Windows 2012 R2.
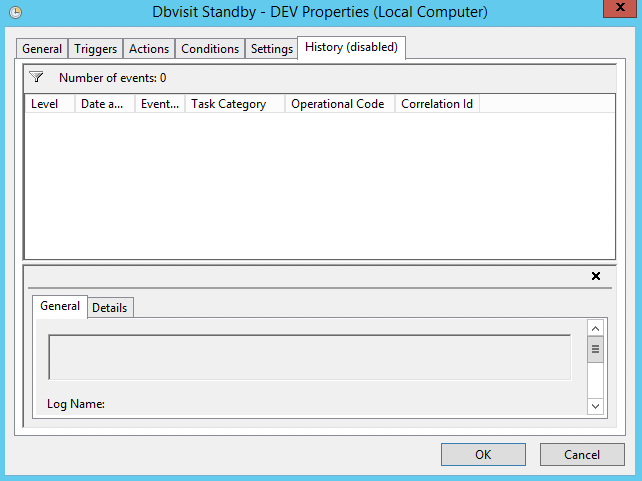

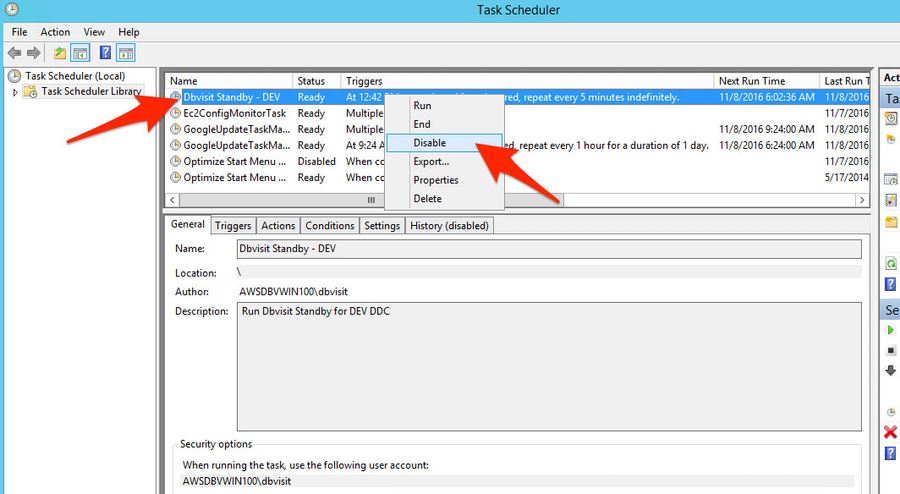
3.2. Disabling a schedule
To disable a schedule select the task, right click and select "Disable"
4. Running Dbvisit Standby in the Background
This is also known as running the Dbvisit Standby Daemon process - which is executed per DDC.
This is the new feature introduced in Dbvisit Standby version 8, which allows you to run Dbvisit Standby in the background.
The feature was first introduced on the Linux based environments and was made available on Windows-based platforms from update 8.0.06
| Warning |
|---|
Note: The daemon processes must be stopped and restarted after a Daylight Saving Clock change. Failure to restart these processes after such a time change can result in Log Gap reports run by the daemon e.g. the Daily Status report displaying the size of the log gap incorrectly. |
4.1. Linux Based Systems
The commands that can be used are listed below:
| No Format |
|---|
dbvctl -d <ddc> -D start|stop|status |
The options are:
- -d <ddc> which indicates the DDC for which the background process will be started
- -D indicates the following commands are executed specifically for the Daemon (background) process, which is "start", "stop" or "status"
Example to start Dbvisit Standby version 8 for a particular DDC, let's say DEV, to automatically ship or apply logs as they become available is:
4.1.1. Example: Starting a DDC Daemon Process
| No Format |
|---|
[oracle@dbv1 standby]$ ./dbvctl -d DEV -D start Starting Dbvisit Daemon... Started successfully. |
4.1.2. Example: Stopping a DDC Daemon Process
| No Format |
|---|
[oracle@dbv1 standby]$ ./dbvctl -d DEV -D stop Stopping Dbvisit Daemon... Successfully stopped. |
4.1.3. Example: Status Check of a DDC Daemon Process
| No Format |
|---|
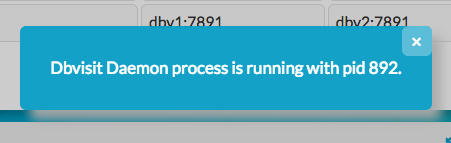
[oracle@dbv1 standby]$ ./dbvctl -d DEV -D status Dbvisit Daemon process is not running. [oracle@dbv1 standby]$ ./dbvctl -d DEV -D start Starting Dbvisit Daemon... Started successfully. [oracle@dbv1 standby]$ ./dbvctl -d DEV -D status Dbvisit Daemon process is running with pid 2209. |
4.1.4. Example: Listing running processes
| No Format |
|---|
[oracle@dbv1 standby]$ ps -ef|grep dbvctl|grep -v grep oracle 2209 0 1 10:42 ? 00:00:00 ./dbvctl -d DEV -D start |
4.2. Windows Based Systems
On Windows-based systems, the process will make use of Services. Meaning for every DDC file you want to run the Daemon/Background process, you will need to create a service.
| Note | ||
|---|---|---|
| ||
If you attempt to run the Linux way of starting the service with "dbvctl -d <DDC> -D start|stop|status" the process is run in the foreground and not as a service. This is useful for testing, but not recommended for production systems. Using the methods described below is recommended (using dbvsmgr) |
This can be done via the Central Console - please see 129641850
On Windows Based systems a new Utility - dbvsmgr is used to manage the Dbvisit Standby services. This includes Dbvnet, Dbvserver and Dbvagent as well as the new Background/Daemon process - which will be configured to run as a Windows Service.
Example, once the service is created you will see a new service for the DDC in the format of "dbvctl-DDCName" - in the example the DDC is QA so the service name is "dbvctl-QA"
When this service is started, the Daemon will run for this DDC. The service can be started either direct from the Windows Services console or by using the Dbvsmgr utility which is located in DBVISIT_BASE/dbvsmgr folder.

4.2.1. Manually Creating the Service using Dbvsmgr
The dbvsmgr utility has the following options:
| No Format |
|---|
c:\Program Files\Dbvisit\dbvsmgr>dbvsmgr.exe -h

Dbvisit services management tool for Windows.
Use this option to perform Windows service actions, such as status checks, starting and stopping services.
Services include: dbvnet, dbvagent or dbvserver

-u <service>        : To Uninstall the <service>
-i <service>        : To Install the <service>
                      This option will require the -a <username> and -p <password> options
-a <user>           : User account to run the service
-p <pwd>            : User password
-s <service>        : Start the <service>
-t <service>        : Stop the <service>
-f <service>        : Status of the <service>
-d <DDC>            : Specify DDC Name (only for use with dbvctl)
-q                  : Specify GUI mode
-r <command>        : Run, internal use only
-g                  : Provide debug output
-c                  : Review user permissions
                      This option will require the -a <username> and -p <password> options
-V                  : Display Version
-h                  : Display help
|
4.2.1.1. Creating a DDC Service
Creating a Service for a DDC file requires a few parameters, these are:
-i dbvctl
-d <DDC>
-a <Windows User That will run Service>
-p <Windows User Password>
Example: dbvsmgr -i dbvctl -d QA -a "dbvwin101\Administrator" -p "Abc123"
Important: Before you run this command, you need to make sure that you have a Valid DDC and that the License key has been applied. Otherwise, the Service will be created, but will not be able to start.
Example Output:
| No Format |
|---|
c:\Program Files\Dbvisit\dbvsmgr>dbvsmgr.exe -i dbvctl -d DEV -a "dbvwin301\Administrator" -p "Test123" Service has been installed Security Information has been updated |
4.2.1.2. Stop, Start, Status Checks for DDC Service
To Stop, Start and Check the status of the service is done using the --starts, --stop t and --status f options.
Example:
| No Format |
|---|
C:\Program Files (x86)\Dbvisit\dbvsmgr>dbvsmgr.exe -f dbvctl-statusDEV dbvctl-QAd DEV Dbvnet service is not running C:\Program Files (x86)\Dbvisit\dbvsmgr>dbvsmgr.exe -s dbvctl-startDEV dbvctl-QAd DEV Starting Dbvnet service Start Complete C:\Program Files (x86)\Dbvisit\dbvsmgr>dbvsmgr.exe -f dbvctl-statusDEV dbvctl-QAd DEV Dbvnet service is running C:\Program Files (x86)\Dbvisit\dbvsmgr>dbvsmgr.exe -t dbvctl-stopDEV dbvctl-QAd DEV Stopping Dbvnet service.................... Stop Complete C:\Program Files (x86)\Dbvisit\dbvsmgr>dbvsmgr --status dbvctl-QA Dbvnet service is not running |
4.2.1.3. Removing the DDC Service
To remove the DDC service, you have to stop the service first, then run use the dbvsmgr --uninstall <service-name> command.
In the example below, we want to remove the dbvctl-QA service
-u option.
Example:
| No Format |
|---|
C:\Program Files (x86)\Dbvisit\dbvsmgr>dbvsmgr.exe -u dbvctl-uninstallDEV dbvctl-qad DEV Dbvnet service uninstalled successfully. |
4.3. Configuration Options
Configuration options are specified in the particular DDC file.
The parameters relating to the Daemon/Background process stars with DMN_ and is grouped together in the DDC file.
Example extract below - indicating Default Values
| No Format |
|---|
# 70 Daemon Settings #>>>Explanation>>>>>>>>>>>>>>>>>>>>>>>>>>>>>>>>>>>>>>>>>>>>>>>>>>>>>>>>>>>>>>>> # DMN_DBVISIT_INTERVAL - interval in seconds for dbvisit schedule on source # DMN_MONITOR_INTERVAL - interval in seconds for log monitor schedule on source # DMN_DBVISIT_TIMEOUT - max seconds for a dbvisit process to complete on source # DMN_MONITOR_LOG_NUM - number of logs to monitor on source # DMN_MAX_FAIL_NOTIFICATIONS - max number of emails sent on failure on source # DMN_DBVISIT_INTERVAL_DR - interval in seconds for dbvisit schedule on destination # DMN_MONITOR_INTERVAL_DR - interval in seconds for log monitor schedule on destination # DMN_DBVISIT_TIMEOUT_DR - max seconds for a dbvisit process to complete on destination # DMN_MONITOR_LOG_NUM_DR - number of logs to monitor on destination # DMN_MAX_FAIL_NOTIFICATIONS_DR - max number of emails sent on failure on destination #<<<<<<<<<<<<<<<<<<<<<<<<<<<<<<<<<<<<<<<<<<<<<<<<<<<<<<<<<<<<<<<<<<<<<<<<<<<<<< DMN_DBVISIT_INTERVAL = 600 DMN_MONITOR_INTERVAL = 5 DMN_DBVISIT_TIMEOUT = 3600 DMN_MONITOR_LOG_NUM = 1 DMN_MAX_FAIL_NOTIFICATIONS = 3 DMN_DBVISIT_INTERVAL_DR = 600 DMN_MONITOR_INTERVAL_DR = 5 DMN_DBVISIT_TIMEOUT_DR = 3600 DMN_MONITOR_LOG_NUM_DR = 1 DMN_MAX_FAIL_NOTIFICATIONS_DR = 3 |
There are 4 key values that should be reviewed and adjusted to your requirements:
| No Format |
|---|
DMN_DBVISIT_INTERVAL = 600 DMN_MONITOR_INTERVAL = 5 DMN_DBVISIT_INTERVAL_DR = 600 DMN_MONITOR_INTERVAL_DR = 5 |
The Interval and Monitor Interval parameters indicate the frequency of checking for new logs (DMN_MONITOR_INTERVAL), and if no logs are generated during a specified period - Dbvisit Standby version 8 will force a log switch (DMN_DBVISIT_INTERVAL).
In most cases, the default values should be sufficient.
Please note that logs will be shipped and applied sequentially.
Additional information can be found in our knowledge base document @@ https://support.dbvisit.com/hc/en-us/articles/115006499748-Dbvisit-Standby-Daemon-Variables
4.4 Daemon Blackout
The blackout feature will help in pausing the archive send/apply process for a particular timeframe.
If the blackout window is set for primary, during this window no archives would be sent, when set for standby no archives would be applied for the particular window.
This can be done by editing the DDC file directly or can be set from the Manage Configurations Menu in GUI.
Below are the configuration parameters for enabling a blackout window for Primary
| Code Block |
|---|
DMN_BLACKOUT_STARTTIME = DMN_BLACKOUT_ENDTIME = |
Below are the configuration parameters for enabling a blackout window for Standby
| Code Block |
|---|
DMN_BLACKOUT_STARTTIME_DR = DMN_BLACKOUT_ENDTIME_DR = |
Example: In this example, we have provided a blackout time frame for both primary and standby between 19:00 to 21:00hrs, if the entries are not removed the blackout will happen every day during the particular time frame.
| Code Block |
|---|
DMN_BLACKOUT_STARTTIME = 19:00 DMN_BLACKOUT_ENDTIME = 21:00 DMN_BLACKOUT_STARTTIME_DR = 19:00 DMN_BLACKOUT_ENDTIME_DR = 21:00 |
| Note |
|---|
The Daemon Blackout parameter can be used only when the Daemon process is used for sending and applying archivelogs. |
5. Start Background Process in Central Console
The new background process option where you can run Dbvisit Standby for each DDC in the background can be managed via the Central Console.
To get access to this option, you must already have a DDC configured and must be able to manually ship and apply logs prior to enabling this option.
- When using Linux, the background process will be started using the -D option (dbvctl -d DDC -D start|stop|status)
- When using Windows, the background process will run as a Windows Service. A Windows Service will be created on the primary and standby server for each DDC.
5.1. Managing the Daemon for Linux Based systems
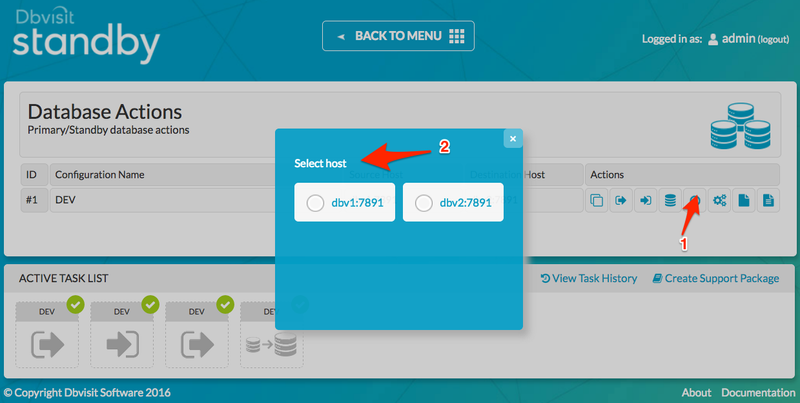
Step 1: Navigate to the Database Actions Menu
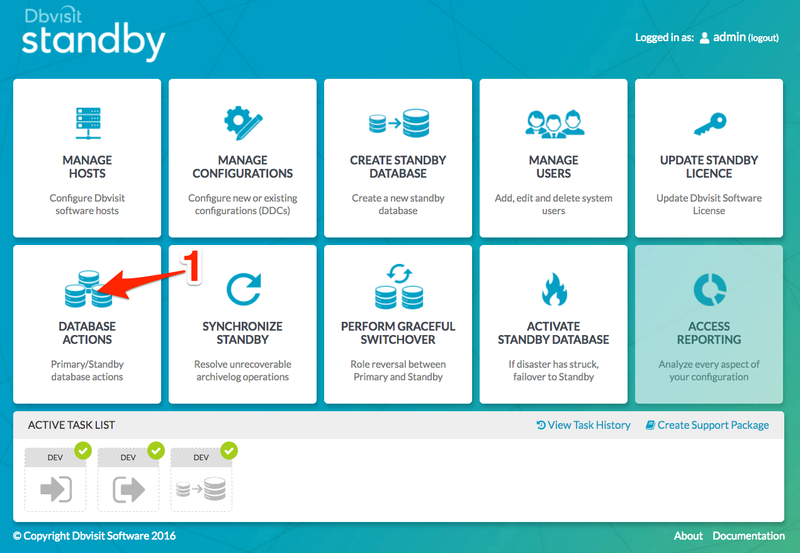
Step 2: For the particular DDC, select the Daemon Actions option which is the lightning bolt icon as shown below.
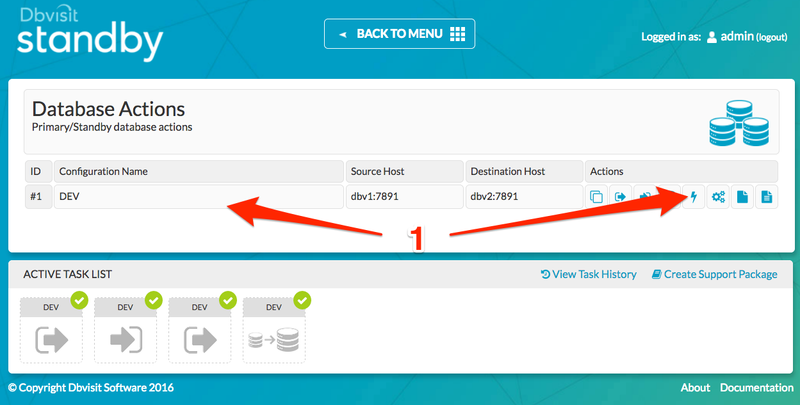
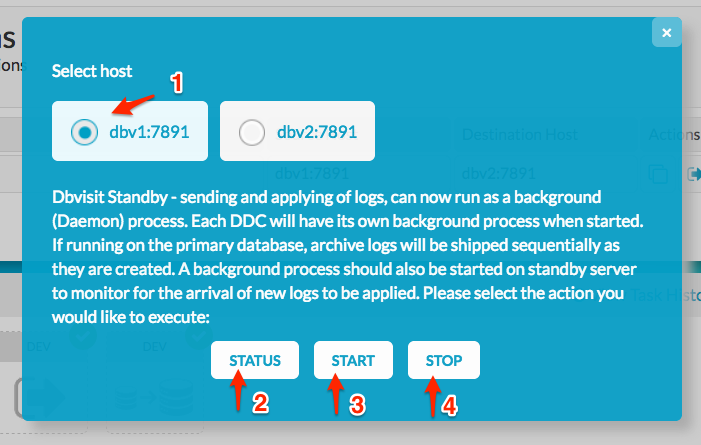
Step 3: Select the Host on which you want to perform the action. Note that you have to start the daemon on both hosts if you want to automate the log shipping and applying options.
Step 4: Once the host is selected, the options available will be displayed: Status, Start, Stop - note for Windows there will be an install option which is to create the service.
Step 5: The output windows below show you the output of the command options
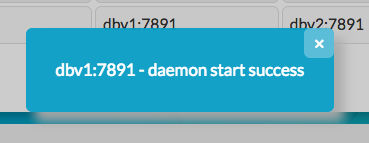
Start Daemon output
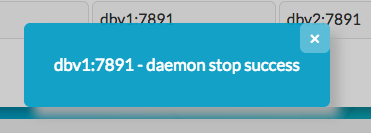
Stop Daemon output
Status check of the Deamon
5.2. Managing the Daemon for Windows Based systems
If you are running Standby on a Windows environment, the available Daemon Control options are a little different.
In order to work with the Daemon, Dbvisit must first install a Windows Service to manage the communication.
You can check whether the required Service is installed and/or running by using the Status command [1].

This command will return whether the Service is (a) installed, and (b) running. The Service must be both installed and running to work.
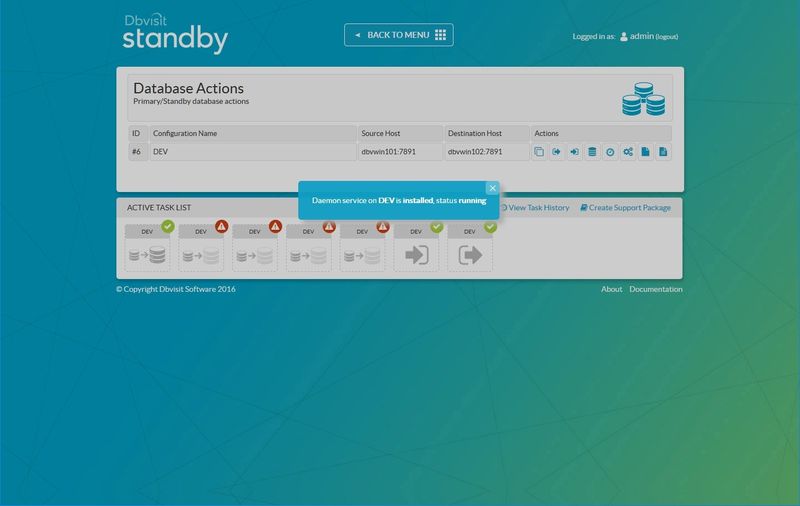
If the Service is not installed, all other commands (Uninstall, Start, Stop) will fail, and may incorrectly report an error. Therefore, you should always run the Status command if in doubt over the status of the Daemon Service.
To install the Service, click the Install button [1].
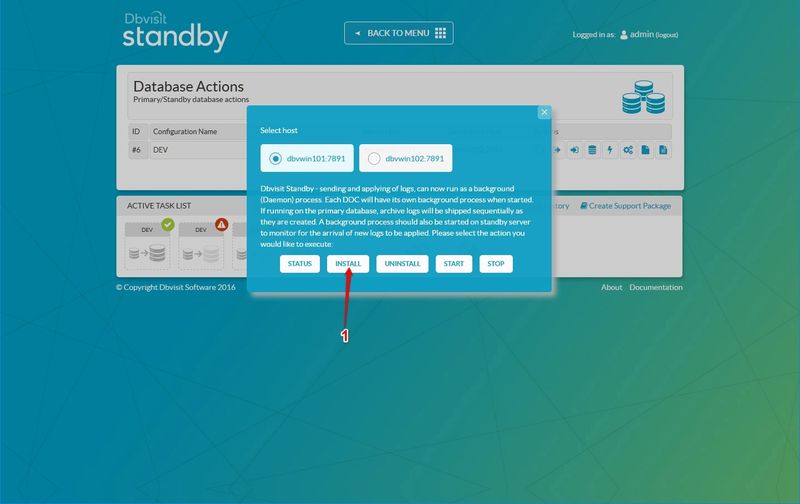
Once the Service is installed, you may use the other commands at will exactly as you would as per section 5