Installing Standby Multiplatform on Unix
You can follow these basic steps discussed in this section to install Standby Multiplatform. This section covers the installation of Standby Multiplatform on a Non-RAC environment (Single Instance configuration).
The Standby installation uses approximately 250MB of disk space, but as trace files and log files will be stored in this location, 512MB free space is the recommended minimum.
In multiplatform the default installation location is /usr/dbvisit, it is also known and referred to as the Dbvisit Base (DBVISIT_BASE) directory.
Step 1: Create a "Dbvisit Base" Directory
The first step is to create the Dbvisit Base directory. This is the directory into which Dbvisit Standby will be installed. The default location is /usr/dbvisit
This directory should be owned by the Oracle/SQLServer Database software owner.
The following steps can be executed as the "root" user to create the directory and set correct permission. This example shows an installation for the Oracle database:
| Code Block |
|---|
oracle@dbvlin101[/root]:# cd /usr oracle@dbvlin101[/usr]# mkdir dbvisit oracle@dbvlin101[/usr]# chown -R oracle:oinstall dbvisit oracle@dbvlin101[/usr]# ls -ald /usr/dbvisit drwxr-xr-x 2 oracle oinstall 6 Jun 24 11:46 /usr/dbvisit |
Step 2: Download Latest Software
The first step is to download the latest available version from the Dbvisit web site https://www.dbvisit.com
Once the software is downloaded, you can copy it to a temporary location on your server.
Important:
Do not install Dbvisit Standby as the Unix "root" user.
When you download the installer, please make sure you download it into a temporary folder and that the installer is run from there. Do not extract and run the installer from the location where you want the files to be installed.
In this example, we create a temporary directory called MP in /home/oracle and copy the software download into this directory.
| Code Block |
|---|
[oracle@dbvel71 ~]$ mkdir MP [oracle@dbvel71 ~]$ cd MP/ [oracle@dbvel71 MP]$ pwd /home/oracle/MP |
Now copy the installer file into the /home/oracle/MP location.
| Code Block |
|---|
[oracle@dbvel71 MP]$ ls -lrt -rw-r--r--. 1 oracle oinstall 145919908 Dec 12 13:12 standby-v11.0.0RC2-1-gd3c1a710.tar.gz [oracle@dbvel71 MP]$ |
Step 3: Extract Software Install Package
The next step is to extract the software package and then check if their permissions for agent and console installer have execute permission. First, use the gunzip utility to unzip the software and use tar -xf to extract the archive. The steps are shown below.
| Code Block |
|---|
[oracle@dbvel71 MP]$ gunzip standby-v11.0.0RC2-1-gd3c1a710.tar.gz [oracle@dbvel71 MP]$ tar -xf standby-v11.0.0RC2-1-gd3c1a710.tar [oracle@dbvel71 MP]$ ls -al total 303688 drwxr-xr-x. 2 oracle oinstall 4096 Dec 12 13:14 . drwx------. 11 oracle oinstall 4096 Dec 12 13:10 .. -rwxr-xr-x. 1 oracle oinstall 126913353 Dec 8 18:35 install-agent-v11.0.0RC2-1-gd3c1a710 -rwxr-xr-x. 1 oracle oinstall 28568135 Dec 8 18:34 install-control-v11.0.0RC2-1-gd3c1a710 -rw-r--r--. 1 oracle oinstall 155484160 Dec 12 13:12 standby-v11.0.0RC2-1-gd3c1a710.tar [oracle@dbvel71 MP]$ |
There are two installation packages available. install-agent-* and install-control-*. Executing install-agent-* will prompt you for installing the dbvagentmanager (aka agent). Executing install-control-* will prompt you for installing dbvcontrol (aka console, control center).
Step 4: Install standby multiplatform agent manager
The standby multiplatform agent must be installed on both primary and standby servers.
To preview the full help of the installer and the arguments (parameters) that can be passed for automated installations - run ./install-agent-v0.9.6BETA-47-g6f0eba0f -h
| Code Block |
|---|
[oracle@dbvel71 MP]$ ./install-agent-v11.0.0RC2-1-gd3c1a710 -h
+----------------------------------------------------------------------+
|          ____  _                  _ _           __  __ ____          |
|         / ___|| |_ __ _ _ __   __| | |__  _   _|  \/  |  _ \         |
|         \___ \| __/ _' | '_ \ / _' | '_ \| | | | |\/| | |_) |        |
|          ___) | || (_| | | | | (_| | |_) | |_| | |  | |  __/         |
|         |____/ \__\__,_|_| |_|\__,_|_.__/ \__, |_|  |_|_|            |
|          Copyright 2021                   |___/   By Dbvisit         |
+----------------------------------------------------------------------+

Welcome to Dbvisit StandbyMP setup version v11.0.0RC2-1-gd3c1a710.

Usage of install-agent-v11.0.0RC2-1-gd3c1a710:
  -agent-communications-port int
    	Agent communications port number (default 5533)
  -agent-file-transfer-port int
    	Agent file transfer port number (default 7890)
  -batch
    	install non-interactively using default values or values supplied on the command line
  -control-center-address string
    	host address of the Control Center
  -default-backup-dir string
    	default directory for SQL Server backup files
  -host-address string
    	resolvable address of this host (default "dbvel71.oraclekiwi.co.nz")
  -install-dir string
    	base directory to install into (default "/usr/dbvisit")
  -passphrase string
    	passphrase used to secure communication between Agents and Control Center
[oracle@dbvel71 MP]$ |
| Note |
|---|
Note - the agent install executable script must have the execute permission for the Linux software owner - which in this example is the "oracle" Unix account. |
Example Installation:
Below is an example of standby multiplatform agent installation process.
| Code Block |
|---|
[oracle@dbvel71 MP]$ ./install-agent-v11.0.0RC2-1-gd3c1a710 +----------------------------------------------------------------------+ | ____ _ _ _ __ __ ____ | | / ___|| |_ __ _ _ __ __| | |__ _ _| \/ | _ \ | | \___ \| __/ _' | '_ \ / _' | '_ \| | | | |\/| | |_) | | | ___) | || (_| | | | | (_| | |_) | |_| | | | | __/ | | |____/ \__\__,_|_| |_|\__,_|_.__/ \__, |_| |_|_| | | Copyright 2021 |___/ By Dbvisit | +----------------------------------------------------------------------+ Welcome to Dbvisit StandbyMP setup version v11.0.0RC2-1-gd3c1a710. ? Which directory should the software be installed into? /usr/dbvisit - - - You are now configuring the Dbvisit StandbyMP Agent - - - The Agent will listen on the following discovered addresses: - 127.0.0.1 - 10.0.2.9 - 192.168.56.9 ? Agent File Transfer Port: 7890 ? Fully Qualified Domain Name for this host: dbvel71.oraclekiwi.co.nz ? Fully Qualified Domain Name for the Control Center: 192.168.56.10 ? Agent Communications Port: 5533 Each Dbvisit StandbyMP Agent and the Dbvisit StandbyMP Control Center must be configured with the same passphrase. This is how we know that they are all intended to be part of the same system. Please specify a strong passphrase - we suggest at least 12 characters, containing at least 2 numbers and 2 symbols. ? Passphrase: ******* ? Confirm Passphrase: ******* - - - Dbvisit StandbyMP Agent configuration finished - - - - - - Ready to perform installation - - - ? Do you wish to proceed with the setup using the supplied configuration options? Proceed with setup - - - Performing installation - - - Copying software files to '/usr/dbvisit'... Writing Agent configuration file '/usr/dbvisit/standbymp/conf/dbvagentmanager.ini'... - - - Installation successful! - - - To enable the installed Dbvisit StandbyMP components to run as system services, you will need to execute some commands as the "root" user in order to complete the setup. To install the system service(s), you can run, substituting the name of the user to run as if it is different from the current user: sudo /usr/dbvisit/standbymp/bin/dbvagentmanager service install --user oracle To start the system service(s), you can run: sudo /usr/dbvisit/standbymp/bin/dbvagentmanager service start - - - Configuration Summary - - - Install Directory: /usr/dbvisit Fully Qualified Domain Name for this host: dbvel71.oraclekiwi.co.nz Fully Qualified Domain Name for the Control Center: 192.168.56.10 Agent Communications Port: 5533 Agent File Transfer Port: 7890 - - - Installation Summary - - - The following actions have been performed: - Installed Dbvisit StandbyMP Agent software into: /usr/dbvisit/standbymp - Agent settings are available in the configuration file: /usr/dbvisit/standbymp/conf/dbvagentmanager.ini - Generated new security certificates in: /usr/dbvisit/standbymp/certificates - - - INSTALLATION SUCCESSFUL - - - |
Let's break down the steps and look at individual inputs that are required as part of the installation process
Step 4.1
By default, the installation goes to the /usr/dbvisit directory, but you could provide custom locations. It is not recommended to provide this as a users home directory(For example /home/oracle)
| Code Block |
|---|
? Which directory should the software be installed into? (/usr/dbvisit) |
Step 4.2
The installation will list all the IP addresses on which Agent will Listen on port 7890. This is mainly used for file transfer between Primary and standby servers.
| Code Block |
|---|
The Agent will listen on the following discovered addresses: - 127.0.0.1 - 10.0.2.9 - 192.168.56.9 |
Step 4.3
The default agent file transfer port is used for transferring archivelogs/transaction logs and backup files between primary and standby. This value can be modified and a different port can be used.
| Code Block |
|---|
? Agent File Transfer Port: 7890 |
Step 4.4
The host in which the control center is installed or will be installed. It is recommended to provide the resolvable IPAddress of the host, but a hostname can also be provided.
| Code Block |
|---|
? Control Center Address: 192.168.56.10 |
Step 4.5
Port 5533 is the default agent communication port with the control center.
| Code Block |
|---|
? Agent Communications Port: 5533 |
Step 4.6
The passphrase provided must match across Agent and control center installation. This is to ensure that the control center can discover all the systems that are part of it.
| Code Block |
|---|
Each Dbvisit Standby Multiplatform Agent and the Dbvisit Standby Multiplatform Control Center must be configured with the same passphrase. This is how we know that they are all intended to be part of the same system. Please choose a strong passphrase that is difficult to guess and that contains letters, numbers and symbols. ? Passphrase: ******* ? Confirm Passphrase: ******* |
Step 4.7
The installation proceeds and provides the options for starting the components and also provides a summary of the components installed along with ports used.
| Code Block |
|---|
- - - Installation successful! - - - To enable the installed Dbvisit StandbyMP components to run as system services, you will need to execute some commands as the "root" user in order to complete the setup. To install the system service(s), you can run, substituting the name of the user to run as if it is different from the current user: sudo /usr/dbvisit/standbymp/bin/dbvagentmanager service install --user oracle To start the system service(s), you can run: sudo /usr/dbvisit/standbymp/bin/dbvagentmanager service start - - - Configuration Summary - - - Install Directory: /usr/dbvisit Fully Qualified Domain Name for this host: dbvel71.oraclekiwi.co.nz Fully Qualified Domain Name for the Control Center: 192.168.56.10 Agent Communications Port: 5533 Agent File Transfer Port: 7890 - - - Installation Summary - - - The following actions have been performed: - Installed Dbvisit StandbyMP Agent software into: /usr/dbvisit/standbymp - Agent settings are available in the configuration file: /usr/dbvisit/standbymp/conf/dbvagentmanager.ini - Generated new security certificates in: /usr/dbvisit/standbymp/certificates - - - INSTALLATION SUCCESSFUL - - - |
Step 4.8
Install and start the service. The sudo command can be used if the installed user has permission to start or run this
| Code Block |
|---|
[root@dbvel71 ~]# /usr/dbvisit/multiplatform/bin/dbvagentmanager service install --user oracle [root@dbvel71 ~]# [root@dbvel71 ~]# /usr/dbvisit/multiplatform/bin/dbvagentmanager service start |
Step 4.9
Once the service is started, below are the processes that run.
| Code Block |
|---|
[oracle@dbvel71 MP]$ ps -ef |grep dbv oracle 6791 1 0 13:22 ? 00:00:00 /usr/dbvisit/standbymp/bin/dbvagentmanager |
Step 5: Install Standby Multiplatform Control Center
The control center must be installed only on one server. This can be either in your standby server or as per recommendations in a separate server.
To preview the full help of the installer and the arguments (parameters) that can be passed for automated installations - run ././install-control-v0.9.6BETA-47-g6f0eba0f -h
| Code Block |
|---|
[oracle@dbvel72 MP]$ ./install-control-v11.0.0RC2-1-gd3c1a710 -h
+----------------------------------------------------------------------+
|          ____  _                  _ _           __  __ ____          |
|         / ___|| |_ __ _ _ __   __| | |__  _   _|  \/  |  _ \         |
|         \___ \| __/ _' | '_ \ / _' | '_ \| | | | |\/| | |_) |        |
|          ___) | || (_| | | | | (_| | |_) | |_| | |  | |  __/         |
|         |____/ \__\__,_|_| |_|\__,_|_.__/ \__, |_|  |_|_|            |
|          Copyright 2021                   |___/   By Dbvisit         |
+----------------------------------------------------------------------+

Welcome to Dbvisit StandbyMP setup version v11.0.0RC2-1-gd3c1a710.

Usage of install-control-v11.0.0RC2-1-gd3c1a710:
  -agent-communications-port int
    	Agent communications port number (default 5533)
  -batch
    	install non-interactively using default values or values supplied on the command line
  -install-dir string
    	base directory to install into (default "/usr/dbvisit")
  -passphrase string
    	passphrase used to secure communication between Agents and Control Center
  -web-server-port int
    	Control Center web server port number (default 4433)
[oracle@dbvel72 MP]$ |
Example Installation:
| Code Block |
|---|
[oracle@dbvel72 MP]$ ./install-control-v11.0.0RC2-1-gd3c1a710 +----------------------------------------------------------------------+ | ____ _ _ _ __ __ ____ | | / ___|| |_ __ _ _ __ __| | |__ _ _| \/ | _ \ | | \___ \| __/ _' | '_ \ / _' | '_ \| | | | |\/| | |_) | | | ___) | || (_| | | | | (_| | |_) | |_| | | | | __/ | | |____/ \__\__,_|_| |_|\__,_|_.__/ \__, |_| |_|_| | | Copyright 2021 |___/ By Dbvisit | +----------------------------------------------------------------------+ Welcome to Dbvisit StandbyMP setup version v11.0.0RC2-1-gd3c1a710. ? Which directory should the software be installed into? /usr/dbvisit - - - You are now configuring the Dbvisit StandbyMP Control Center - - - The Control Center will listen on the following discovered addresses: - 127.0.0.1 - 10.0.2.10 - 192.168.56.10 ? Control Center Web Server Port: 4433 ? Agent Communications Port: 5533 Each Dbvisit StandbyMP Agent and the Dbvisit StandbyMP Control Center must be configured with the same passphrase. This is how we know that they are all intended to be part of the same system. Please specify a strong passphrase - we suggest at least 12 characters, containing at least 2 numbers and 2 symbols. ? Passphrase: ******* ? Confirm Passphrase: ******* - - - Dbvisit StandbyMP Control Center configuration finished - - - - - - Ready to perform installation - - - ? Do you wish to proceed with the setup using the supplied configuration options? Proceed with setup - - - Performing installation - - - Copying software files to '/usr/dbvisit'... Writing Control Center configuration file '/usr/dbvisit/standbymp/conf/dbvcontrol.ini'... - - - Installation successful! - - - To enable the installed Dbvisit StandbyMP components to run as system services, you will need to execute some commands as the "root" user in order to complete the setup. To install the system service(s), you can run, substituting the name of the user to run as if it is different from the current user: sudo /usr/dbvisit/standbymp/bin/dbvcontrol service install --user oracle To start the system service(s), you can run: sudo /usr/dbvisit/standbymp/bin/dbvcontrol service start - - - Configuration Summary - - - Install Directory: /usr/dbvisit Control Center Web Server Port: 4433 Agent Communications Port: 5533 - - - Installation Summary - - - The following actions have been performed: - Installed Dbvisit StandbyMP Control Center software into: /usr/dbvisit/standbymp - Control Center settings are available in the configuration file: /usr/dbvisit/standbymp/conf/dbvcontrol.ini - Generated new security certificates in: /usr/dbvisit/standbymp/certificates - - - INSTALLATION SUCCESSFUL - - - |
Let's break down the steps and look at individual inputs that are required as part of the installation process
Step 5.1
By default, the installation goes to the /usr/dbvisit directory, but you could provide custom locations. It is not recommended to provide this as a users home directory(For example /home/oracle)
| Code Block |
|---|
Welcome to Dbvisit Standby Multiplatform setup version v0.9.6BETA-47-g6f0eba0f. ? Which directory should the software be installed into? /usr/dbvisit |
Step 5.2
The installation executable will list all the IP addresses that it will listen on
| Code Block |
|---|
The Control Center will listen on the following discovered addresses: - 127.0.0.1 - 10.0.2.10 - 192.168.56.10 |
Step 5.3
The control center webserver port by default is 12345 and the Agent communication port is 5533. The agent communication port must match the port provided during the agent installation.
| Code Block |
|---|
? Control Center Web Server Port: 4433 ? Agent Communications Port: 5533 |
Step 5.4
The passphrase must be the same as the one provided during the agent installation. This is to ensure that the control center discovers all the hosts that are part of the configuration.
| Code Block |
|---|
Each Dbvisit Standby Multiplatform Agent and the Dbvisit Standby Multiplatform Control Center must be configured with the same passphrase. This is how we know that they are all intended to be part of the same system. Please choose a strong passphrase that is difficult to guess and that contains letters, numbers and symbols. ? Passphrase: ******* ? Confirm Passphrase: ******* - - - Dbvisit Standby Multiplatform Control Center configuration finished - - - |
Step 5.5
The installation proceeds further after the configuration is complete and it also provides an option to change any provided value during the configuration process.
| Code Block |
|---|
- - - Installation successful! - - - To enable the installed Dbvisit StandbyMP components to run as system services, you will need to execute some commands as the "root" user in order to complete the setup. To install the system service(s), you can run, substituting the name of the user to run as if it is different from the current user: sudo /usr/dbvisit/standbymp/bin/dbvcontrol service install --user oracle To start the system service(s), you can run: sudo /usr/dbvisit/standbymp/bin/dbvcontrol service start - - - Configuration Summary - - - Install Directory: /usr/dbvisit Control Center Web Server Port: 4433 Agent Communications Port: 5533 - - - Installation Summary - - - The following actions have been performed: - Installed Dbvisit StandbyMP Control Center software into: /usr/dbvisit/standbymp - Control Center settings are available in the configuration file: /usr/dbvisit/standbymp/conf/dbvcontrol.ini - Generated new security certificates in: /usr/dbvisit/standbymp/certificates - - - INSTALLATION SUCCESSFUL - - - |
Step 5.6
Start the dbvcontrol service and add the service to the system services. This is done to ensure that the services are started automatically during server restarts.
| Code Block |
|---|
[root@dbvel72 ~]# /usr/dbvisit/multiplatform/bin/dbvcontrol service install --user oracle [root@dbvel72 ~]# /usr/dbvisit/multiplatform/bin/dbvcontrol service start [root@dbvel72 ~]# |
Step 5.7
Once the service is started, below are the processes that run.
| Code Block |
|---|
[root@dbvel72 ~]# ps -ef |grep dbv oracle 18757 1 1 13:45 ? 00:00:01 /usr/dbvisit/multiplatform/bin/dbvcontrol root 18875 18635 0 13:47 pts/0 00:00:00 grep --color=auto dbv [root@dbvel72 ~]# |
Installing Standby Multiplatform on Windows
Step 1: Windows Installation Pre-requisites
If installing Dbvisit Standby onto a Windows Based environment (Microsoft Windows 2008 and above - 64bit) the following pre-requisite checks should be performed:
The user installing Dbvisit Standby may be a Local or a Domain user.
The user must be part of the following Local Groups
Local Administrators
ORA_DBA
Users
If using Oracle 12c - Oracle Home DBA group
It is recommended that User Account Control be turned off - not strictly required, but highly recommended.
The user will be granted the "Log On As Service" policy to allow the user to run the Dbvisit Standby Services
When the Installer asks for the user that will be running the Dbvisit Services (Dbvnet, Dbvserver and Dbvagent) it is important that this user is in the Local Administrators and ORA_DBA Groups.
If you are using Oracle 12c and during the Oracle Software installation you selected the option for Oracle to create a local account to own the Oracle Home and run the services - do not specify this user as the user to run the Dbvisit Standby services. Rather create a new local account with the above-mentioned permission and use it to then run Dbvisit Standby services.
When using temporary backup directories (example d:\temp) during the Create Standby Database (CSD) or Synchronize Standby Database (SYNC) options, you need to make sure that these directories allow for FULL read/write permission for the user running Dbvisit Services as well as for the user that is running the Oracle Database services.
Log on as a Service
Important - when you install Dbvisit Standby and you specify the Windows user and password that will be used to run the Dbvisit Services, this user must have "Log on as a service" permission. Otherwise, you might end up with an error message "specify valid username and password". You can double-check the permission as follow:

Directory Permissions
It is important to make sure that the directories used to store temporary backups - an example where the backups are stored during Create Standby Database (CSD) and Synchronise Standby Database (SYNC) have the Windows Oracle Homeowner added to have full read/write permission. Ensure, correct permissions are provided to custom backup locations for source and target transaction logs for SQL Server.
This also counts for the source dbvisit archivelog destination and target archivelog destinations. If these directories do not have correct permission, the CSD, SYNC or Graceful Switchover processes could fail with errors.
Step 2: Windows agentmanager Installation
The steps for Installing Standby Multiplatform on Windows are easy and no outage is required.
We do recommend that before you install software into a production environment, you always test it first in your development or test environment to make sure you are familiar with the process and required pre-requisite steps.
In this section, we will now review the installation process.
Before you start the installer it is again important to make sure that the user account you are running the installer as and that will be used to run the Dbvisit Standby software must be in the Local Administrators, Users and ORA_DBA Windows Groups for Oracle configuration. Failing to do this can lead to errors during installation. Disabling User Access Control is also recommended.
We recommend you create a new Local Windows account that have the above-mentioned permissions and that this account is used to run the Dbvisit Standby software (it's Services and Windows Schedules).
In the example we will discuss below a new Local account called "dbvisit" is created with the relevant groups assigned. UAC was also disabled.
Before you continue, review the following checklist:
Is port 4433 open for the Central Console
Is port 7890 used by Dbvnet open and available
Is port 5533 used by agent for communication is open and available.
The above ports should be added to the Windows Firewall to allow the Dbvisit Standby components to communicate. If you have a firewall between your Primary and Standby (DR) datacenter please make sure that these ports can be used.
Also, review any AntiVirus software application installed and make sure these do not block the Dbvisit Standby software components.
| Note |
|---|
The passphrase must be same across agentmanager and the control center. This should not be changed for any configuration. |
Unlike the previous version, the agent and control center installations are separate installer files. Below we will first look at agent manager installation.

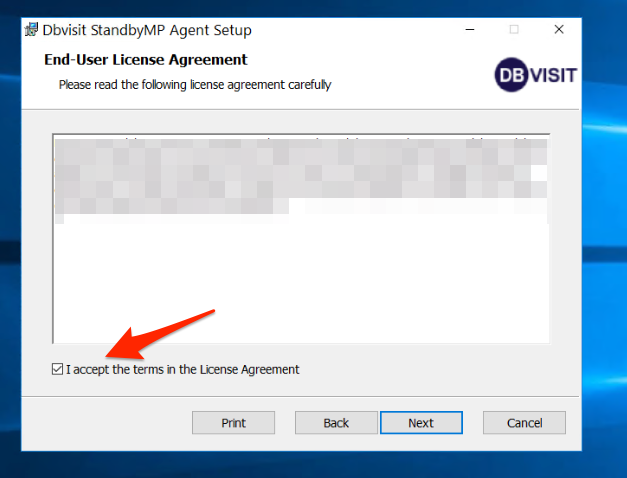
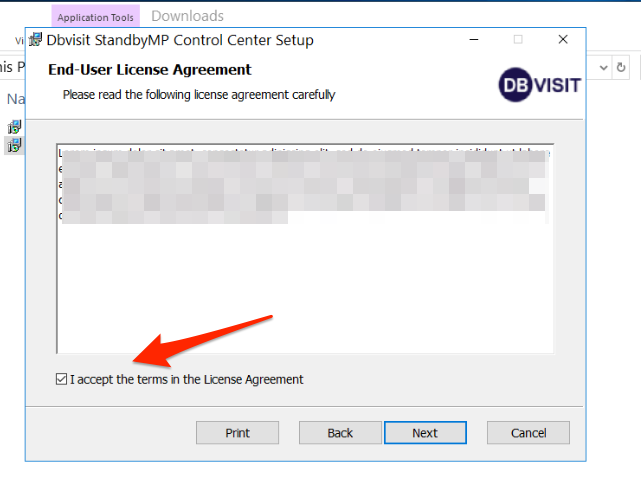
Step 2.1: Accept the license agreement
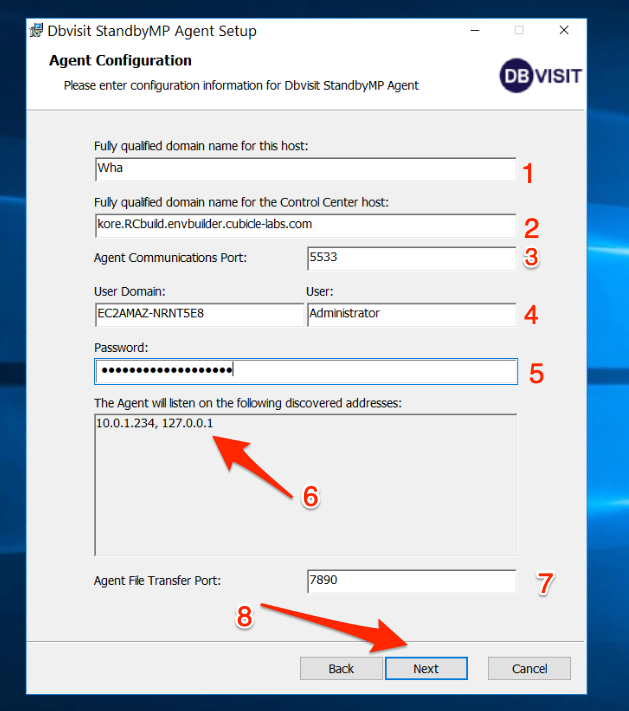
Step 2.3: Complete the configuration Details
( 1 ) Fully qualified name for the agent host. Here we have provided the short host name but it is recommended to provide the fully qualified host name.
( 2 ) The control center hostname. This is the server on which control center is installed.
( 3 ) The agent communication port. The default port is 5533
( 4 ) The User domain and the user in which the agent manager is installed. In this case its Administrator.
( 5 ) The password for the user
( 6 ) The agent hosts IPAddress on which the agent manager listens
( 7 ) Agent Transfer port. The default port is 7890. This port is used for file transfer between primary and standby and also run remote commands.
( 8 ) Click Nex to continue the installation.
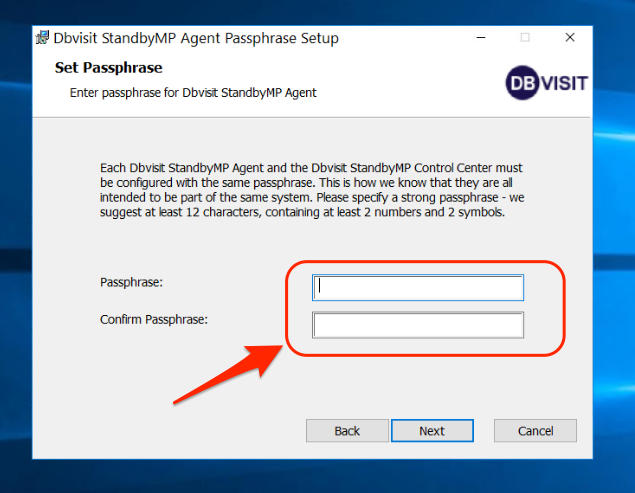
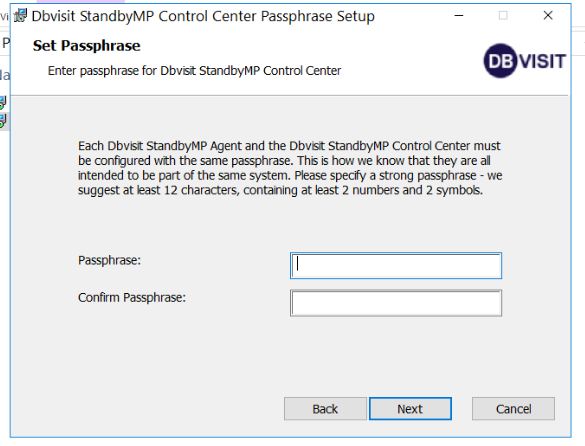
Step 2.4: Agent Passphrase
The Agent and control center must be configured with the same passphrase. This is how the system knows that the systems are part of the same configuration setup. Recommended a strong passphrase.
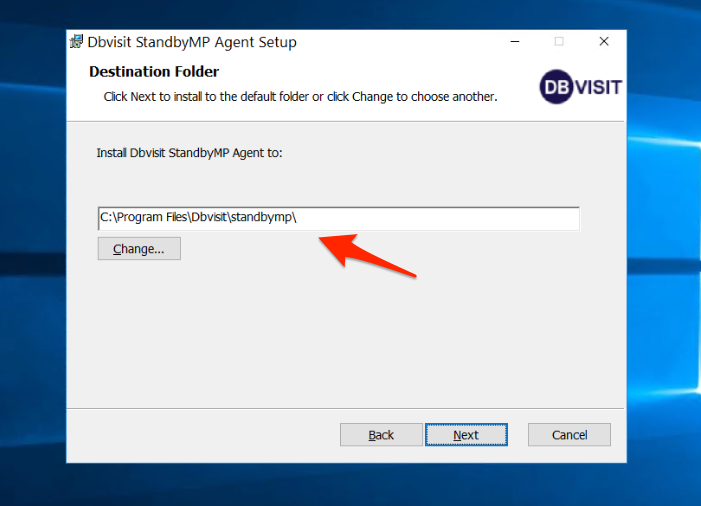
Step 2.5: Installation Directory
The location of the software installation.
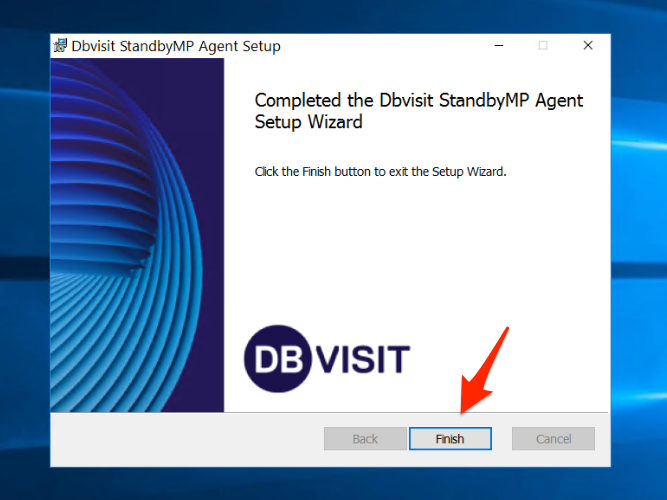
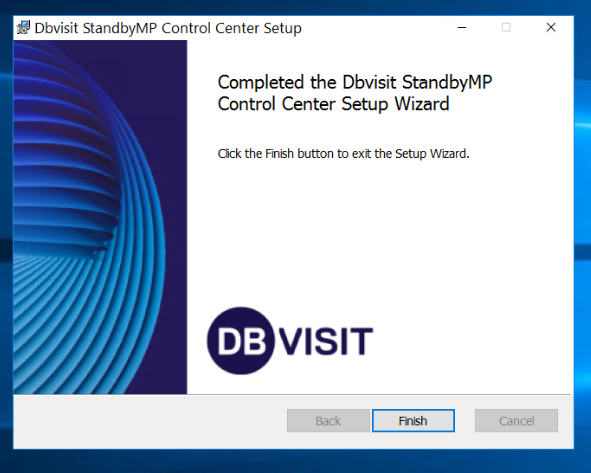
Step 2.6: Finish the Installation

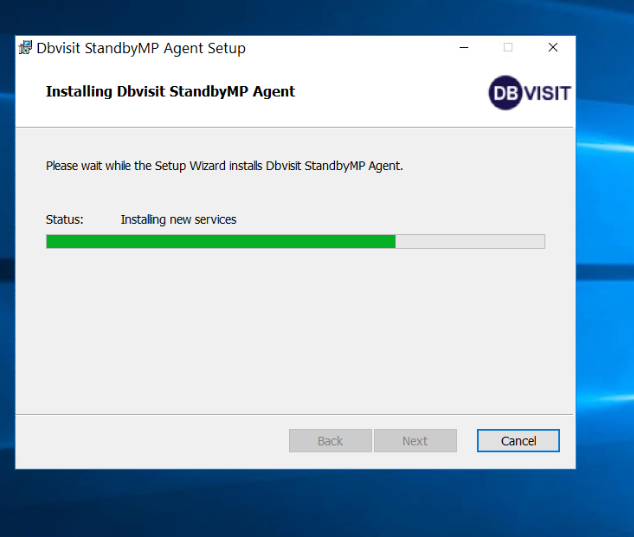
Click Finish to complete the installation
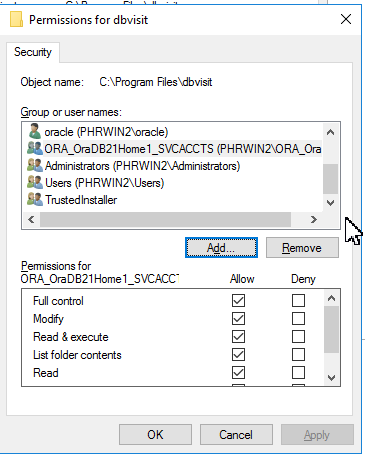
| Note |
|---|
IMPORTANT: The OS user which owns ORACLE_HOME (owner) requires "Full access" to folders below on both primary and standby:
If the ORACLE_HOME owner is:
|
The service agentmanager is running

Step 3: Windows control center Installation
The windows control center installation is straightforward and simple installation.
Step 3.1: Start the installer
Step 3.2: License Agreement
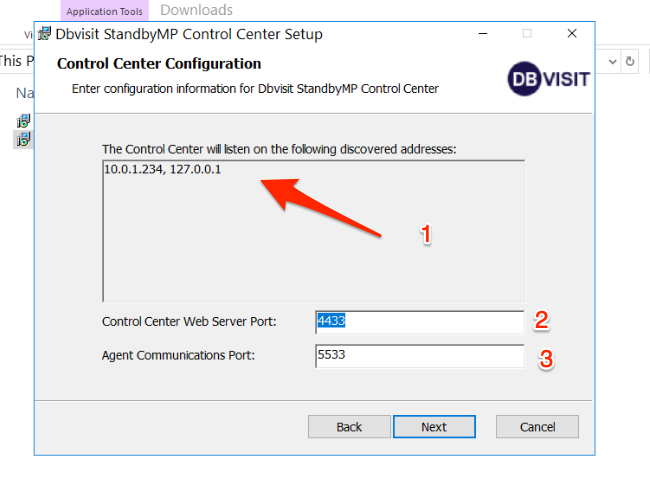
Step 3.3: Configuration details
The control center hosts resolvable IP addresses are displayed ( 1 ). The Webserver port ( 2 ) and the Agent Communication ( 3) . By default the agent communication port is 5533 and the webserver GUI port is 4433.
Step 3.4: Passphrase for control center.
This is the passphrase that must be the same as the agent manager passphrase. This is to ensure that the hosts are recognised as part of same system
Step 3.5:Installation Location
The default installation location is specified in the installer. This location can be changed to custom locations.
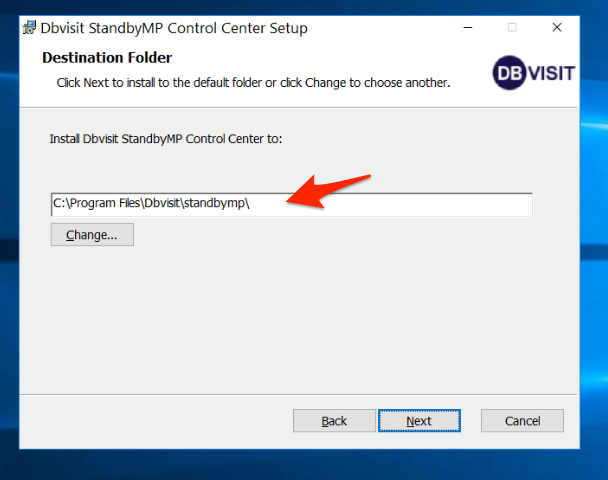
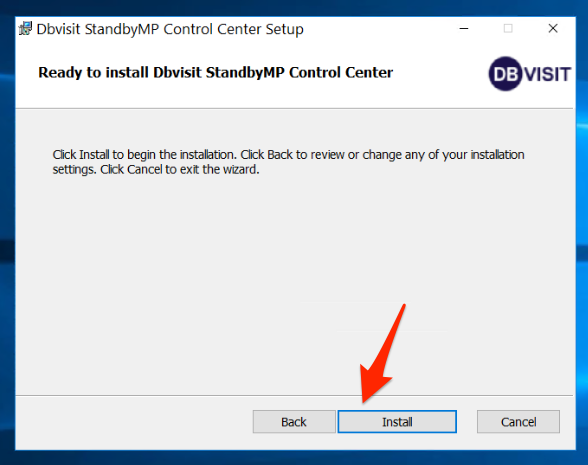
Step 3.6: Finish the installation
Click on Install to start the control center installation process.
Click on Finish to exit out of the installer.

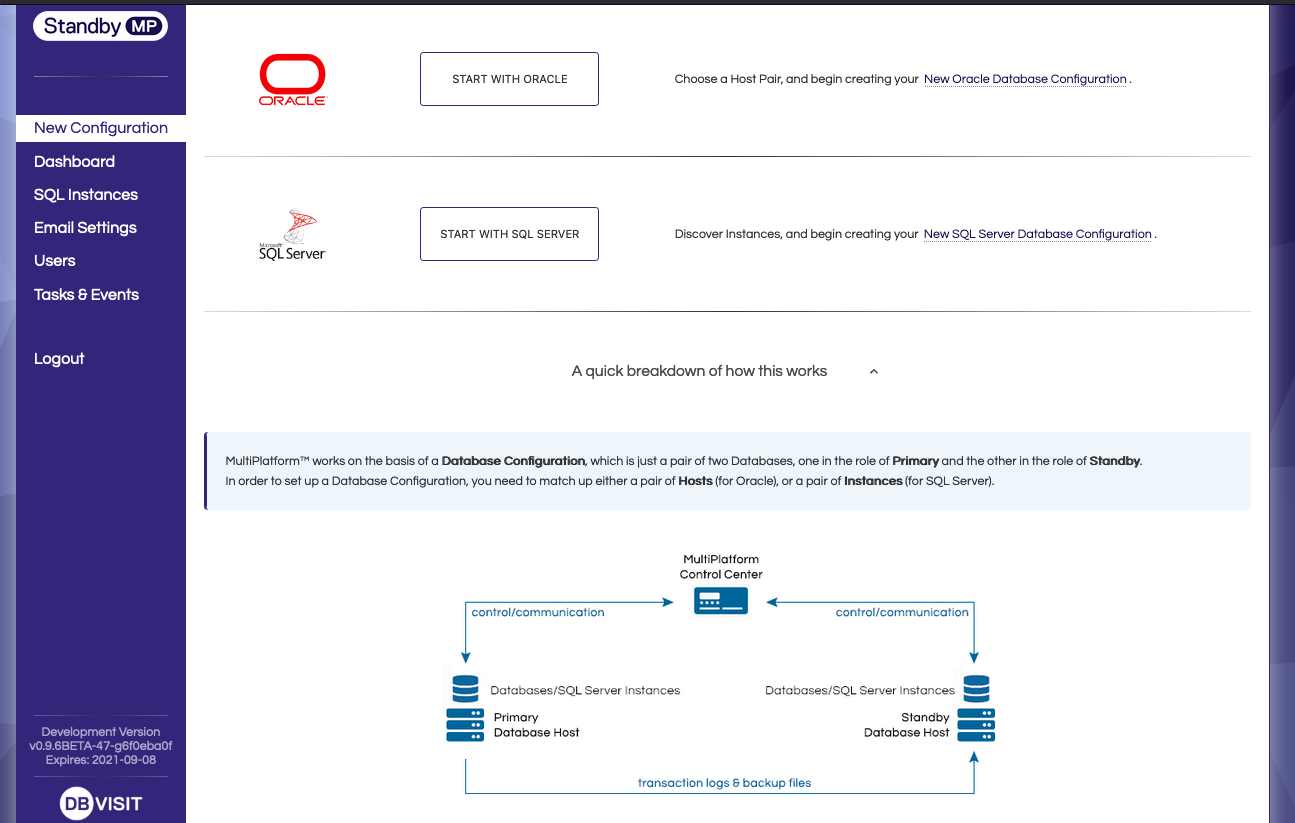
After the Installation
After the installation is complete and the services are running, the control center can be opened in the browser using the following address. The default login password for the control center is admin/admin.
https://<control center address provided during agent installation>:4433

Below is the main screen after logging in using the default username and password.