Performing a Standby Activation (Failover) via GUI
In the event that disaster strikes and the primary database is no longer available for some reason, you might want to look at activating your standby database.
By doing this you are changing the standby database status from being a standby database to an active primary database with a current controlfile. When this process is executed, there is the potential for data loss as the latest transactions (logs) might not have been transferred from the primary to the standby.
The example below show the activation step from the Standby “Run Interactive” menu option:
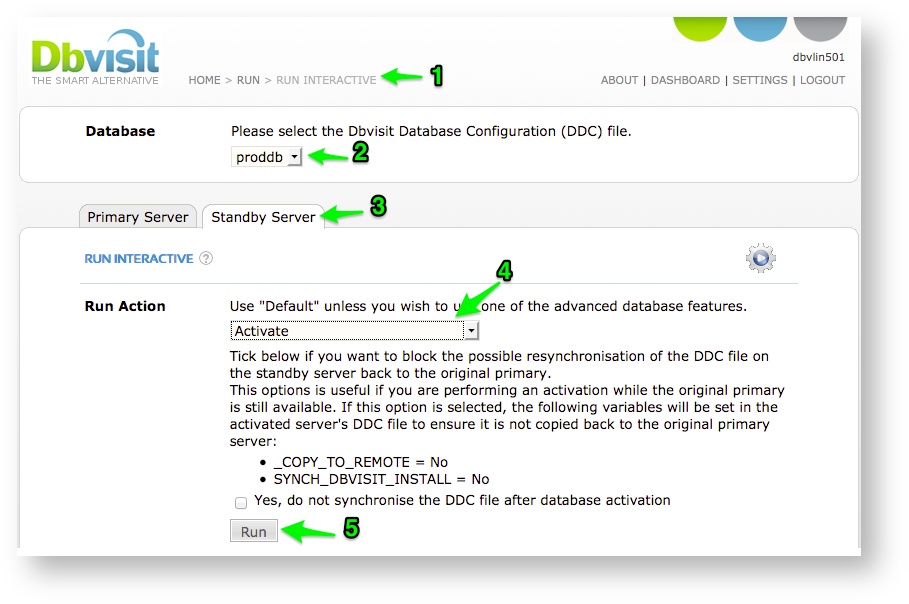
- On the Standby Server GUI Interface, navigate to the "Run Interactive" screen
- Select the Database (DDC) you would like to activate
- Select the "Standby Server" tab
- From the Run Action drop down, select the "Activate" option.
- Click on "Run" to start the activation.
- In certain cases where the original primary database is still available, it is recommended to click the option "Yes, do not synchronise the DDC file after database activation"
- By selecting this option the original primary database DDC file will not be overwritten in case Dbvisit is run on the newly activated standby
- Note: this can only happen if the original primary database is still available. Such as during test activation where the standby or DR plan is tested.
- In certain cases where the original primary database is still available, it is recommended to click the option "Yes, do not synchronise the DDC file after database activation"