The Synchronize Standby Database Option
- Deepika Kumar (Deactivated)
- Vijayganesh Sivaprakasam
2. Synchronize Standby Database - using CLI
The command to start the Sync feature must be executed on the primary database server.
The command used is:
dbvctl -d <DDC> --sync
For full detail usage of the Sync feature, run the command "dbvctl --sync -h"
[oracle@dbv1 standby]$ ./dbvctl -d DEV --sync -h
    Syncronize standby database

    dbvctl -d <ddc> --sync [--mode CLI|BATCH|GUI] [--tmp_dir <tmp_dir>] [--tmp_dir_dest <tmp_dir_dest>] [--sync_lag] [--sync_nologging]

    --mode           CLI default
    --tmp_dir        Existing tmp directory on primary
    --tmp_dir_dest   Existing tmp directory on standby
    --sync_lag       Sync standby that is lagging behind
    --sync_nologging Sync non logged transactions
Below is an example:
[oracle@dbv1 standby]$ ./dbvctl -d DEV --sync
-------------------------------------------------------------------------------
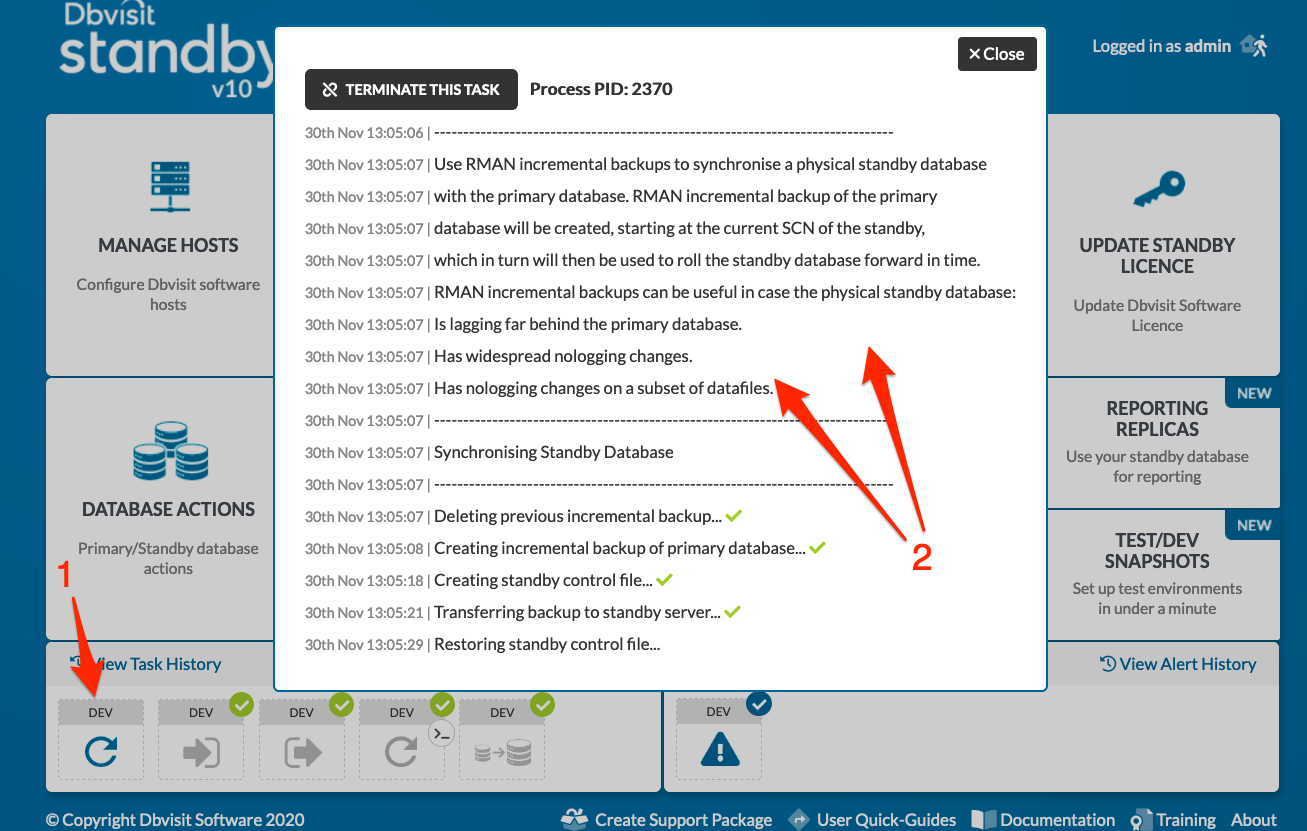
Use RMAN incremental backups to synchronise a physical standby database
with the primary database. RMAN incremental backup of the primary
database will be created, starting at the current SCN of the standby,
which in turn will then be used to roll the standby database forward in time.
RMAN incremental backups can be useful in case the physical standby database:
Is lagging far behind the primary database.
Has widespread nologging changes.
Has nologging changes on a subset of datafiles.
-------------------------------------------------------------------------------
Continue? <Yes/No> [Yes]:
>>> Running pre-checks please wait... done
-------------------------------------------------------------------------------
SUMMARY
-------------------------------------------------------------------------------
SOURCE dbv1
Current SCN: 1128151 Time: 2020-11-30:12:43:08
DESTINATION dbv2
Next SCN required for recovery: 1128121 Time: 2020-11-30:12:42:08
Time difference between SOURCE and DESTINATION: +00:01:00
No nonlogged transactions detected in datafiles on DESTINATION.
-------------------------------------------------------------------------------
=>Synchronize standby database using incremental backups from SCN 1128121? [Y]:
Your input: Y
Is this correct? <Yes/No> [Yes]:
-------------------------------------------------------------------------------
TRANSPORTABLE MEDIA can be used to transfer the database backup to the standby
server.
Transportable media is an external device such as a USB drive that is first
plugged into the primary server and then manually transferred to the standby
site and plugged into the standby server to continue the process.
It can be used for large databases or slow networks.
Specifying No means the network will be used to transfer the database backup.
=>Do you want to use TRANSPORTABLE MEDIA? [N]:
Your input: N
Is this correct? <Yes/No> [Yes]:
-------------------------------------------------------------------------------
A temporary location must be specified on dbv1 where the database will be
backed up to first.
This location must be big enough to hold RMAN incremental backup of the primary
database).
=>Specify the location on dbv1: [/usr/dbvisit/standby/tmp]:
Your input: /usr/dbvisit/standby/tmp
Is this correct? <Yes/No> [Yes]:
-------------------------------------------------------------------------------
A temporary location must be specified on dbv2 where the backup will be copied
to before being applied.
This location must be big enough to hold RMAN incremental backup of the primary
database).
=>Specify the location on dbv2: [/usr/dbvisit/standby/tmp]:
Your input: /usr/dbvisit/standby/tmp
Is this correct? <Yes/No> [Yes]:
Synchronising Standby Database
-------------------------------------------------------------------------------
>>> Deleting previous incremental backup... done
>>> Creating incremental backup of primary database... done
>>> Creating standby control file... done
>>> Transferring backup to standby server... done
>>> Restoring standby control file... done
>>> Cataloguing incremental backup in RMAN catalogue... done
>>> Applying incremental backup to the standby database... done
>>> Performing checkpoint and archiving logs... done
>>> Synchronising standby... done
>>> Obtaining sync summary... done
-------------------------------------------------------------------------------
SUMMARY
-------------------------------------------------------------------------------
SOURCE dbv1
Current SCN: 1128547 Time: 2020-11-30:12:44:39
DESTINATION dbv2
Next SCN required for recovery: 1128534 Time: 2020-11-30:12:44:29
Time difference between SOURCE and DESTINATION: +00:00:10
No nonlogged transactions detected in datafiles on DESTINATION.
-------------------------------------------------------------------------------
PID:1437
TRACE:1437_dbvctl_sync_DEV_202011301243.trc
Once the process is complete, the next step is to run Dbvisit Standby manually on the primary then standby to first ship logs then apply them.
3. Synchronize Standby Database - using Central Console
In the section below we will show you how you can run the Sync feature for both option to recover from unrecoverable archive log gap, as well as fixing logical corruption due to nologging operations.
3.1. Recover from Unrecoverable Archivelog Gap
It may happen that an archivelog was removed by backups before it was shipped to the standby, or if the standby database is far behind the primary for some reason - it is then possible to make use of the Synchronize Standby Database feature provided by Dbvisit Standby. This method can be used instead of the traditional rebuild of the standby database using the CSD (Create Standby Database) feature.
During this process, Dbvisit Standby will perform an incremental backup on the primary database backing up the required changed blocks from the SCN number where the standby is currently and then ship this backup to the standby and then use RMAN to recover the standby using this backup. The result is that the standby database is "rolled forward" past this missing archived log. The process is easy and described in the steps below.
Please note that the backup process (step 1) may take the same amount of time as a full backup as the full primary database is scanned for the required blocks to backup. The backup file should be smaller than a full backup. The recovery process should be much faster.
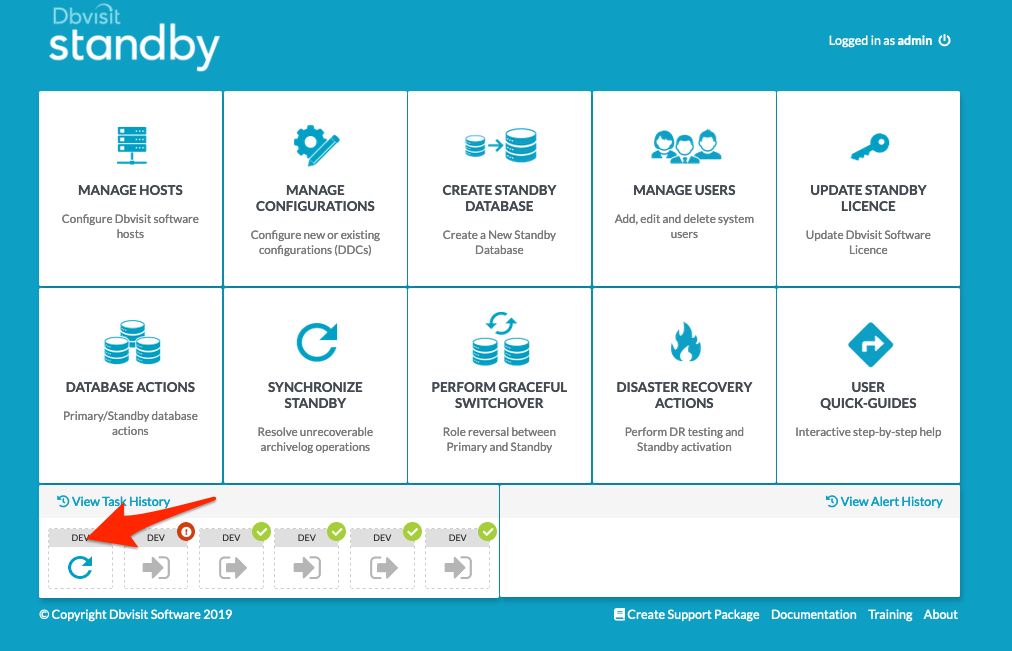
Step 1: Select Synchronize Standby from the main screen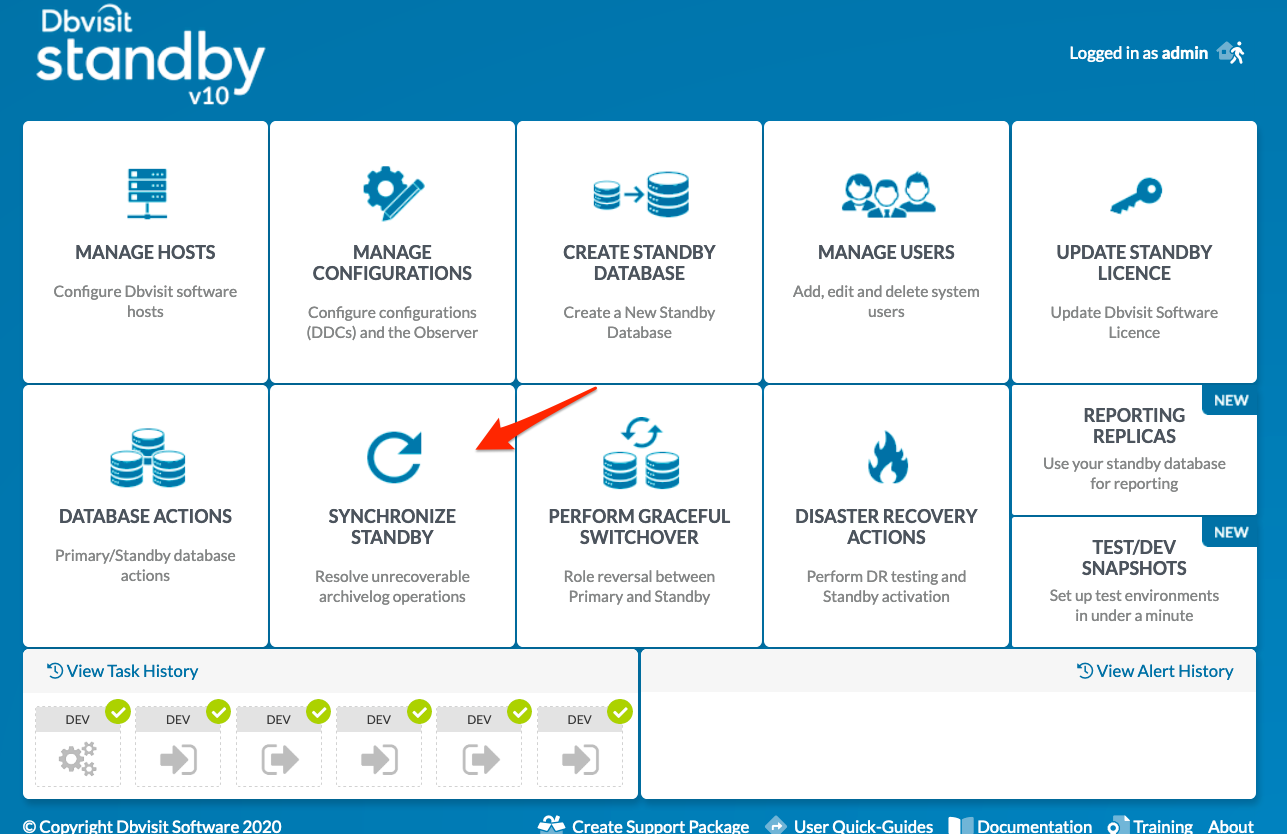
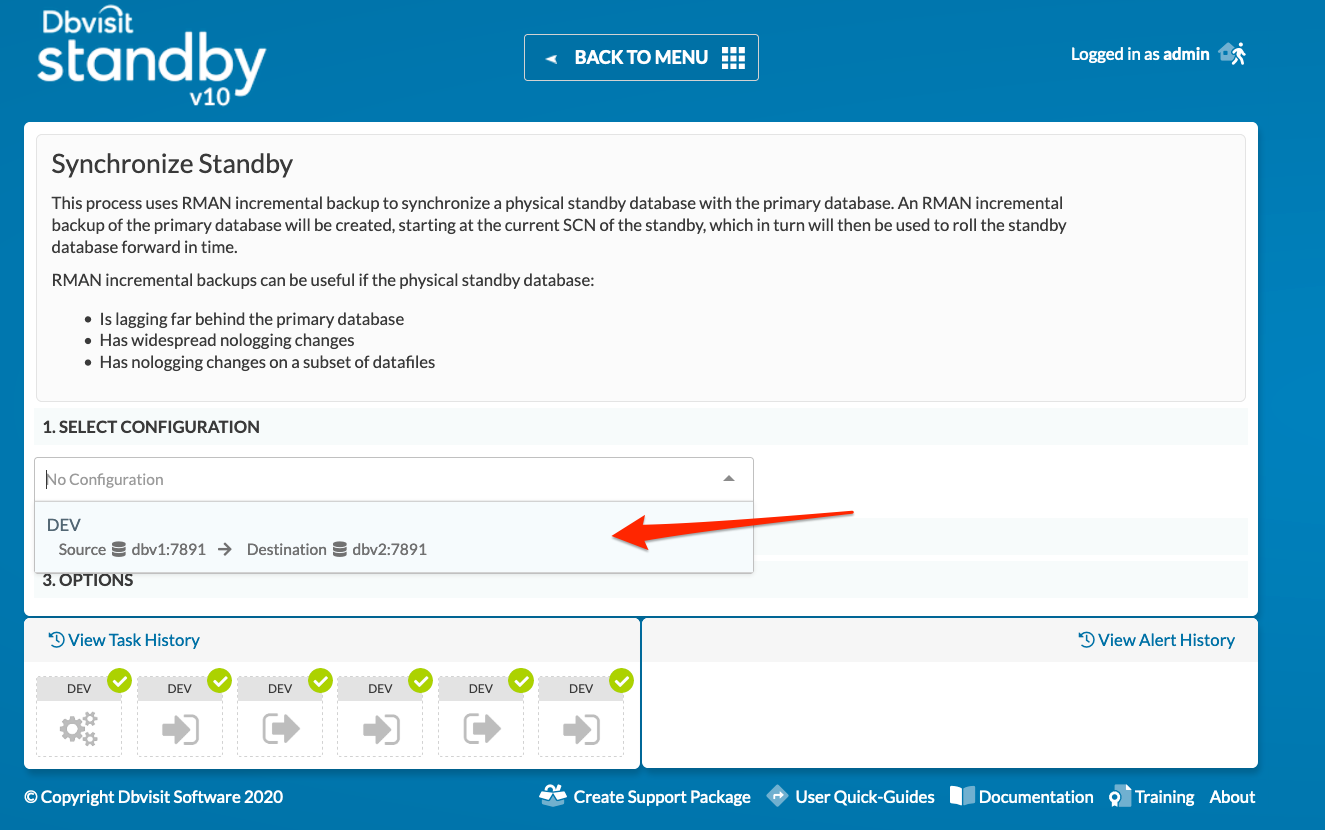
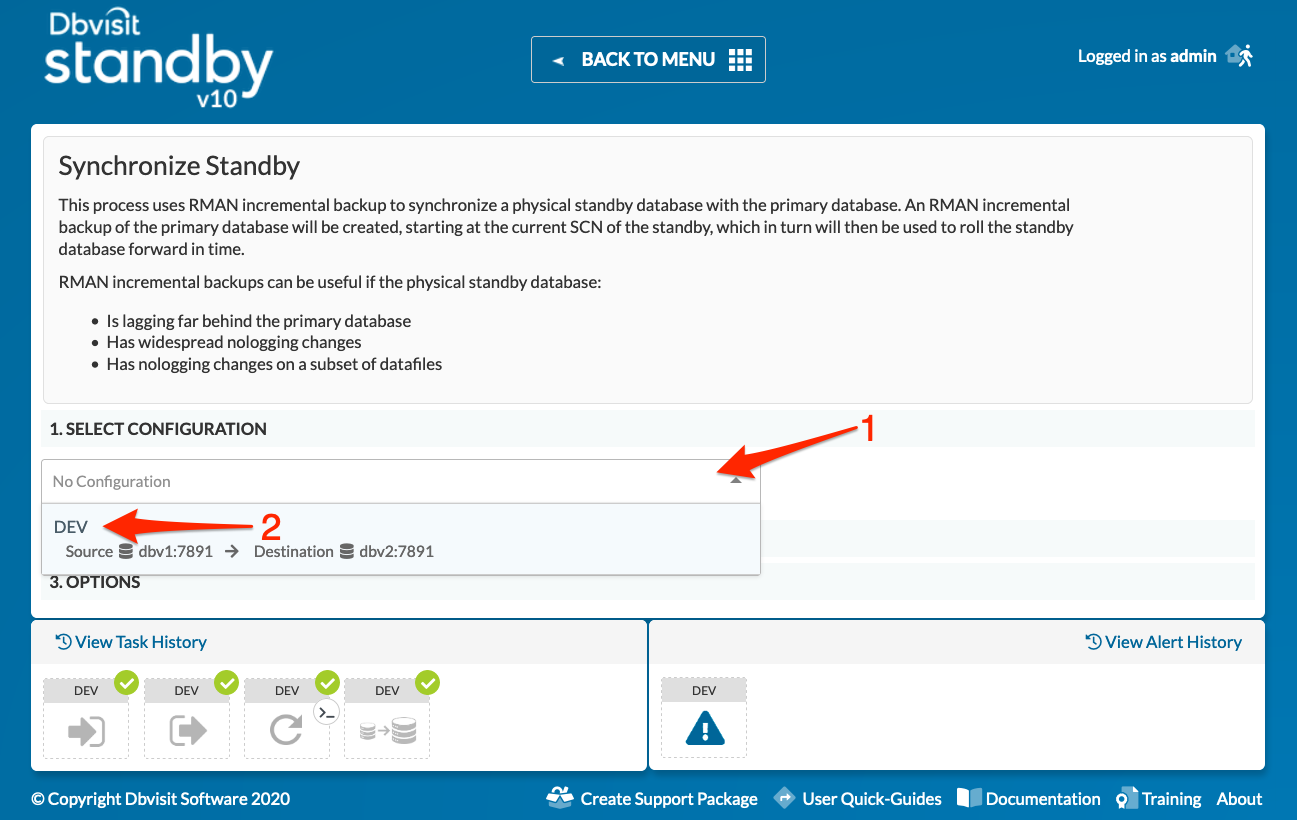
Step 2: From the drop-down option - as pointed by the arrow, select the specified DDC file. In this example, the DDC named DEV2 will be selected.
Step 3: In the next step you will be presented with a screen that will require some input. 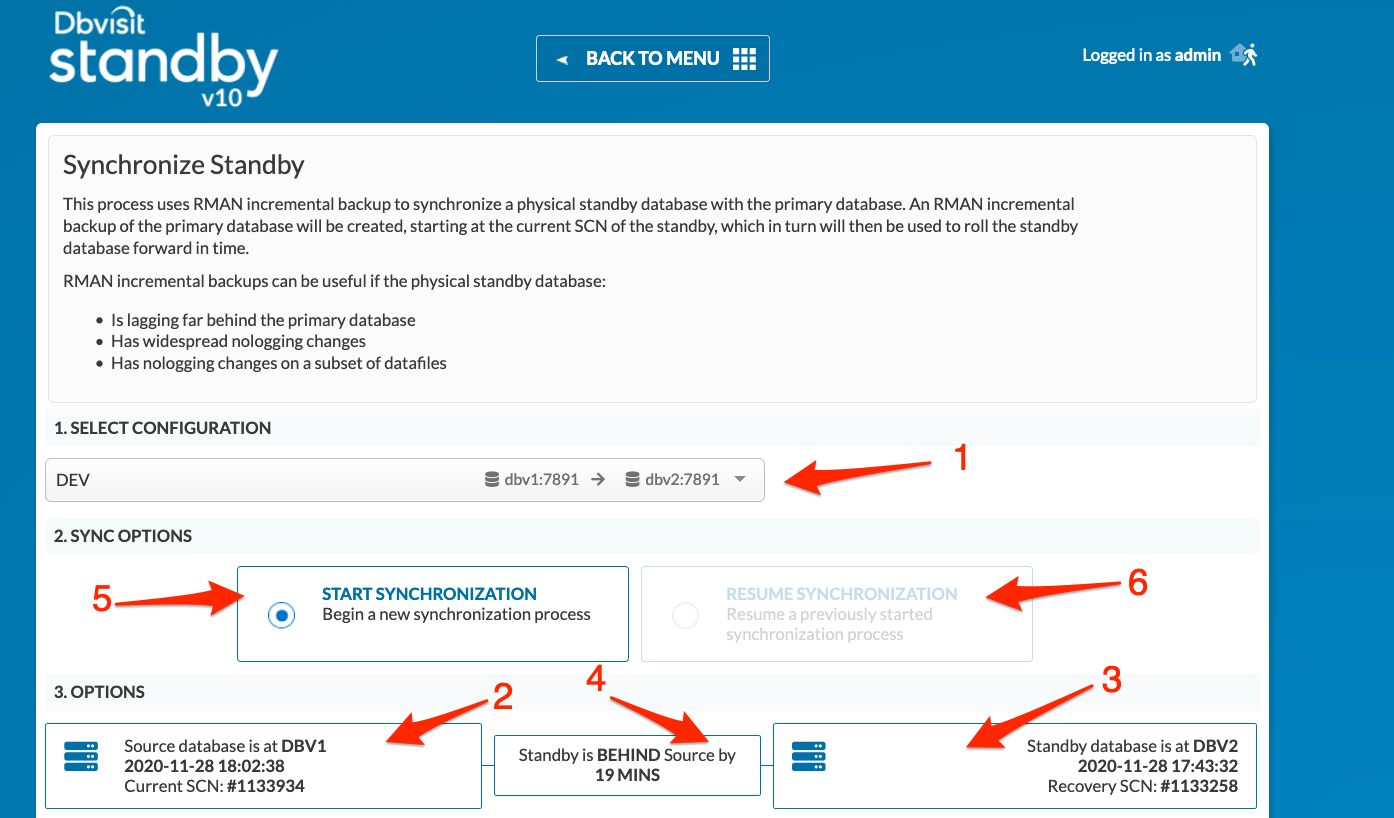
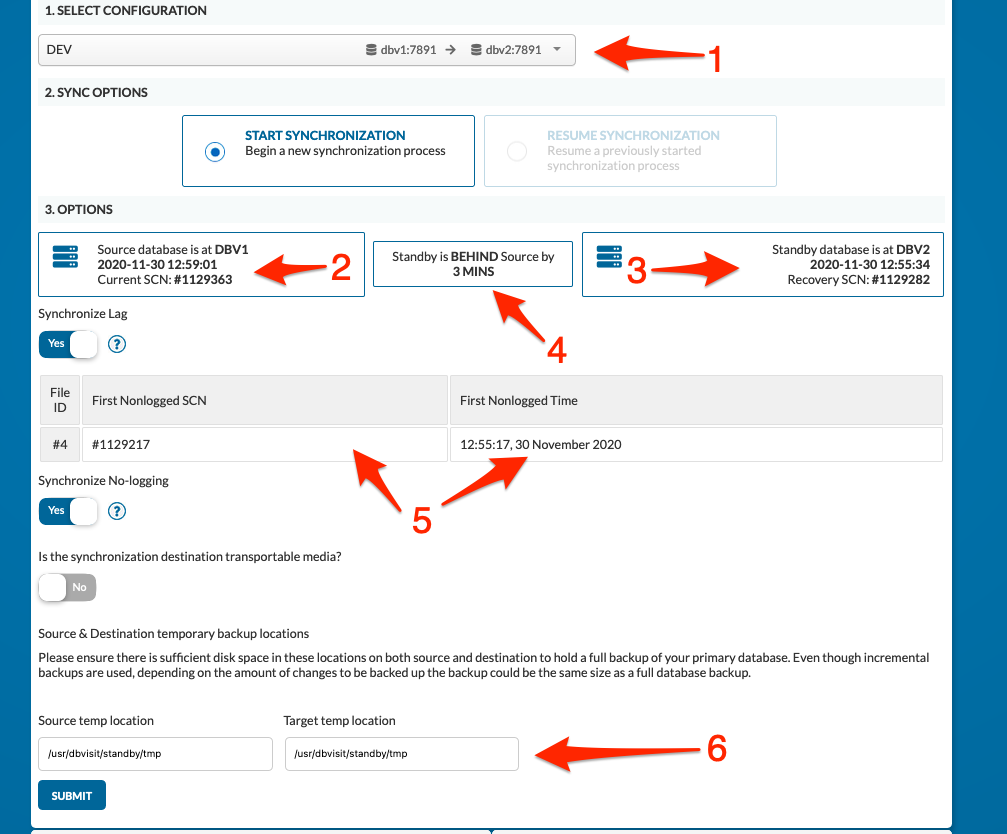
The options above marked with arrows and numbers can be summarised as follow:
- This is the DDC selected
- This option is to start synchronization
- Resume synchronizing if transportable media option is used or an error occurred during the SSD process.
- The primary details are being displayed which include the current SCN number and Date/Time.
- The standby details are displayed, this includes the current SCN the standby database is at and its Date/Time
- Difference between primary and standby database is expressed as time in the format HH:MI: SS
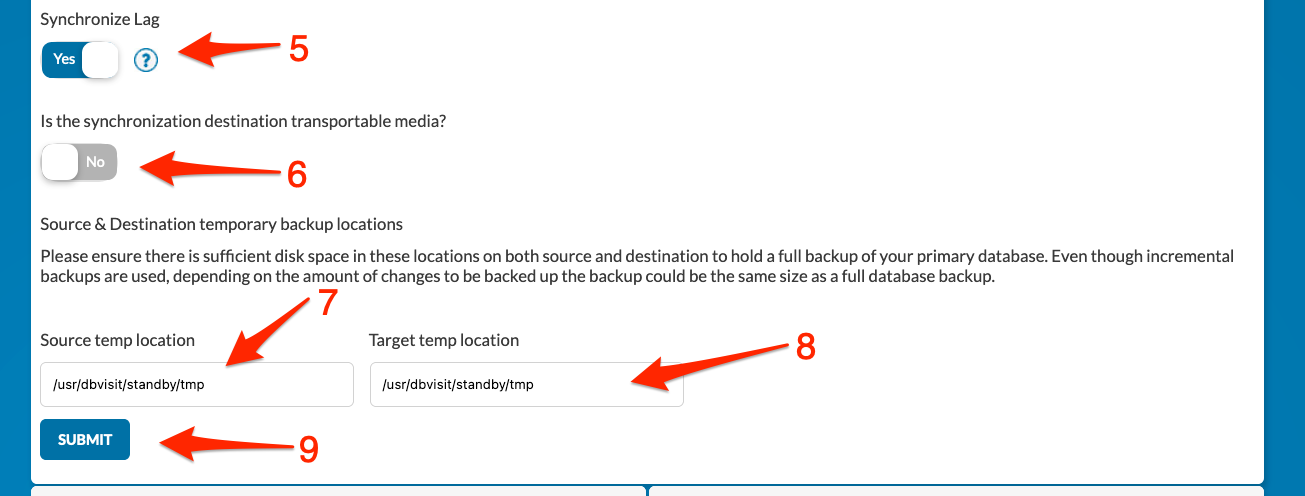
- By default, the Synchronize Lag option is selected.
- We can use transportable media option for the destination so that the external media can be used to take backup in source and we could resume the sync once the media has been attached in the standby
- Specify the temporary backup location where the incremental backup will be created on the primary database server. It is important that this location must be able to hold at least a full compressed backup of the primary database (RMAN compressed backupset). If you do not have sufficient disk space, the Synchronize Standby process will fail. Note that the backup in most cases will be much smaller than a normal full backup as only the blocks needed to recover the standby database will be backed up. Make sure this location has correct permission and that the Oracle software owner has full read-write permission on this folder.
- This is the temporary location on the standby database server where the temporary incremental backup will be copied. It is recommended that this location have sufficient space to hold a full compressed backup of the primary database to ensure you do not run into any space-related issues during this process. This location must exist on the standby database server and the Oracle software owner must have full read/write permission on this folder.
- Once you have provided the source and destination temporary backup locations, you can click on submit to start the process.
Step 4: An Active task is created for the Synchronize Standby Database task.
Once the task (Synchronize Standby Database) has been submitted, you will notice a new task appearing on the bottom active task list. If you hover over the task with your mouse you will get updates on the progress. You can also click on the task to get a more detailed update view.
Step 5: Task completion
Once the task is complete, the Active task will have a green checkmark next to it. This indicates successful completion. If you click on the task you will get a full detail listing.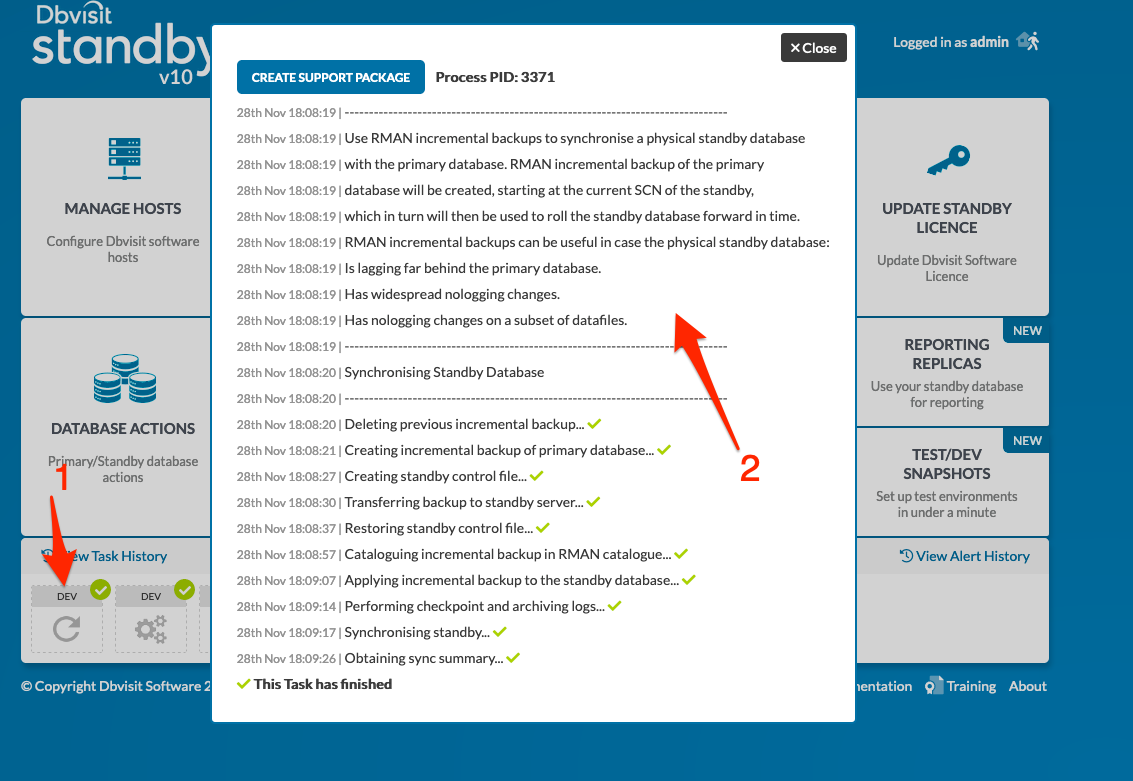
Once the above process is complete, it is recommended to manually ship an archive log to the standby and then apply it to make sure the primary and standby database is in sync.
You can then follow this by running an archive log gap report to review the status.
3.2. Fix Logical Corruption (No-logging Operations)
Step 1: Select the DDC file you want to run the Sync option for
Step 2: Once selected, if there are any datafiles affected by nologging operations they will be displayed - see [5] below.
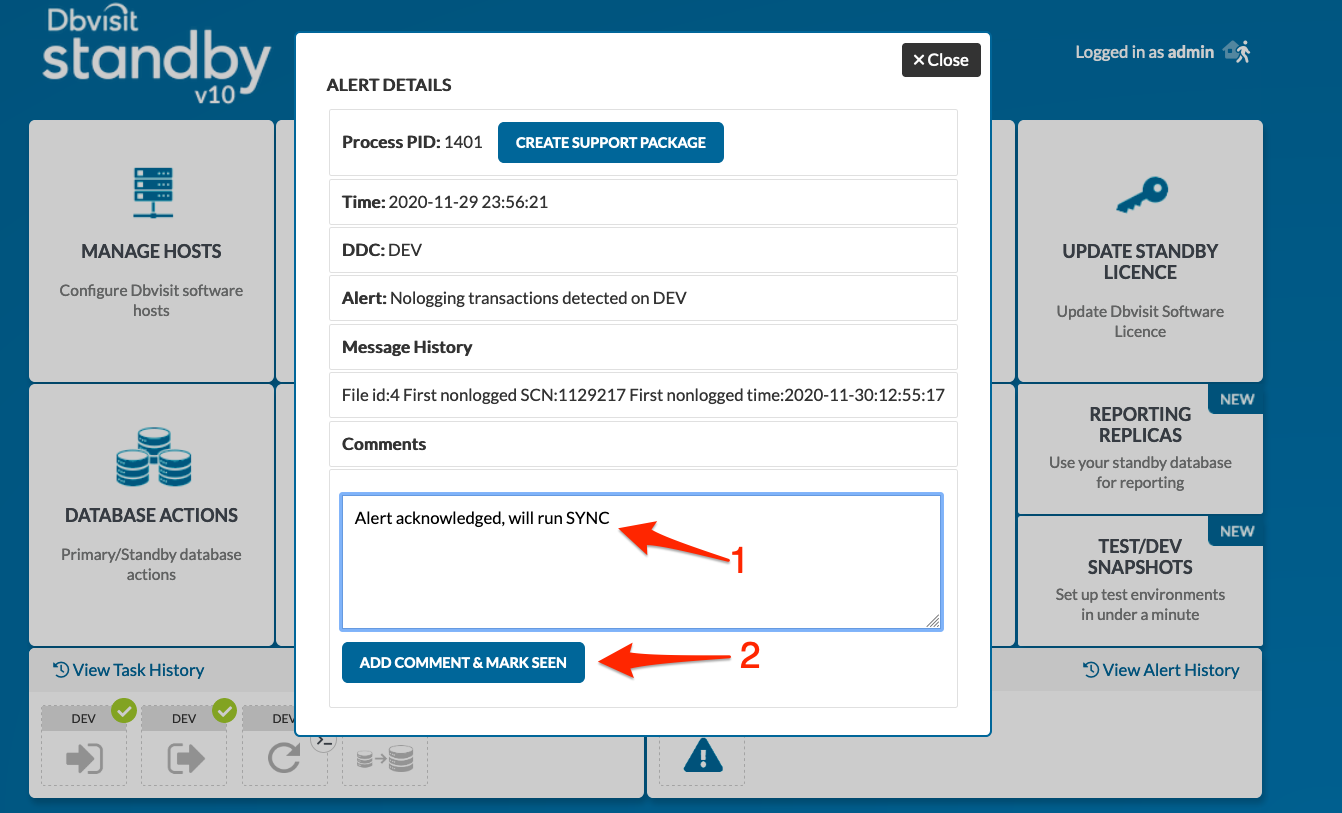
Below screenshot shows the alert in the Alert History tab.

Comments can be added [ 1] and marked as seen [ 2]so that a tick mark appears above the alert.
Step 3: Monitor the Active Task
Please note that the backup process (step 1) may take the same amount of time as a full backup as the full primary database is scanned for the required blocks to backup. The backup file should be smaller than a full backup. The recovery process should be much faster.