Creating the DDC from the GUI
To create the Dbvisit Database Configuration file from the GUI interface you need to login to the web-based interface as the admin (default) user.
Once logged in select the “SETUP” button from the main screen.
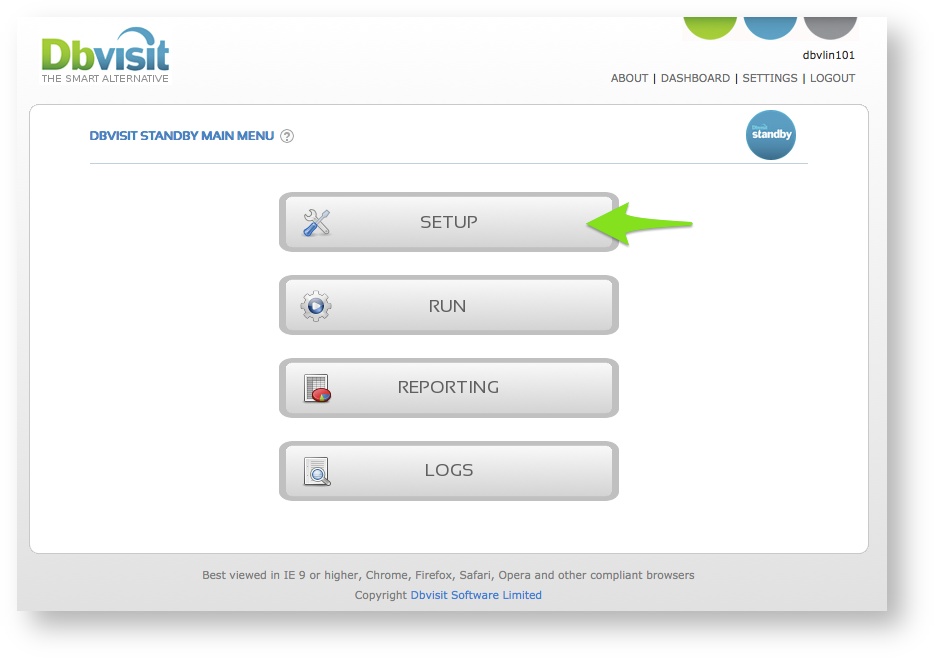
You will then enter the Dbvisit Setup menu as seen below:
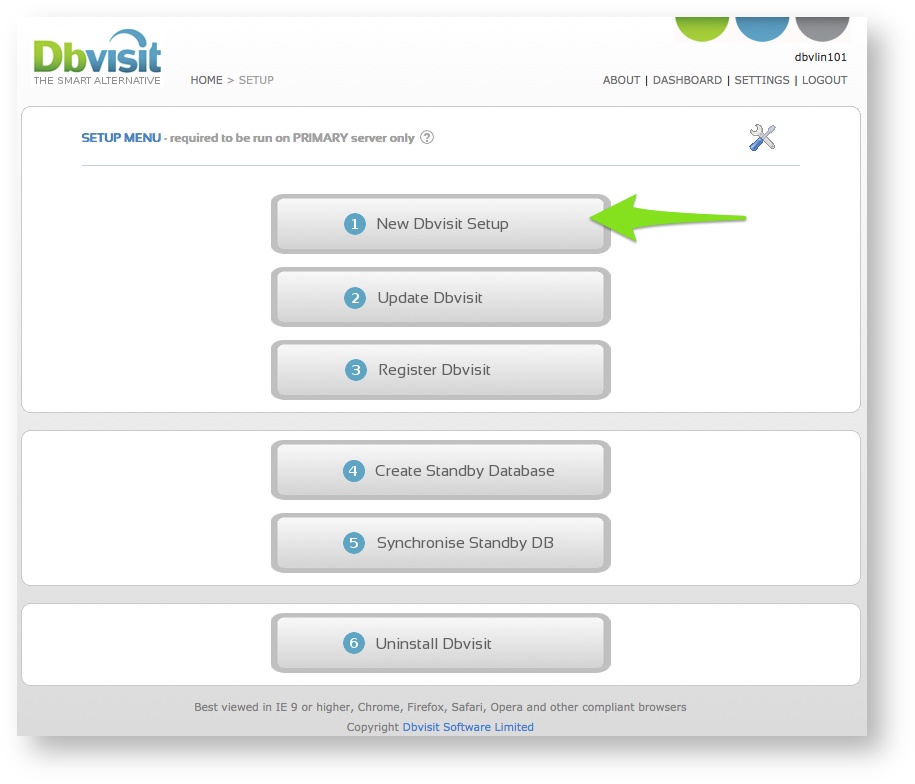
Once you have entered the "New Dbvisit Setup" section, you will be displayed with the screen blow. From this screen select the database you would like to configure Dbvisit Standby for (Create a DDC file for).
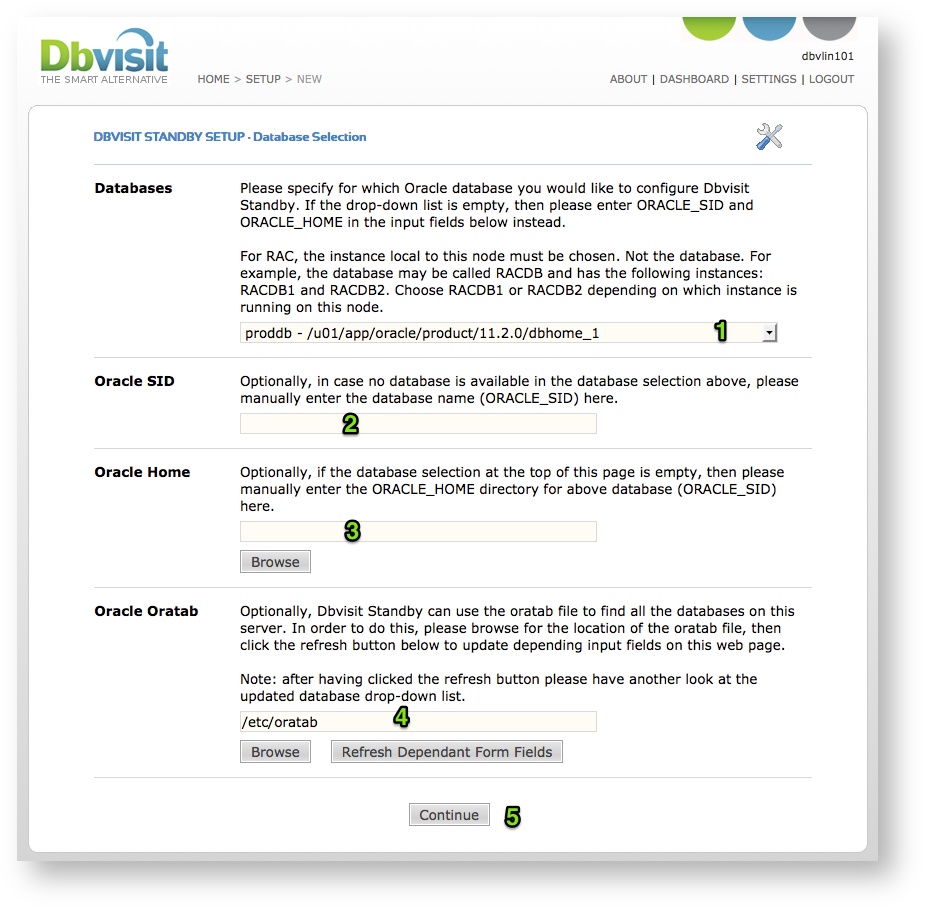
Dbvisit Standby will attempt to identify the databases running on the server. On Unix it will look for the Oracle "oratab" file, which should indicate all databases configured on the server and on Windows based systems, the information will be obtained from the Windows registry.
It is important that for Oracle RAC environments you have an entry in the "oratab" file for the instance running on this server. Example, if the primary RAC database is called PROD and instance PROD1 is running on this node that you have an entry for PROD1 in the "oratab" file. On the second node, you will then have PROD2 in the oratab file. Make sure in the Dbvisit Configuration, that you select the name for the instance running on that node, example on node 1 select PROD1 and node 2 select PROD2.
- You do not have to specify the Oracle SID. This is optional and will be obtained from the "oratab" file or "registry" if Windows is used. If your database is not listed in step 1 (drop down list), but is running, you can then manually add the Oracle SID.
- The Oracle Home will be obtained automatically and does not require andy value. But if the database was not listed in step 1 (drop down list), then you should specify the Oracle Home used for this database.
- This field will show the location of the /etc/oratab and in most cases does not require any changes.
Once you have selected the database in the step 1 above, a question will be asked confirming this is the primary server, confirm with Yes and then click continue.
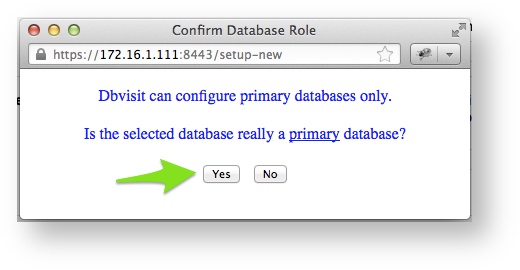
Click on Yes to confirm this is the primary.
You have to run the New Setup on the primary server only. (If you are using Oracle RAC, you need to run this configuration on ALL the RAC nodes)
You will now be presented with the Main screen for a new Setup from where you will have to follow 7 steps (TABS) to complete the new configuration (creation of a DDC file)
STEP 1: Primary Server
This screen will take you through 7 tabs to create the Dbvisit Standby Database Configuration file.
Similar questions as mentioned for the CLI, will be asked as you move through these “tabs”.
Once you have completed all the information required in these 7 tabs, the DDC file as well as Dbvisit Database Repository (DDR) will be created.
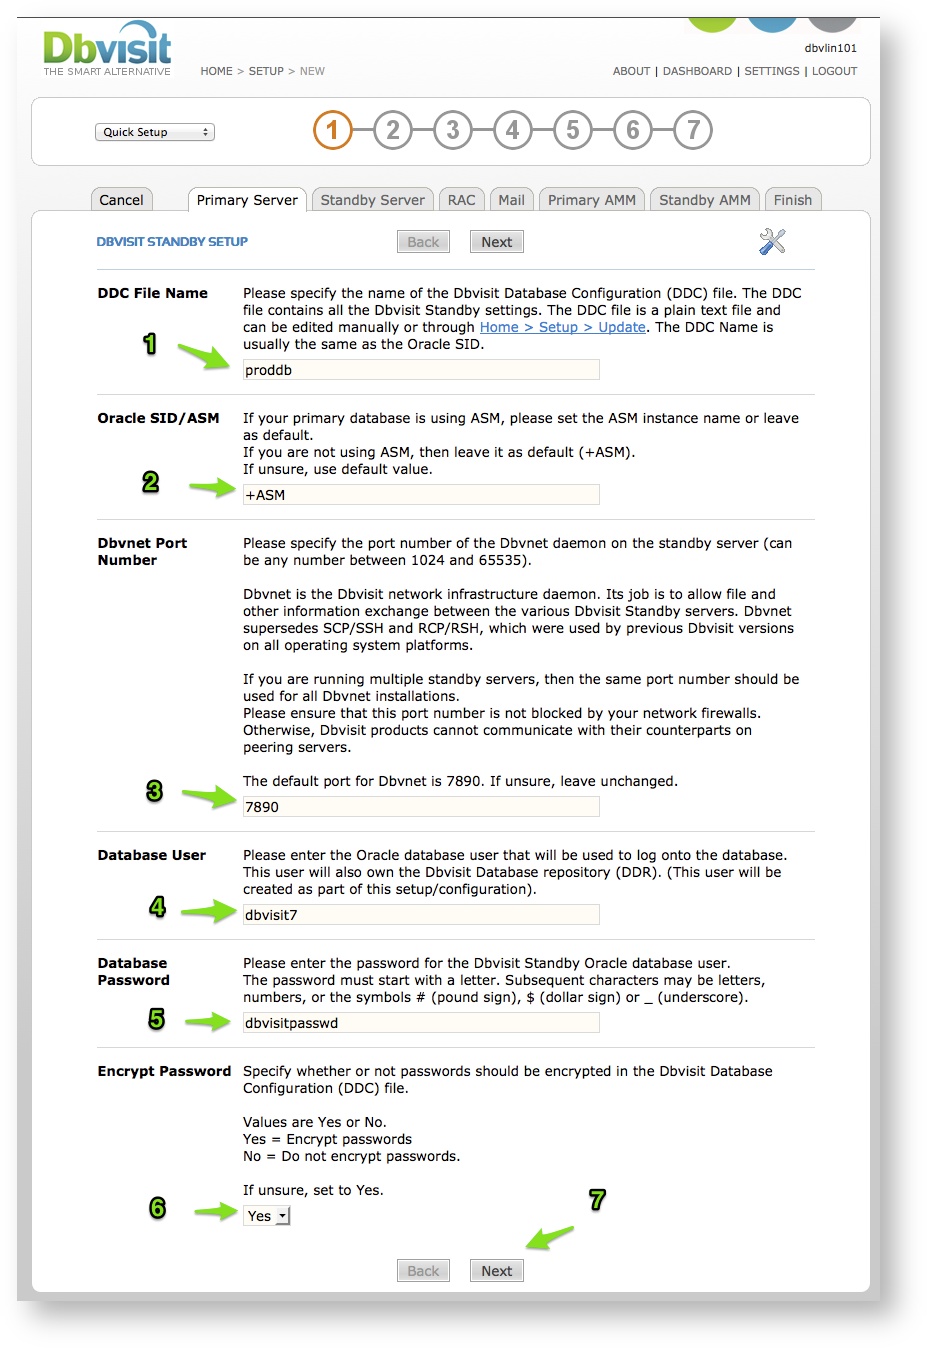
- Specify the Dbvisit Standby Configuration (DDC) name. We recommend using the Database Name, and if using RAC use the INSTANCE Name from the server where you are running this configuration. Example, if you are running the configuration on Node 1 in a RAC configuration for RAC database PROD and on this node the database Instance name is PROD1, then we recommend you use PROD1 as the DDC name. In the above example the DDC name is called the same as the database "proddb" (single instance on this server).
- Specify the ASM Instance name on this server. If ASM is not used, ignore this field and leave the default value of +ASM. If you are using ASM, specify the ASM instance name running on this server. Example if this is a single instance environment (Non RAC), then the default ASM instance name will be +ASM. But if you are using RAC, the ASM instance name will be for example +ASM1 on node 1 and +ASM2 on node to.
- Specify the Dbvnet Port. The default port number 7890 is recommended. You need to make sure this port is open and not blocked by firewalls on the primary and standby servers.
- Dbvisit Standby is making use of a small database repository. The default schema (database username) is "dbvisit7"
- Specify the password for the repository owner (dbvisit7)
- Specify if the password should be encrypted in the DDC file or not. Default recommended value is Yes.
- Click on Next to continue.
STEP 2: Standby Server
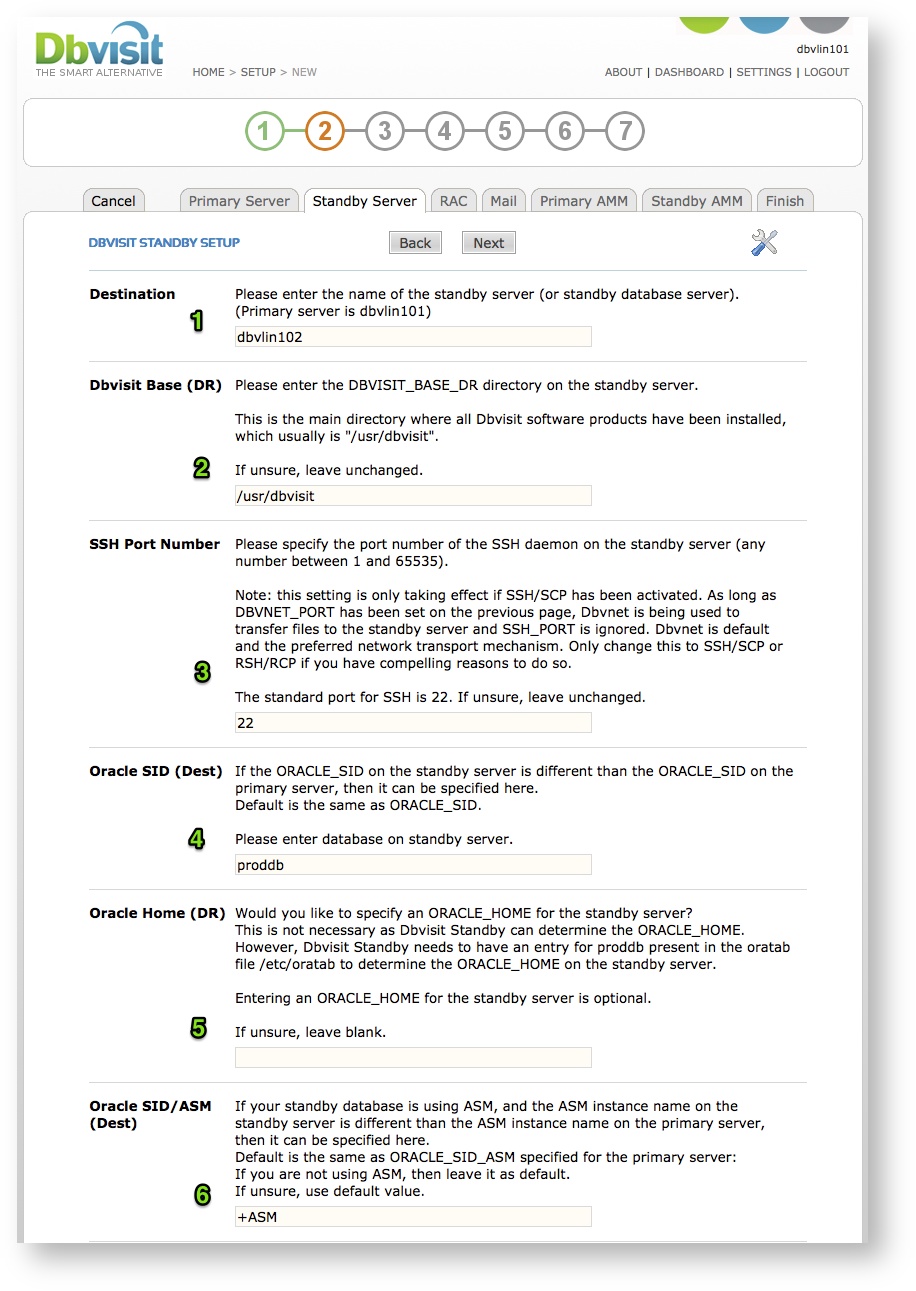
Please note that the Dbvisit Standby ARCHDEST location must exist on both primary and standby server. It must be located on normal filesystem, not ASM. This location is not the same as the Database archive destinations, but is specific to Dbvisit Standby.
- Specify the Standby Database Server Name
- Specify the DBVISIT_BASE location on the Standby Server (It is recommended that this location be the same on the Primary and Standby Server)
- Specify SSH Port (Not Required) The SSH Port is ignored on Windows Based systems. On Linux SSH can still be used, only if the DBVNET_PORT is not specified. The recommended option is to ignore this value (leave it at 22) and make use of Dbvnet.
- Specify the Oracle SID for the Standby Database. It is recommended to make use of the same name as what the primary database is called. Example if your primary database is called PROD, then you can call the Standby database PROD as well. In the above example the primary database is called "proddb" and the standby Oracle SID is specified the same - proddb.
- The Oracle Home value is optional. It is recommended that you add the standby database to the "oratab" file if configured on Unix.
- Specify the ASM Instance name on the Standby server. Ignore this value if you are not using ASM.
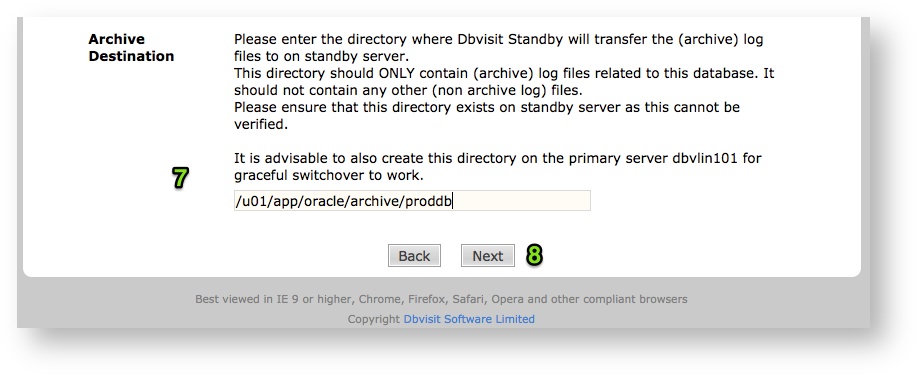
- IMPORTANT. This parameter must be set and this directory must exist on both the primary node(s) and the standby node. This location is used by Dbvisit Standby to store archive logs on the standby server from where they are applied to the Standby database. Note that this location is not the same as the Oracle Database archive destination (FRA/ Recovery Area). This location is also referred to as the Dbvisit Standby ARCHDEST.
STEP 3: RAC
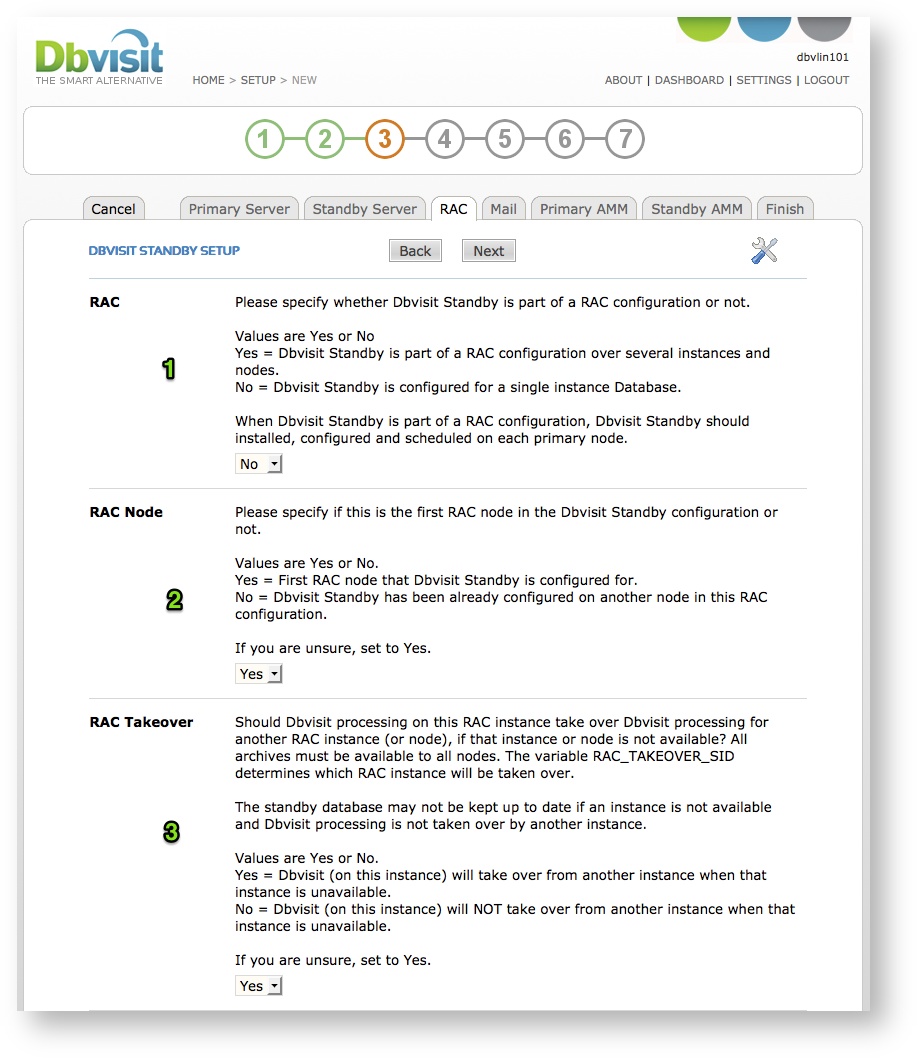
- Specify if this is a RAC configuration (in the above example I am using a Single Instance - Non RAC configuration. If this was Oracle RAC, then specify "yes"
- Specify if this is the 1st RAC node in the configuration. This is required as Dbvisit Standby will create a repository and will only do this from the 1st RAC node.
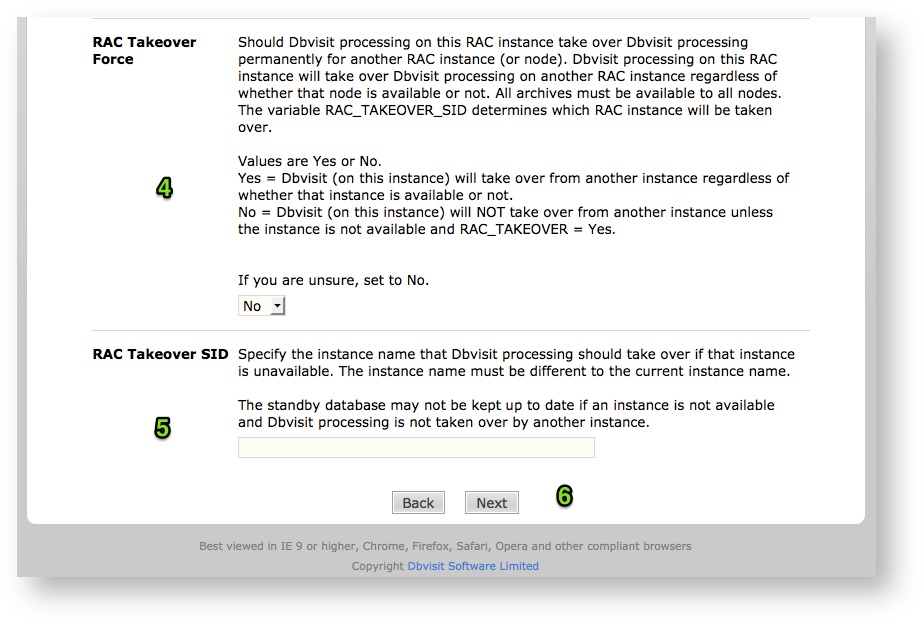
- To enable RAC Takeover (recommended), specify Yes. This RAC node can take over the Dbvisit Processing of another node if that other node is down (unavailable)
- Specify if RAC Takeover should be forced, meaning this node will process the other RAC Node's archive logs (always), even if it is available.
- Specify the other RAC instance for which you want to take over processing (if that node is down, or if RAC Takeover Force is specified)
- Click on next to continue to the next Step (TAB).
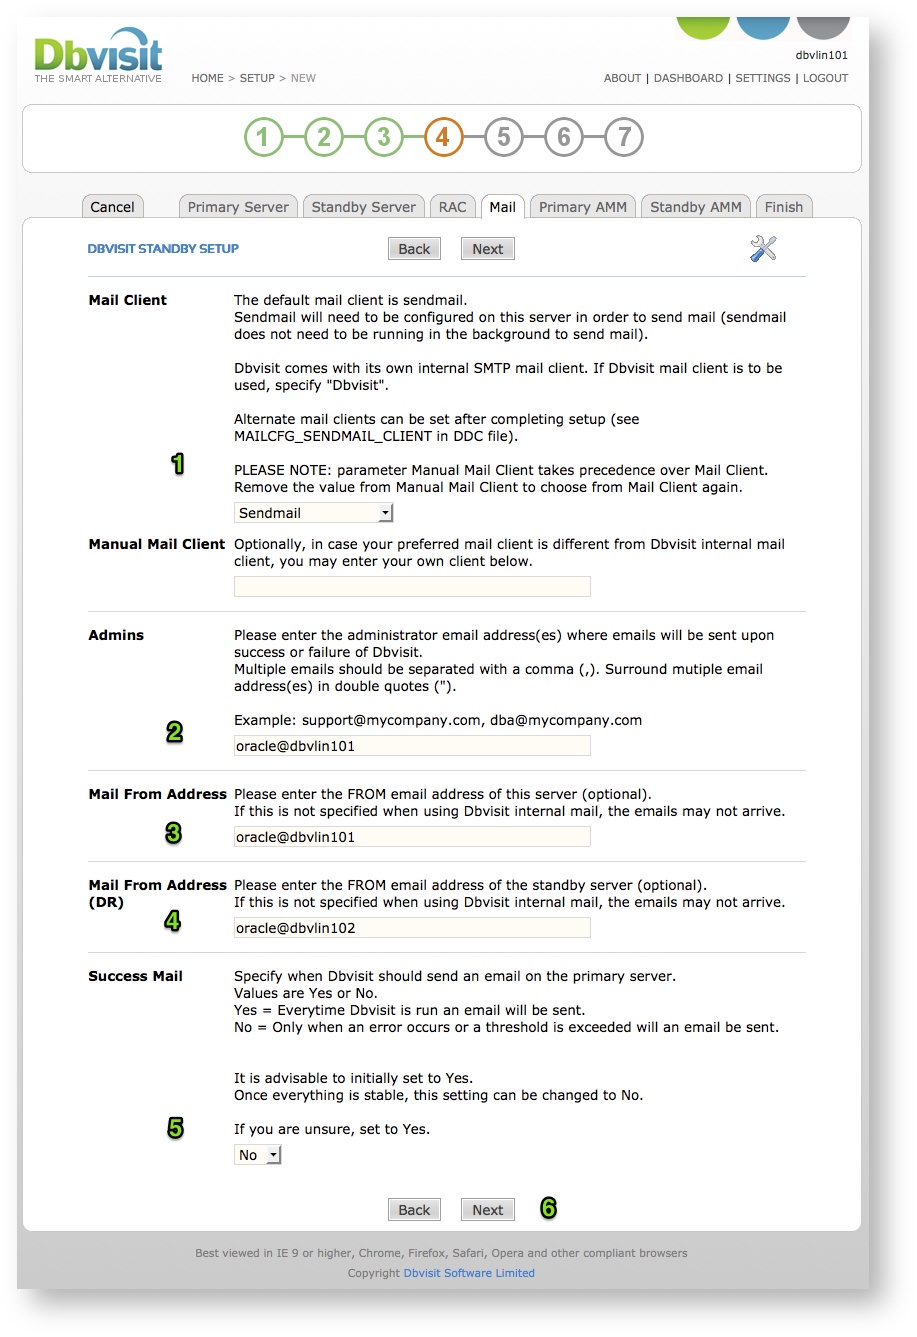
STEP 4: MAIL
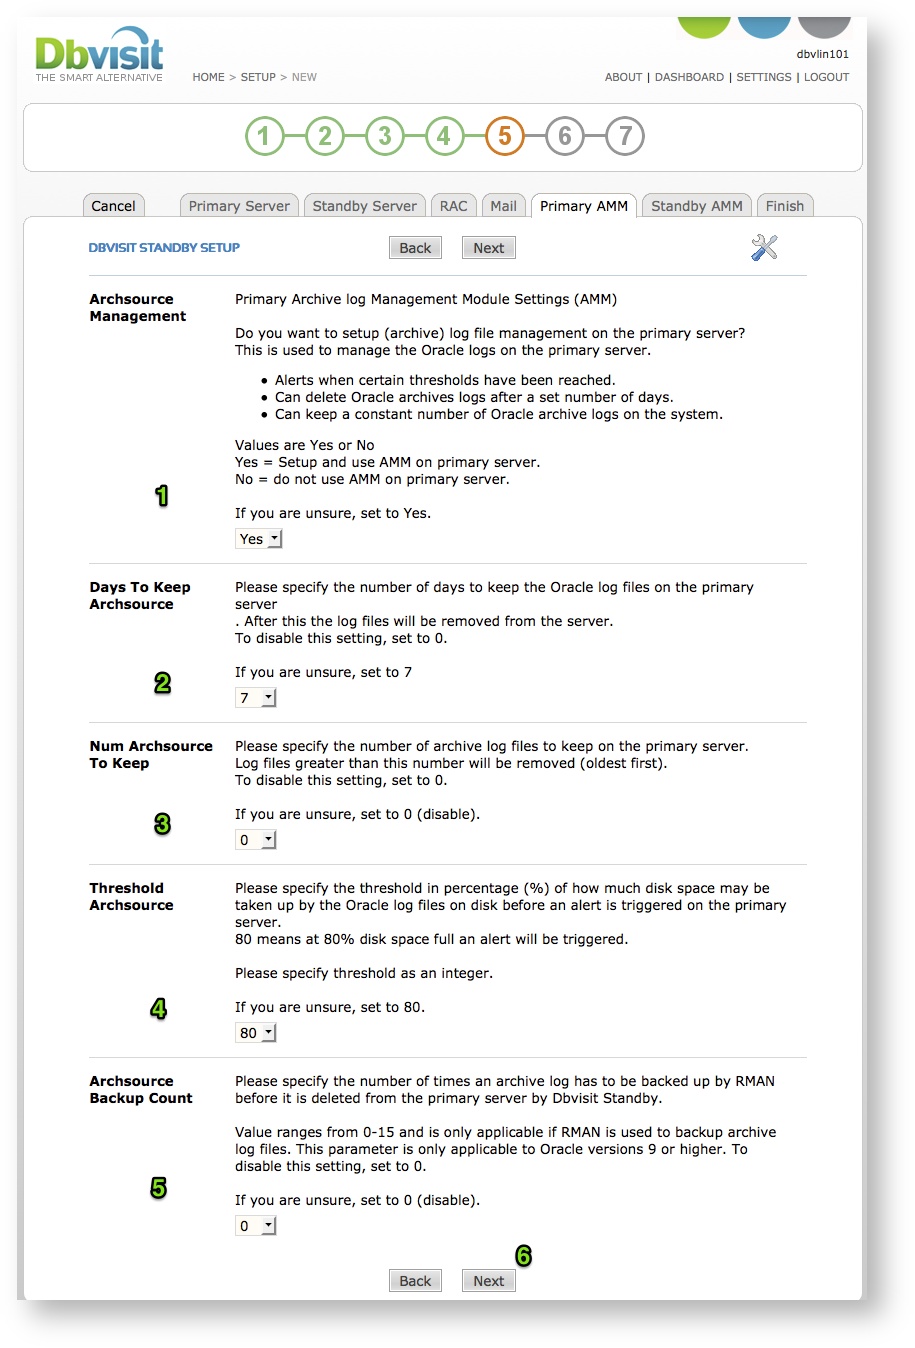
STEP 5: Primary AMM (Dbvisit Standby Archive Log Management Module)
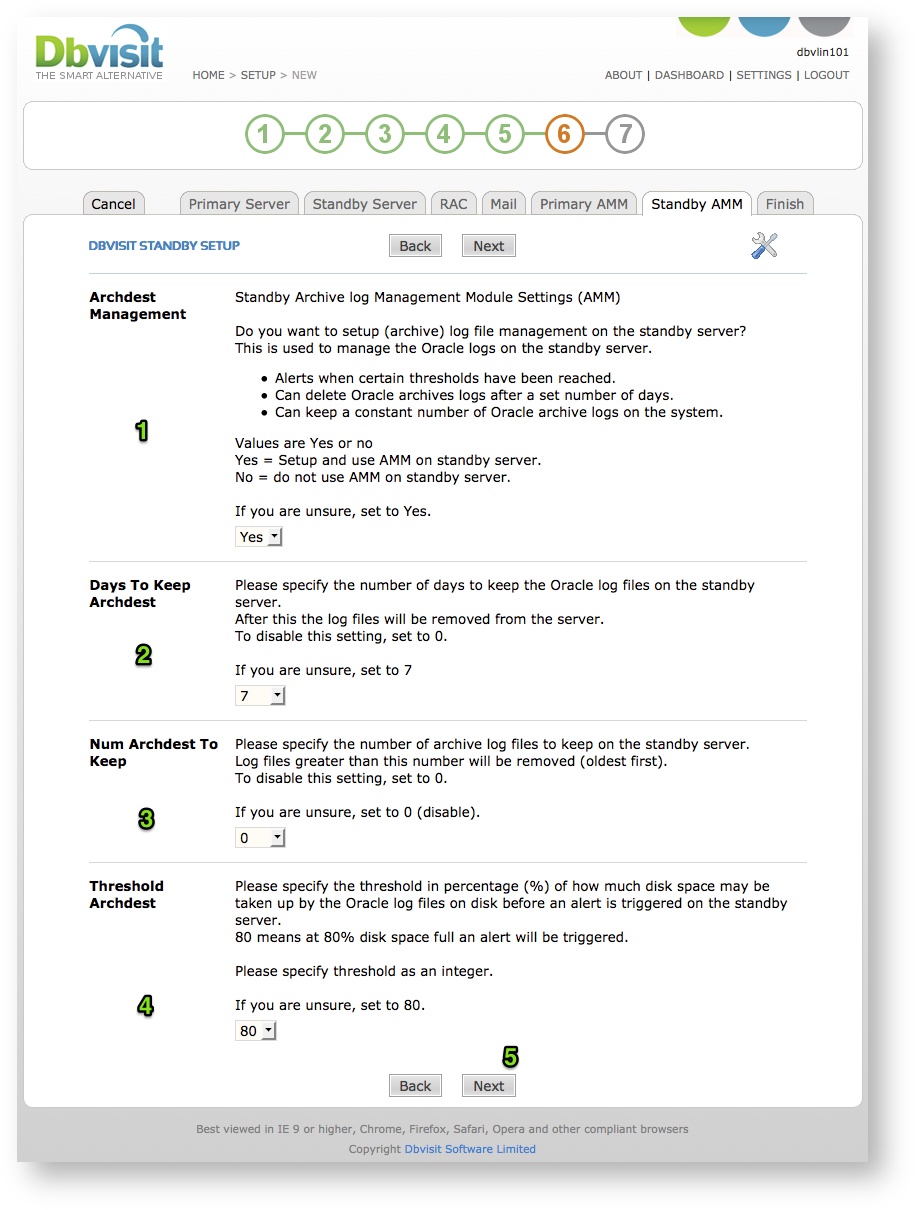
STEP 6: Standby AMM (Dbvisit Standby Archive Log Management Module)
STEP 7: Finish

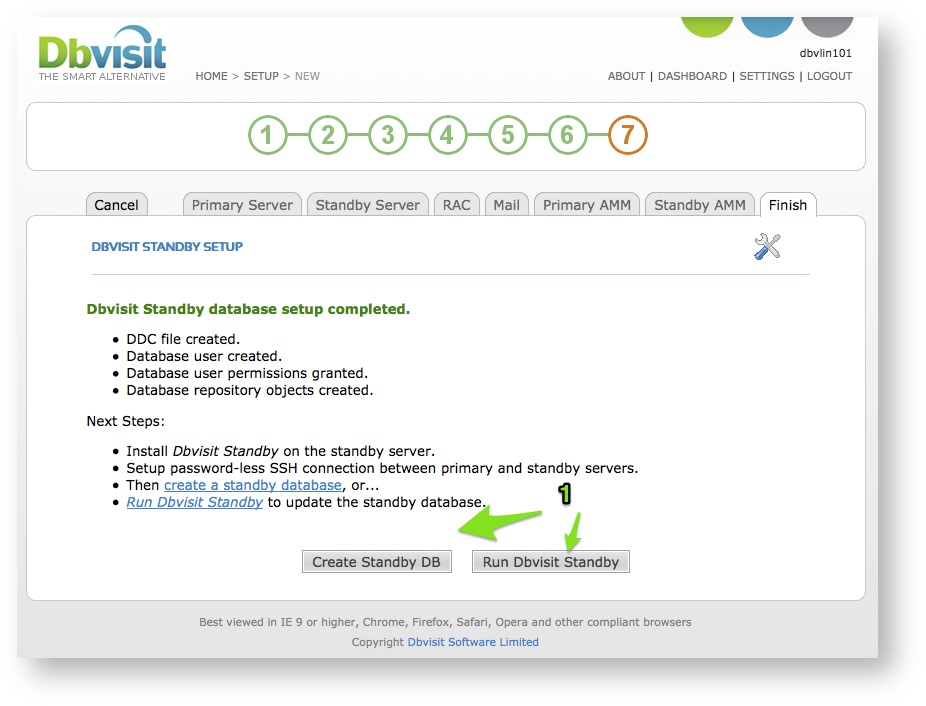
- You can now move on to either create the standby database if it does not exist, or you can run Dbvisit Standby as normal if a standby database is already in place.
Note: For Oracle RAC environments you will need to perform this step on all nodes. Just make sure you create the repository only from one of the Nodes.
Under the RAC Tab, make sure you only specify “yes” to the question “Please specify if this is the first RAC node in the Dbvisit Standby configuration or not.”
On the first node where you run the configuration. On all other RAC nodes make sure this value is set to “No”.