Create Standby Database using GUI
- Anton Els (Deactivated)
- Mike Donovan (Deactivated)
- Ankit Arora (Deactivated)
Introduction
The process followed by the GUI interface is similar to the steps followed/executed by the command line (See previous section - Create Standby Database using CLI),
but instead of running the "dbvisit_setup" command, you use the GUI menu options SETUP -> Create Standby Database option.
This section will now show you the detail steps you can follow to create a standby database using the Dbvisit Standby GUI Interface.
The web-based creation of the standby database is a wizard driven process. The same concepts apply for both the CLI and GUI version.
Create Standby Database Steps
Step 1: Navigate to the Create Standby Database (CSD) menu
The web-based version of Dbvisit Standby to create the standby database has 3 options as listed below:
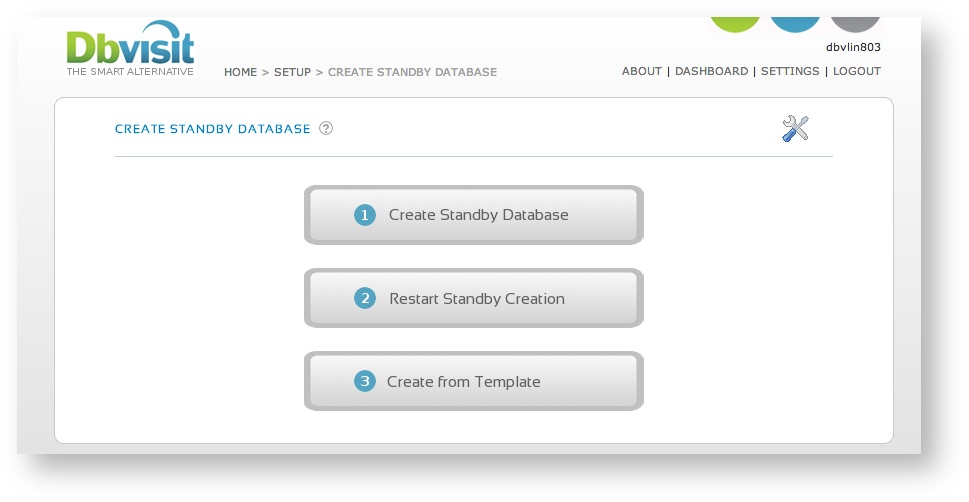
- Create a new standby database. This is used to create a new standby database from scratch.
- Restart the creation of a standby database if for any reason the process has failed. This will restart from the last successful point.
- Create a standby database from an existing template. If a template was saved, this option can be used to create a standby database from a template.
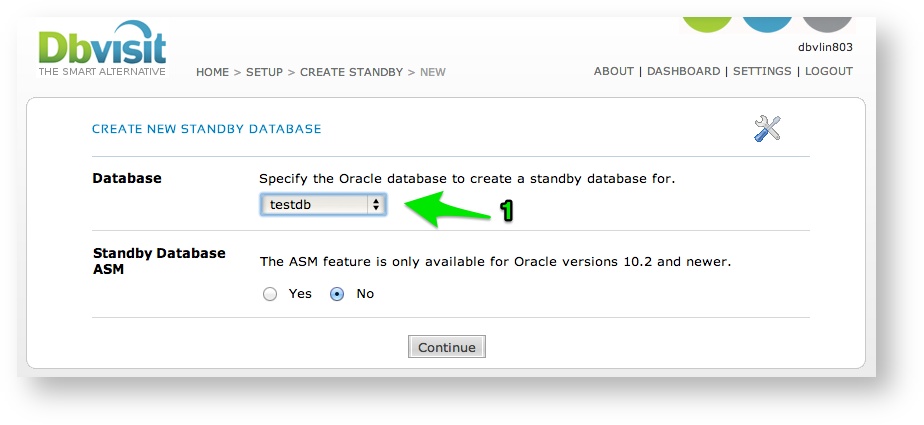
Step 2: Select the DDC for which a Standby database will be created
- Select the database name and continue.
Make sure that you select the correct DDC containing the details for the standby database you want to create.
From the screen below you will also be asked if you want the standby database to be making use of ASM.
Please note that you must already have ASM configured and running (with Disk Groups etc.) before you start the CSD process.
Make note of the Disk Group Names and locations prior to starting the process.
When using ASM on the standby database it is recommended to have it configured similar to your production system, but this is not required, different disk groups can be used.
If your primary database is using ASM, but the standby database is not, then make sure you specify No to the second question asking if your standby database is using ASM.
Note: ASM 10.2. and above is supported, but Dbvisit Standby does not support Graceful Switchover when ASM versions less than 11.1 is used. ASM 11.2 with latest patches applied is recommended.
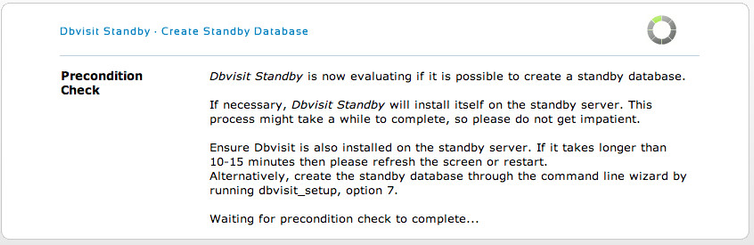
Step 3: Pre-flight check (Pre-Requisite Checks)
Dbvisit will now evaluate and check pre requisites for Standby creation.
During this phase a small instance will be started/stopped on the standby server to ensure some of the required pre-requisites are met.
If they are you will be directed to the next screen, if any of the checks fail an appropriate message will be shown.
Step 4: Create Standby Database Configuration Steps
The next step is to configure the Standby database parameters accordingly.
Recommendations:
- Do not use the Direct Copy option unless the database is really small. Selecting "No" for this value is recommended for all environments.
- File Compression during network transfer (File Compression) is not required as compressed backups is used, we recommend you leave this parameter at "No" to reduce extra overhead.
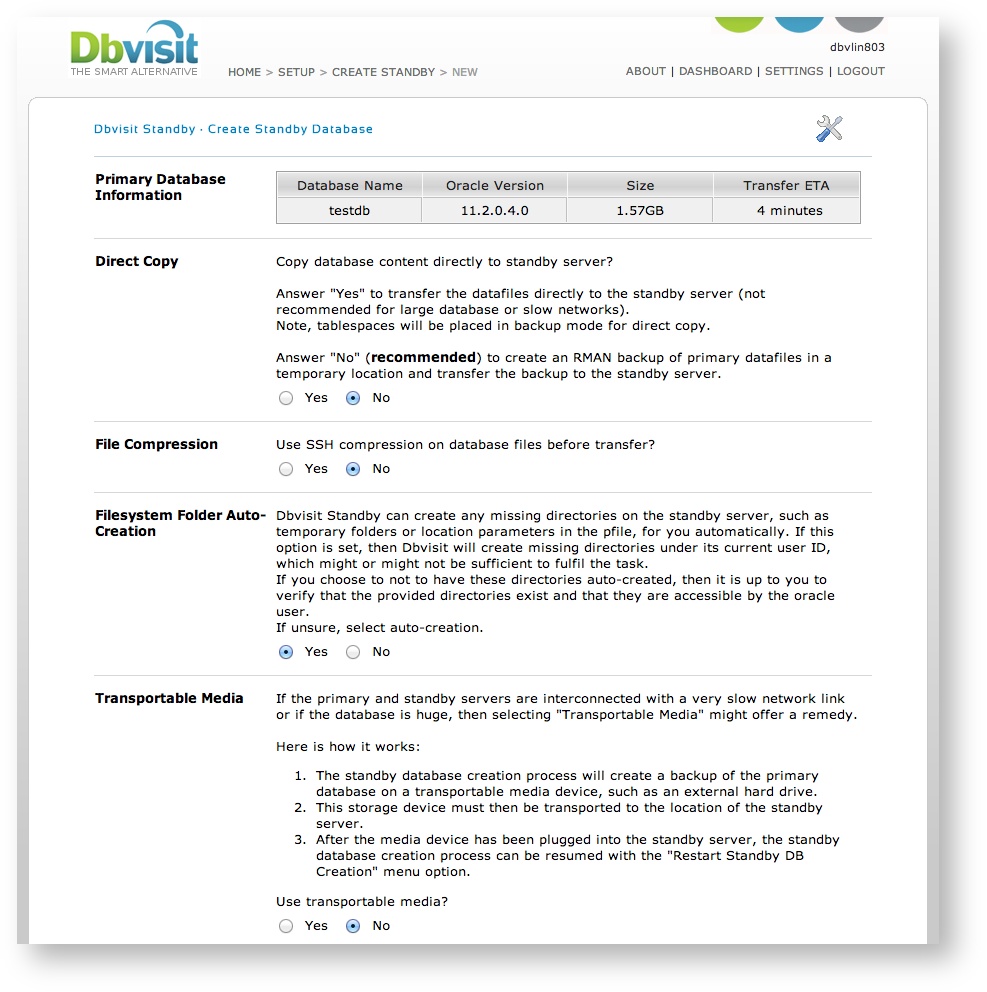
- If the primary database size is substantial and if even a compressed RMAN backup being transferred via the network is not feasible, we recommend you make use of the transportable media option. If using this option you have to make use of external attached storage such as a USB drive or something similar to which you can then create the backup and then transfer (example - courier it) to the standby site where it is attached to the standby server and the CSD process restarted from where it will continue where it left off.
- The TMP location on the primary will be the location where Dbvisit Standby will create a local RMAN compressed backup of the Primary Database. Please make sure there is sufficient space in this location to keep a full compressed backup of the primary database.
- The TMP location on the standby server will be the location to which the backup created on the primary will be transferred. From this location Dbvisit Standby will start the restore/creation of the standby database. Ensure there is sufficient space in this location to hold a full compressed backup of the primary database.
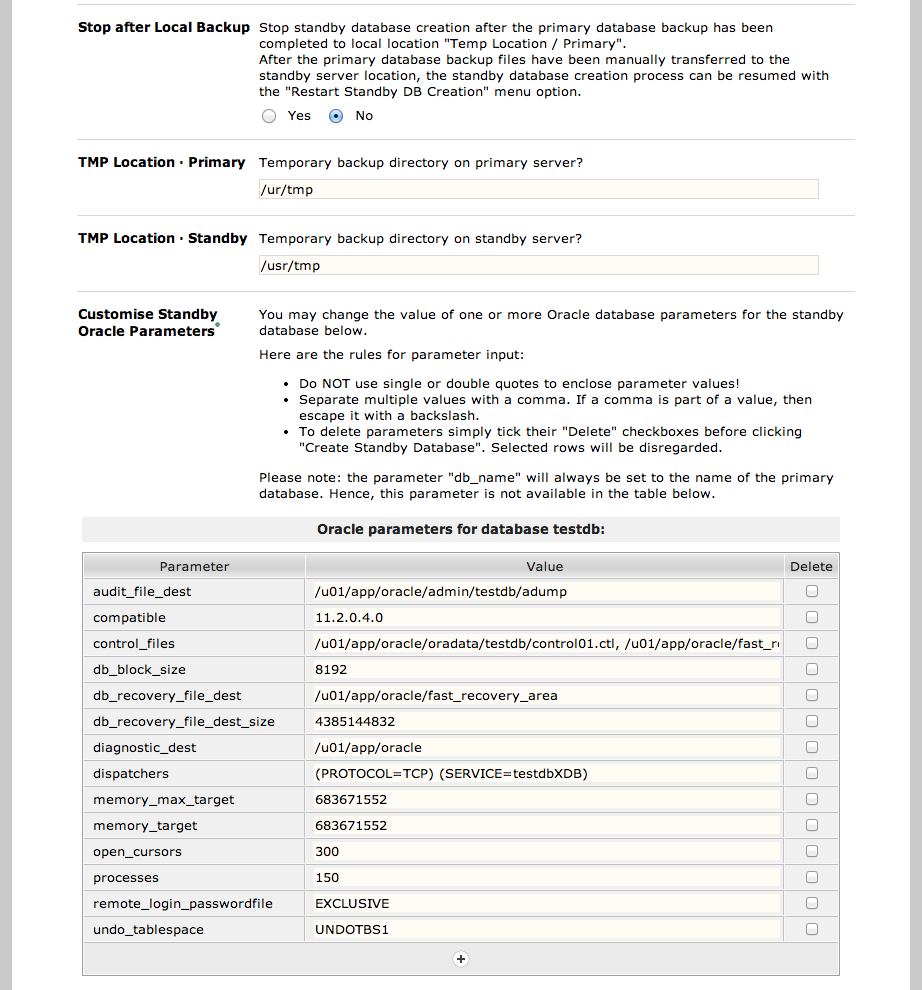
- If you want to update some of the Standby Database parameters, you should do it in the above section.
- If the primary database is using ASM and the standby is using filesystem, you must modify some of the parameters in the above section such as db_recvoery_file_dest might be +FRA on ASM, but a filesystem location on the standby.
- Keep in ming the memory parameters as they might need adjustment as well if your standby server has less memory than the primary server.

- The last step is to specify if this configuration should be saved as a template. This can be useful in environments where the standby database is recreated on a regular basis.
- Note that if you do update the database structure (primary) on a regular basis, you will have to recreate the template (redo the CSD process) as the template that was saved might not contain all the required new changes.
Before starting the Create Standby Database, verify all the parameters.
Step 5: Monitoring the Standby Database Creation
Once the standby database creation process starts, the output of the different steps will be shown in the browser window.
This process can take a very long time depending on the size of the database and the network
A detailed summary screen will show the progress of the standby database creation.
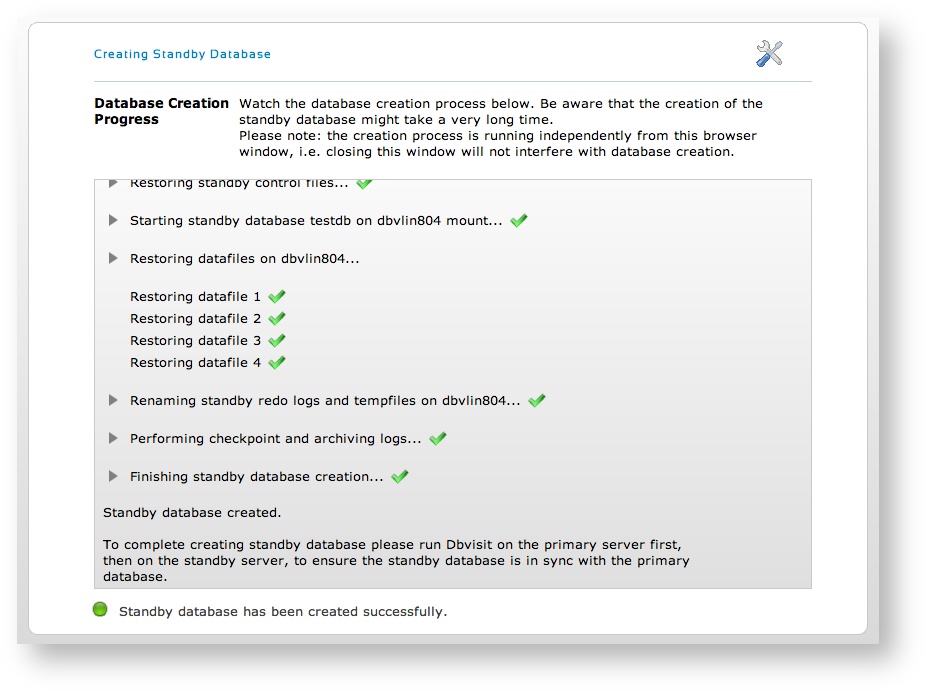
Once the process is complete, a green light is shown.