Amazon AWS EC2 -> Amazon AWS EC2
- Lorraine Anderson (Deactivated)
- Jan Klinke
- Jakub Sejba
- Vijayganesh Sivaprakasam
1. Introduction
The purpose of this Deployment guide is to demonstrate the way in which Dbvisit Standby 8.0 software can be installed on an Amazon AWS EC2 instance. In this guide, we focus on both the Primary and Standby databases being in AWS. In another document, we focus on 'On-Premise Primary' to Standby in AWS. A link that document can be found here
2. Initial Setup and Configuration
2.1 Provisioning the Severs
The primary server dbvaws01 has been provisioned in the equivalent section of the guide "On-Premise Primary" to AWS EC2. This documentation will reference the same server. This section will focus on the provisioning of the 2nd server: dbvaws02 which will be launched from the snapshot taken of dbvaws01 after the Oracle environment had been prepared and the Dbvisit Standby binaries had been copied to the server. The AMI ID is ami-cdcb5cb5
From the AMI menu select this AMI and click 'Launch'

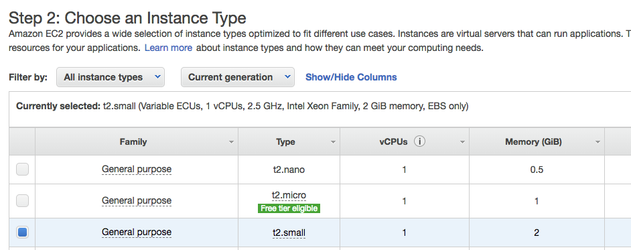
For Step 2 "Choose an Instance Type": The allows you to select from a range of Amazon Instance Types. The "learn more" link directs you to more information about the instance types and how they might suit your computing needs. For the purpose of this guide only, we have chosen t2.small.
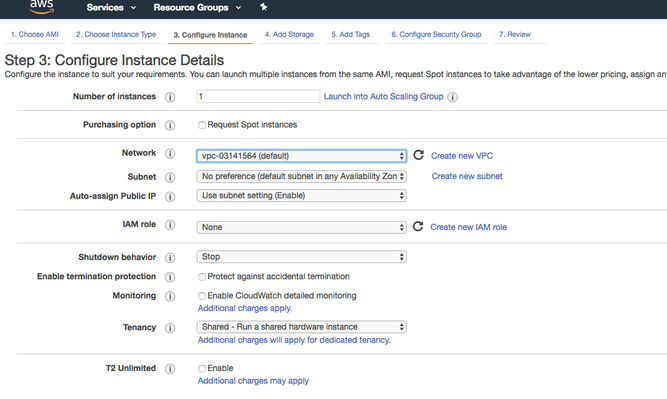
Step 3: Configure the Instance Details. Here we choose the defaults,
Step 4 "Add Storage". We also accept the defaults here as a 30GB disk is more than enough for the demo purposes.

Throughout this guide, no mention is made to the licensing implications of running Oracle software on Amazon AWS. The setup we have here has been built for demonstration purposes/ Further information regarding Oracle Licenses in the cloud can be found here. Also Licensing Oracle Software in the Cloud Computing Environment.
Step 5 "Add Tags". Create a Tag with Key = "Name" and Value = "dbvaws02"

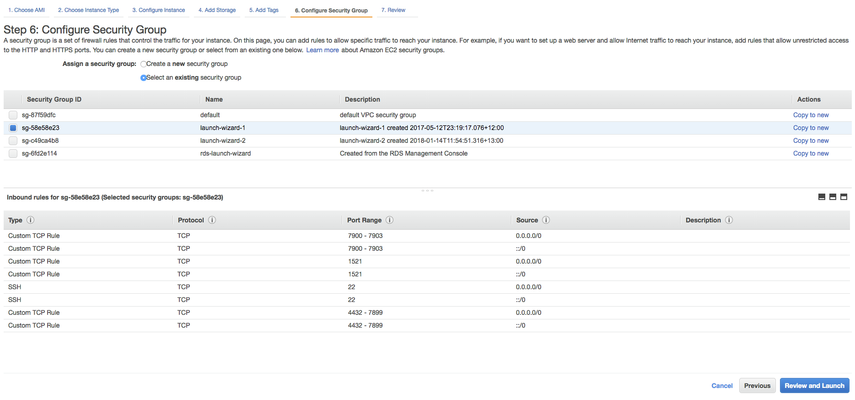
Step 6 "Configure Security Group". Here, we've chosen an existing security group with ports 22 (SSH), 4433 (dbvserver), 7890 (dbvnet) and 7891 (dbvagent) enabled within the INBOUND security rules.
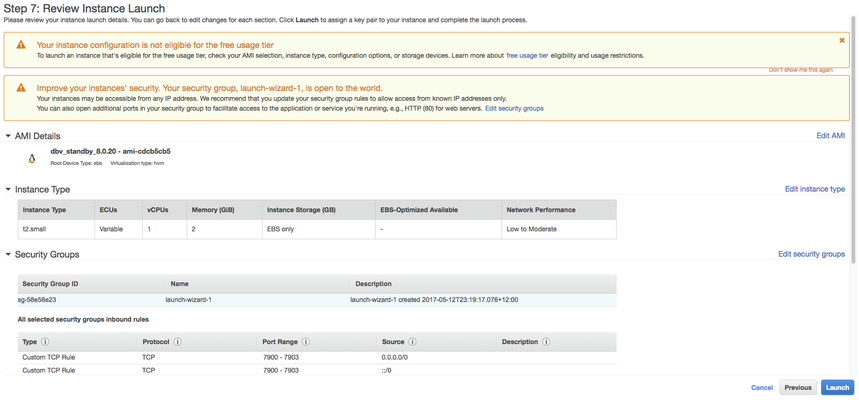
The final step is to review and Launch the new instance making sure that if the 'Choose an existing key pair' option is selected that the .pem file is accessible by yourself.
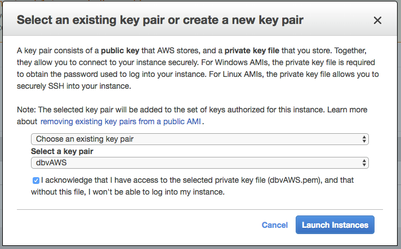
I have access to the dbvAWS.pem file so I clicked the tick box and then proceeded with "Launch Instance"
Within a few minutes, the new instance is up and running.

A test connection can then be made to the new host using the dbvAWS key pair.
Lorraines-MBP:Downloads landers$ ssh -i dbvAWS.pem ec2-user@34.217.129.95
Last login: Thu Mar  8 18:29:09 2018 from 222.154.244.15
[ec2-user@ip-172-31-30-113 ~]$
Summary Details of the 2 VMs are as follows :
| Primary Server Details | Standby Server Details |
|---|---|
Name: dbvaws01 Hosted: Amazon AWS EC2 vCPUs : 1 OS: Oracle Linux EL7 Memory : 2G Storage : 30G Version: 11.2.0.4 Edition: Enterprise Edition Database : XE Dbvisit Base: /usr/dbvisit/standby Standby Version: 8.0.20 | Name: dbvaws02 Hosted: Amazon AWS EC2 vCPUs : 1 OS: Oracle Linux EL7 Memory : 2G Storage : 30G Version: 11.2.0.4 Edition: Enterprise Edition Database : XE Dbvisit Base: /usr/dbvisit/standby Standby Version: 8.0.20 |
2.2 Preparing the Servers: dbvaws01 and dbvaws02
The binaries were copied and the /usr/dbvisit directory was in place as part of the image, so we can proceed directly to the installation. The server dbvaws01 will be reconfigured in this guide to be a primary server and server dbvaws02 will be configured to be the standby server with the GUI binaries installed.
3. Install, Configure and Run the Standby software
3.1 Installing and Configuring the Software
3.1.1 dbvaws01 (hostname : ip-172-31-13-235)
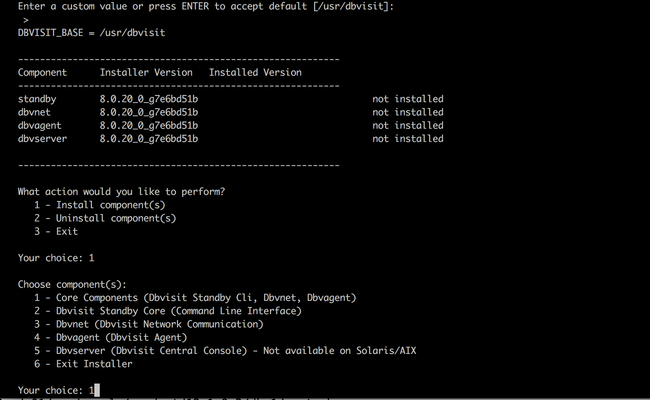
This server, dbvaws01, will be the primary server so install the core components. Here is the link to the full installation guide. It is summarized below. Navigate to where the unpacked files are
[oracle@ip-172-31-13-235 tmp]$ cd dbvisit
[oracle@ip-172-31-13-235 dbvisit]$ ls -lrt
total 20
drwxr-x---. 10 oracle oinstall 4096 Mar  7 19:41 standby
drwxr-x---.  5 oracle oinstall 4096 Mar  7 19:41 dbvserver
drwxr-x---.  5 oracle oinstall 4096 Mar  7 19:41 dbvnet
drwxr-x---.  6 oracle oinstall 4096 Mar  7 19:41 dbvagent
drwxr-xr-x.  2 oracle oinstall 4096 Mar  7 19:41 installer
[oracle@ip-172-31-13-235 dbvisit]$ cd installer
[oracle@ip-172-31-13-235 installer]$ ls -lrt
total 2772
-rwxr-x---. 1 oracle oinstall 2835196 Mar  7 19:41 install-dbvisit
[oracle@ip-172-31-13-235 installer]$ ./install-dbvisit
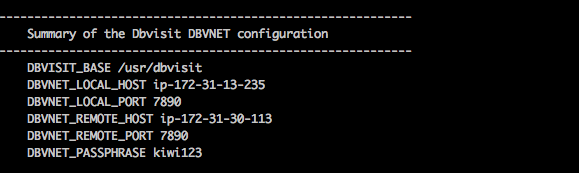
Accept the defaults for the dbvnet configuration and choose ip-172-31-30-113 as the remote host.
Dbvnet Summary Configuration.
Dbvagent Summary configuration on the Standby Server
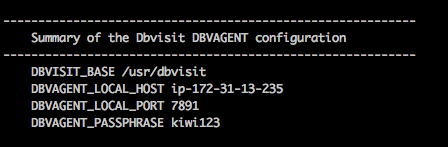
The summary information for this node :

The processes can be started on dbvaws01 (2 small batch scripts dbv_start/dbv_stop have been copied to the /home/oracle directory to quickly stop/start the processes)
[oracle@ip-172-31-13-235 ~]$ cat dbv_start
#!/bin/bash
cd /usr/dbvisit/dbvnet
./dbvnet -d start
cd ../dbvagent
./dbvagent -d start
ps -ef|grep -i dbv
[oracle@ip-172-31-13-235 ~]$ ./dbv_start
dbvnet process started with pid: 11548
dbvagent process started with pid:  11550
oracle   11546 11242  0 19:29 pts/1    00:00:00 /bin/bash ./dbv_start
oracle   11548     1  0 19:29 ?        00:00:00 ./dbvnet -d start
oracle   11550     1  0 19:29 pts/1    00:00:00 ./dbvagent -d start
oracle   11552 11546  0 19:29 pts/1    00:00:00 grep -i dbv
3.1.2 dbvaws02 (hostname : ip-172-31-30-113)
This server will be configured to be the Standby Server. As both of these servers are launched within the same VPC and Security Group. The hostnames ip-172-31-30-113 and ip-172-31-13-235 should be resolvable from each other without the need to update the local host's files.
With the processes started on the primary host, we can test this with a quick telnet on one of the dbvisit ports.
[oracle@ip-172-31-30-113 ~]$ telnet ip-172-31-13-235 7891
Trying 172.31.13.235...
Connected to ip-172-31-13-235.
Escape character is '^]'.
Now we can perform the standby server installation, choosing to install the core components plus the dbvserver.
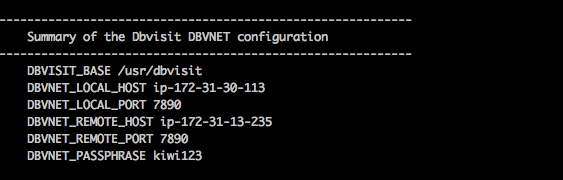
Proceed with the defaults and choose ip-172-31-13-235 as the remote host.
Dbvnet Summary Configuration.
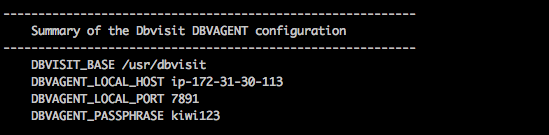
Dbagent Summary Configuration.
Core Component Summary
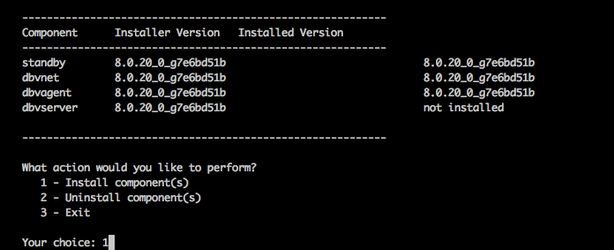
Once the core components are installed, continue with another install of the Dbvserver component.
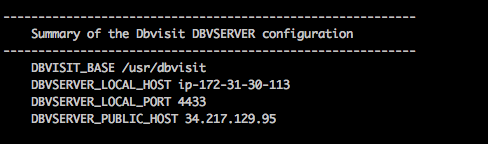
Version 8.0.20 has a new parameter, that of DBVSERVER_PUBLIC_HOST (parameter public_address in dbvserver.conf)
Rather than accepting the default hostname prompt here, the public-facing IPv4 address of the AWS EC2 instance should be used. Public-facing IPv4 address that will be supplied to the Agents (Dbvagent) to be used for pushing information back to the Central Console. This is the externally resolvable address supplied to dbvagent, not an additional listener address on dbvserver itself.
It makes sense to have this address a fixed IP address that is persistent after the instance is shut down and restarted. In AWS this is known as an Elastic IP. However, this resource is an additional cost to the AWS EC2 instances. If the machines are to only be shut down during a controlled event then the IP address change on instance restarted can be edited in the /usr/dbvisit/dbvserver/dbvserver.conf before the process is restarted. This risk of remembering this configuration change needs to be weighed against the cost of a persistent IP versus how often the server will be shut down.
Dbvserver Summary configuration.
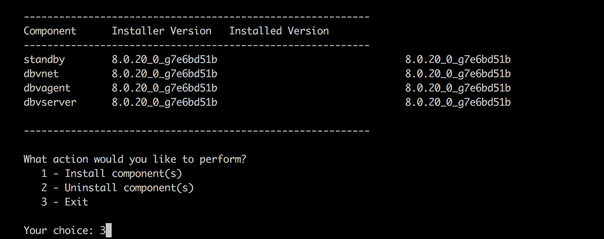
The final summary should show all the components installed and at this stage, the installer can be exited.
The processes can be started on dbvaws02 (the same 2 small batch scripts dbv_start/dbv_stop have been copied to the /home/oracle directory, and modified to include the dbvserver component, to quickly stop/start the processes)
[oracle@ip-172-31-30-113 ~]$ cat dbv_start
#!/bin/bash
cd /usr/dbvisit/dbvnet
./dbvnet -d start
cd ../dbvagent
./dbvagent -d start
cd ../dbvserver
./dbvserver -d start
ps -ef|grep -i dbv
[oracle@ip-172-31-30-113 ~]$ ./dbv_start
dbvnet process started with pid: 4969
dbvagent process started with pid:  4971
dbvserver process started with pid:  4973
oracle    4967 19711  0 20:21 pts/0    00:00:00 /bin/bash ./dbv_start
oracle    4969     1  0 20:21 ?        00:00:00 ./dbvnet -d start
oracle    4971     1  0 20:21 pts/0    00:00:00 ./dbvagent -d start
oracle    4973     1  0 20:21 pts/0    00:00:00 ./dbvserver -d start
oracle    4975  4967  0 20:21 pts/0    00:00:00 grep -i dbv
A quick test from the primary server shows the standby is available on the dbvisit ports
[oracle@ip-172-31-13-235 ~]$ telnet ip-172-31-30-113 7891
Trying 172.31.30.113...
Connected to ip-172-31-30-113.
Escape character is '^]'.
3.2 Start the GUI and Create the DDC
The following browsers are supported when using the Dbvisit Standby Web Based interface (latest versions recommended)
- Firefox
- Chrome
Future support for the following browsers are planned:
- Safari
- IE
Download and install either Chrome or Firefox.
From within the browser navigate to the https://<dbvserver_host>:4433. In this case, the standby node. (The local host/laptop has been altered to include the IP address of dbvaws02)
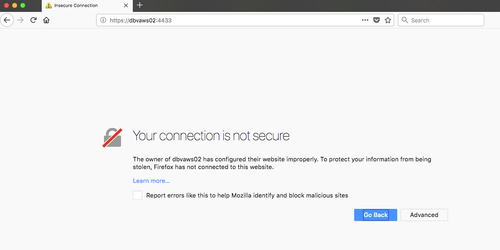
Click 'Advanced' and add the security exception to proceed to the login screen
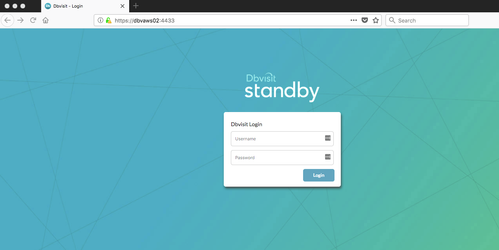
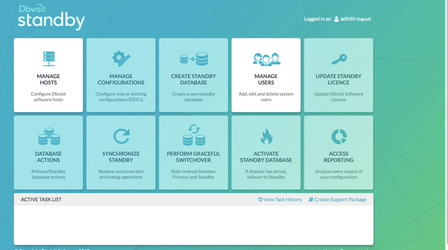
Enter the default username/password of admin/admin and proceed to the first screen, manage hosts.
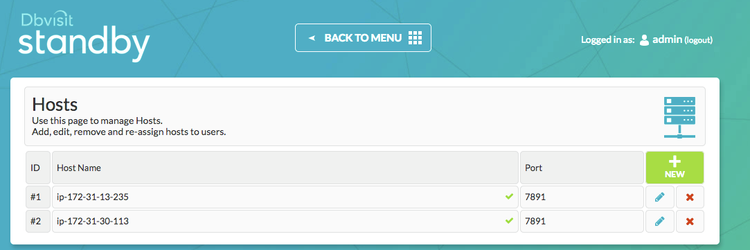
Enter each of the hosts in turn, specifying the passphrase used at creation time.
Return to the Main Menu and then proceed on to creating the DDC
The creation of the DDC file is shown in the following steps.
Firstly Create a directory for ARCHSOURCE and ARCHDEST parameters.
The former is only required in the event of a Graceful switchover when the Primary becomes a Standby database. In this example, the same location is created on each server.
[oracle@ip-172-31-30-113 ~]$ mkdir /u01/app/oracle/dbvisit_arch
To create a DDC from the GUI. Choose the Manage Configurations Tab
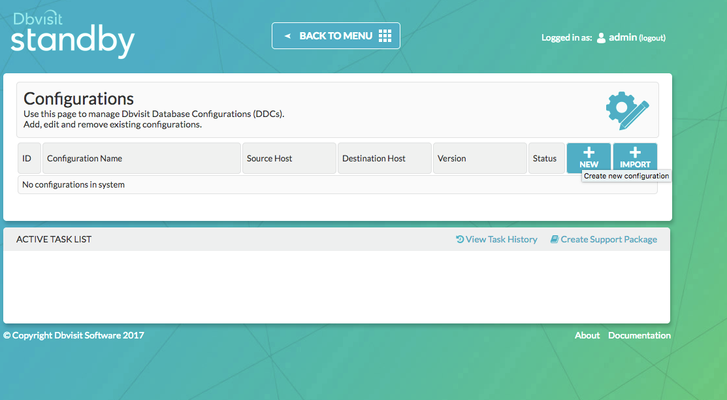
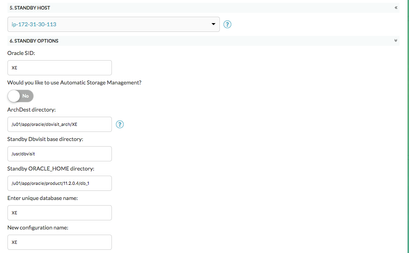
Create a New Configuration. Fill out the relevant entries then click 'Submit' Careful to select the correct value for ORACLE_HOME on the remote host if the installation location differs (here it doesn't as the machine was cloned with Oracle binaries installed).
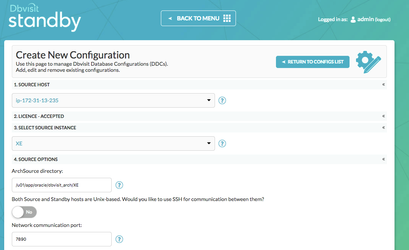
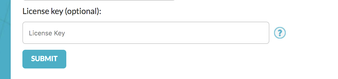
In Standby version 8.0.20 it is possible to enter the license details during the DDC creation, this option was chosen during the creation of this DDC file.
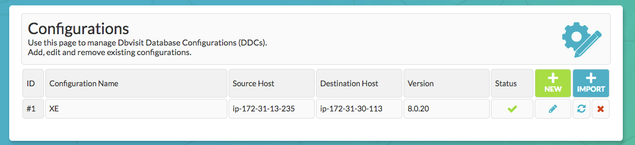
The new configuration, 'XE' can be viewed and edited from the 'Manage Configurations' Tab.
3.3 Create the Standby Database
3.3.1 Creating the Standby with the GUI
Choose the Create Standby Database Tab from the Home Screen.
Select your configuration
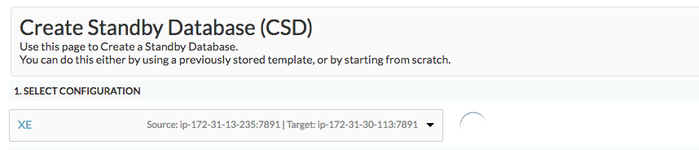
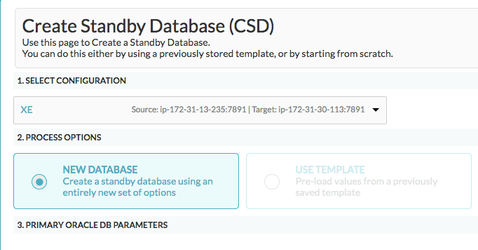
Select New Database
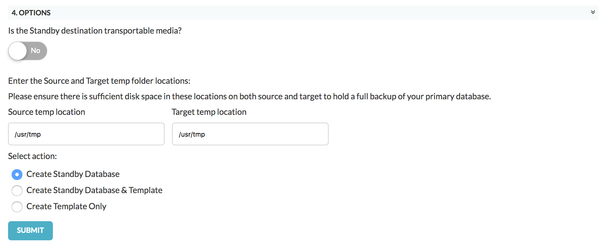
Then check there is enough space in the Source and Dest temp locations before proceeding to Submit.
Click on the Create Standby Task to view the progress
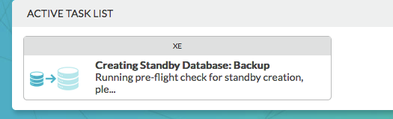
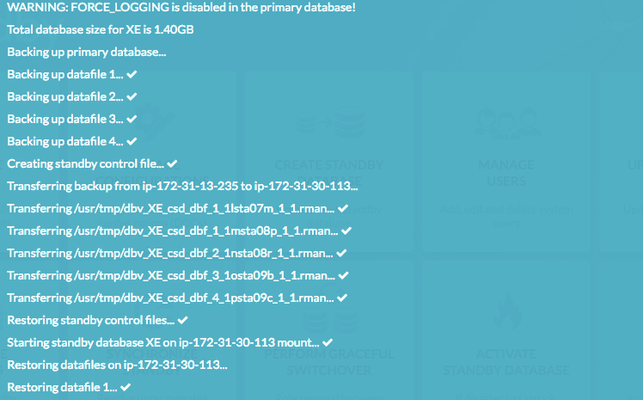
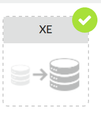
The task has completed when a small green 'tick' appears on the task icon.
3.3.2 Creating the Standby with the CLI
To Create the Standby database with the command line is shown below
[oracle@ip-172-31-13-235 standby]$ ./dbvctl -d XE --csd

>>> Running pre-checks please wait... done
What would you like to do:
   1 - Create standby database (and optionally save settings in template)
   2 - Help
   3 - Terminate processing
   Please enter your choice [1]: 1

-------------------------------------------------------------------------------
Answer Yes to transfer the datafiles directly to the standby server (not
recommended for large database or slow networks)
Note tablespaces will be placed in backup mode for direct copy.
Answer No (recommended) to create an RMAN backup of primary datafiles in a
temporary location and transfer the backup to the standby server

=>Do you want to copy database files directly to the standby server? [N]:
Your input: N

Is this correct? <Yes/No> [Yes]:

-------------------------------------------------------------------------------

=>Do you want to use TRANSPORTABLE MEDIA to transfer the database backup to the
standby server? Transportable media is an external device such as a USB drive
that is first plugged into the primary server and then manually transferred to
the standby site and plugged into the standby server to continue the process.
It can be used for large databases or slow networks.
Specifying No means the network will be used to transfer the database backup.
[N]:
Your input: N

Is this correct? <Yes/No> [Yes]:

-------------------------------------------------------------------------------
A temporary location must be specified on ip-172-31-13-235 where the database
will be backed up to first.
This location must be big enough to hold RMAN backup of the whole database
(1.40GB).

=>Specify the location on this server: [/usr/tmp]:
Your input: /usr/tmp

Is this correct? <Yes/No> [Yes]:

-------------------------------------------------------------------------------
A temporary location must be specified on ip-172-31-30-113 where the database
backup will be copied to before moving to specified locations.

=>Specify location on remote server: [/usr/tmp]:
Your input: /usr/tmp

Is this correct? <Yes/No> [Yes]:

The following oracle database parameters will be set in the standby database pfile or spfile:
-------------------------------------------------------------------------------
SID            NAME                                    VALUE

*              audit_file_dest                         /u01/app/oracle/admin/XE/adump
*              compatible                              11.2.0.4.0
*              control_files                           /u01/app/oracle/oradata/XE/control01.ctl,/u01/app/oracle/fast_recovery_area/XE/control02.ctl
*              db_block_size                           8192
*              db_domain
*              db_name                                 XE
*              db_recovery_file_dest                   /u01/app/oracle/fast_recovery_area
*              db_recovery_file_dest_size              4007657472
*              db_unique_name                          XE
*              diagnostic_dest                         /u01/app/oracle
*              dispatchers                             (PROTOCOL=TCP) (SERVICE=XEXDB)
*              open_cursors                            300
*              pga_aggregate_target                    268435456
*              processes                               150
*              remote_login_passwordfile               EXCLUSIVE
*              sga_target                              805306368
*              spfile                                  OS default
*              undo_tablespace                         UNDOTBS1

-------------------------------------------------------------------------------
What would you like to do:
   1 - Proceed with creating the standby database
   2 - Edit oracle database parameters for the standby database pfile/spfile
   3 - Terminate processing
   Please enter your choice [1]:

Validating oracle database parameters... please wait
=>SUCCEEDED

-------------------------------------------------------------------------------

=>Create standby database template for XE using provided answers? [Y]:
Your input: 1

Is this correct? <Yes/No> [Yes]:

-------------------------------------------------------------------------------

=>Continue with creating a standby database? (If No processing will terminate,
the saved template will be available for future use) [Y]:
Your input: 1

Is this correct? <Yes/No> [Yes]:

>>> dbvctl will now run a pre-flight check for standby database creation. An attempt will
    be made to create a standby (s)pfile using oracle standby database parameters, followed
    by trying to start the standby instance. If this step fails, then please double-check
    the following items before re-running dbvctl again:

    1) Review the standby database parameters you have supplied and provide valid values
    unless a template is used.
    2) Recreate the template to provide valid values for standby database parameters if a
    template is used.

>>> Running pre-flight check for standby creation, please wait... done

WARNING: FORCE_LOGGING is disabled in the primary database!

>>> Total database size for XE is 1.40GB

>>> Backing up primary database...

    Backing up datafile 1...
    Backing up datafile 2... done
    Backing up datafile 3... done
    Backing up datafile 4... done

>>> Creating standby control file... done

>>> Transferring backup from ip-172-31-13-235 to ip-172-31-30-113...

    Transferring /usr/tmp/dbv_XE_csd_dbf_1_1rsta0sm_1_1.rman... done
    Transferring /usr/tmp/dbv_XE_csd_dbf_1_1ssta0tp_1_1.rman... done
    Transferring /usr/tmp/dbv_XE_csd_dbf_2_1tsta0tr_1_1.rman... done
    Transferring /usr/tmp/dbv_XE_csd_dbf_3_1usta0ub_1_1.rman... done
    Transferring /usr/tmp/dbv_XE_csd_dbf_4_1vsta0uc_1_1.rman... done

>>> Restoring standby control files... done

>>> Starting standby database XE on ip-172-31-30-113 mount... done

>>> Restoring datafiles on ip-172-31-30-113...

    Restoring datafile 1... done
    Restoring datafile 2... done
    Restoring datafile 3... done
    Restoring datafile 4... done

>>> Renaming standby redo logs and tempfiles on ip-172-31-30-113... done

>>> Completing standby database creation... done

>>> Standby database created.


>>> Performing checkpoint and archiving logs... done

>>> Synchronising standby... done

PID:12608
TRACE:12608_dbvctl_csd_XE_201803082100.trc
[oracle@ip-172-31-13-235 standby]$
3.4 Performing Basic Tasks
Some examples of basic tasks are outlined below. Please refer to the online documentation for more details on each command.
3.4.1 Log Gap Report
Run a log gap report from the Primary Site
[oracle@ip-172-31-13-235 standby]$ ./dbvctl -d XE -i
=============================================================
Dbvisit Standby Database Technology (8.0.20_0_g7e6bd51b) (pid 12870)
dbvctl started on ip-172-31-13-235: Thu Mar  8 21:09:10 2018
=============================================================


Dbvisit Standby log gap report for XE thread 1 at 201803082109:
-------------------------------------------------------------
Destination database on ip-172-31-30-113 is at sequence: 185.
Source database on ip-172-31-13-235 is at log sequence: 186.
Source database on ip-172-31-13-235 is at archived log sequence: 185.
Dbvisit Standby last transfer log sequence: 185.
Dbvisit Standby last transfer at: 2018-03-08 21:06:30.

Archive log gap for thread 1:  0.
Transfer log gap for thread 1: 0.
Standby database time lag (DAYS-HH:MI:SS): +00:00:12.


=============================================================
dbvctl ended on ip-172-31-13-235: Thu Mar  8 21:09:13 2018
=============================================================

[oracle@ip-172-31-13-235 standby]$
Also from the GUI

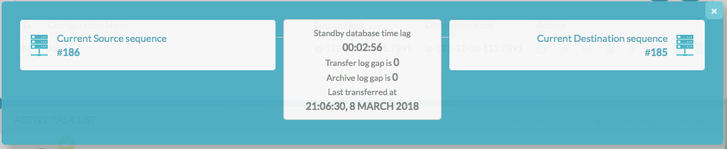
3.4.2 Log Transfer
Sending the logs from the Primary via the CLI
[oracle@ip-172-31-13-235 standby]$ ./dbvctl -d XE
=============================================================
Dbvisit Standby Database Technology (8.0.20_0_g7e6bd51b) (pid 12955)
dbvctl started on ip-172-31-13-235: Thu Mar  8 21:12:33 2018
=============================================================

>>> Obtaining information from standby database (RUN_INSPECT=Y)... done
    Thread: 1 Archive log gap: 0. Transfer log gap: 0

Note FORCE_LOGGING is disabled in the primary database.

>>> Sending heartbeat message... skipped
>>> Performing a log switch... done
>>> Transferring Log file(s) from XE on ip-172-31-13-235 to ip-172-31-30-113 for thread 1:

    thread 1 sequence 186 (o1_mf_1_186_fb3vdq8r_.arc)

=============================================================
dbvctl ended on ip-172-31-13-235: Thu Mar  8 21:12:43 2018
=============================================================

[oracle@ip-172-31-13-235 standby]$
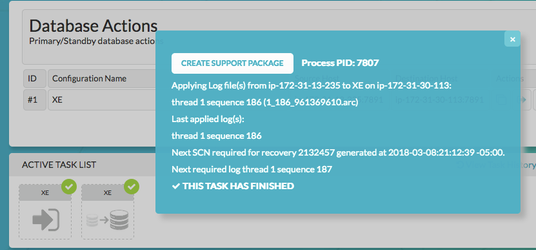
Apply Logs at the Standby Site via the GUI
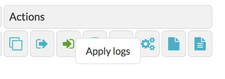
3.4.3 Daemon Status
Start the Daemons for automatic send/apply from the GUI Database Actions Tab.
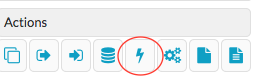
The lightning bolt icon manages the daemon processes.
When started on both sites they Log gap managed automatically and if no natural log switches have occurred, the daemon will also signal a log switch to keep the standby LAG to the desired amount. More information regarding the daemon settings can be found here in Section 4
https://dbvisit.atlassian.net/wiki/display/DS8QSG/Dbvisit+Standby+Scheduling
3.4.4 Starting Standby Database in Readonly Mode
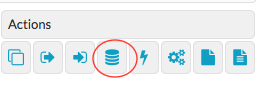
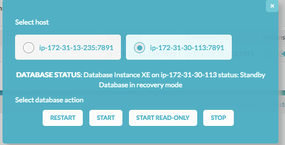
From the Database Actions Tab choose the Database Icon. This allows the user to perform database actions on each node.
Before the Standby Database can be opened in readonly mode, there must be a log gap of 0 between the 2 systems.
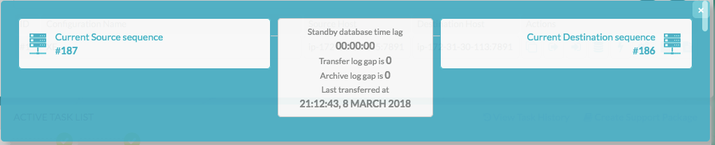
Select the Standby Host, review the current status and Select Start READ ONLY.
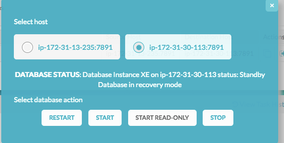
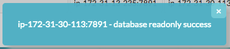
Now, the status is Read Only for the standby database.
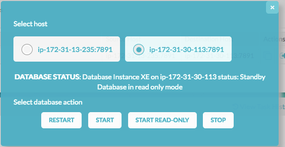
To switch back again. Choose Restart
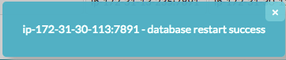
Now the Standby is back in recovery mode and the logs can be applied as normal.
3.5 Performing Graceful Switchover
The following screenshots show a Graceful Switchover from one Cloud Standby to the other using the GUI. A first pre-requisite is to ensure that the daemons started earlier are not running whilst the switchover is in progress.
3.5.1 Check the Status of the Daemons
If the daemons have been started in the previous step, they need to be stopped before performing a graceful switchover.
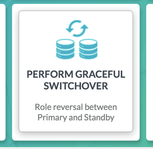
3.5.2 Graceful Switchover Icon GUI
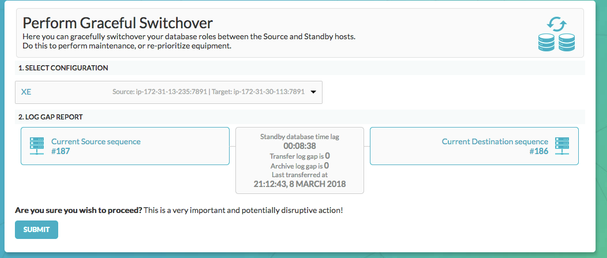
3.5.3 Check Log Gap is Zero and Click Submit
3.5.4 Locate the Task on the Task Bar
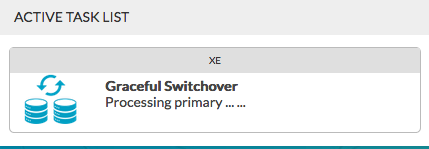
3.5.5 Monitor the Activity
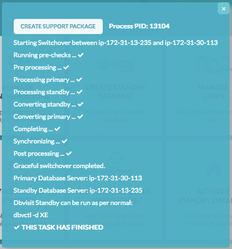
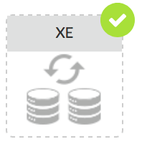
Verify the Switch of hosts in the Configurations tab.
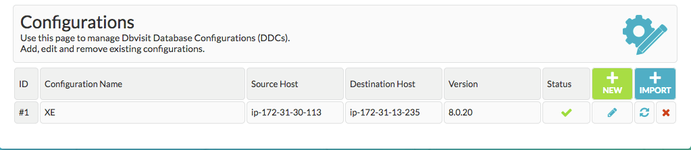
3.5.6 Verify the New Roles within each of the Databases
Verify the new database roles within the database
[oracle@ip-172-31-13-235 ~]$ sqlplus / as sysdba

SQL*Plus: Release 11.2.0.4.0 Production on Thu Mar 8 21:25:48 2018

Copyright (c) 1982, 2013, Oracle.  All rights reserved.


Connected to:
Oracle Database 11g Enterprise Edition Release 11.2.0.4.0 - 64bit Production
With the Partitioning, OLAP, Data Mining and Real Application Testing options

SQL> select database_role from v$database;

DATABASE_ROLE
----------------
PHYSICAL STANDBY

[oracle@ip-172-31-30-113 ~]$ . oraenv
ORACLE_SID = [XE] ?
[oracle@ip-172-31-30-113 ~]$ sqlplus / as sysdba

SQL*Plus: Release 11.2.0.4.0 Production on Thu Mar 8 21:26:24 2018

Copyright (c) 1982, 2013, Oracle.  All rights reserved.


Connected to:
Oracle Database 11g Enterprise Edition Release 11.2.0.4.0 - 64bit Production
With the Partitioning, OLAP, Data Mining and Real Application Testing options

SQL> select database_role from v$database;

DATABASE_ROLE
----------------
PRIMARY

SQL>
3.6 Activate the Standby Database
It is possible to activate the Standby Database and make it become the new Primary. This is also called failover to the standby database.
The assumption is that the original Primary site has been lost and needs to be rebuilt.
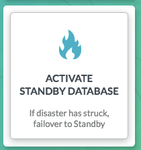
From the Central Console/GUI Choose the "Activate Standby Database Command"
3.6.1 Choose the Activate Standby Database
3.6.2 Select the Configuration
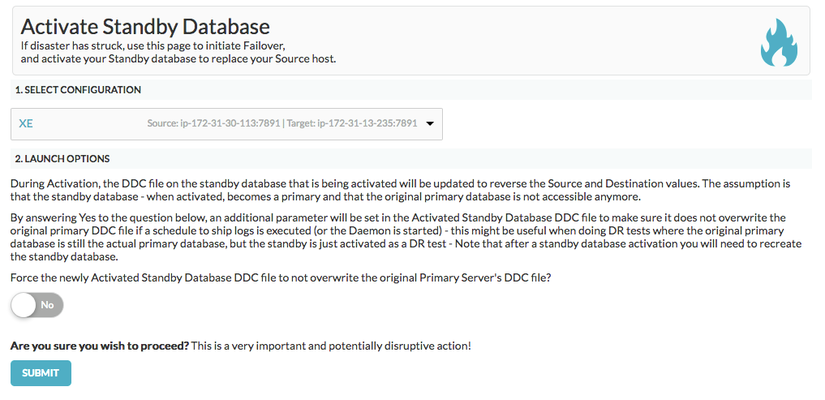
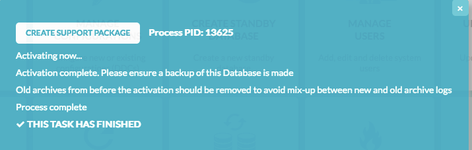
3.6.3 Monitor the Task from The Task Bar
3.6.4 Verify the Status within the Database
[oracle@ip-172-31-13-235 ~]$ sqlplus / as sysdba

SQL*Plus: Release 11.2.0.4.0 Production on Thu Mar 8 21:33:33 2018

Copyright (c) 1982, 2013, Oracle.  All rights reserved.


Connected to:
Oracle Database 11g Enterprise Edition Release 11.2.0.4.0 - 64bit Production
With the Partitioning, OLAP, Data Mining and Real Application Testing options

SQL> select database_role from v$database;

DATABASE_ROLE
----------------
PRIMARY

SQL>

[oracle@ip-172-31-30-113 ~]$ . oraenv
ORACLE_SID = [XE] ?
The Oracle base remains unchanged with value /u01/app/oracle
[oracle@ip-172-31-30-113 ~]$ sqlplus / as sysdba

SQL*Plus: Release 11.2.0.4.0 Production on Thu Mar 8 21:26:24 2018

Copyright (c) 1982, 2013, Oracle.  All rights reserved.


Connected to:
Oracle Database 11g Enterprise Edition Release 11.2.0.4.0 - 64bit Production
With the Partitioning, OLAP, Data Mining and Real Application Testing options

SQL> select database_role from v$database;

DATABASE_ROLE
----------------
PRIMARY

SQL>
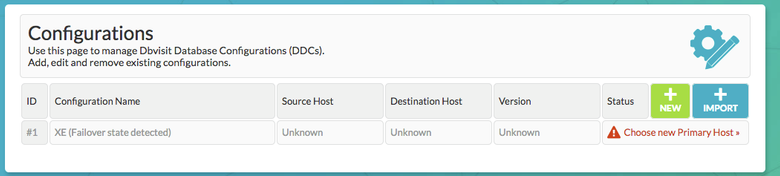
3.6.5 Manage Configurations Tab Implications
Now the Manage Configurations Tab has the option to choose the hosts. This allows you to either accept the current configuration with the new Primary (old Standby site) or start again with the original Primary site and depends on the circumstances of the Activation.